Nestled gracefully within any corner or dangling effortlessly from that perfect perch, air plants have captured the hearts of both seasoned and novice plant lovers alike. Unlike their more conventional potted counterparts, these unique, soil-free wonders bring an element of ethereal charm to spaces of all shapes and sizes. But with their exotic appearance often comes the mistaken idea that they thrive on thin air alone. Understanding the intricacies of their hydration needs is crucial not just for their survival, but for ensuring they flourish with vibrant, lush growth.
In an age where sustainability and indoor gardening are valued more than ever, air plants offer an intriguing blend of beauty and ease. However, without proper care, these resilient companions can sometimes appear baffling. How exactly does one water a plant that doesn’t live in the ground? In this guide, we’ll unravel the mystery of keeping your air plants well-watered and thriving, tapping into expert insights and easy-to-follow methods designed to demystify the care of these captivating plants. Prepare to transform from a curious novice into a confident caretaker, and watch your air plants not only survive but also become the thriving masterpieces they are meant to be.
Understanding the Unique Watering Needs of Air Plants
Air plants, scientifically known as Tillandsia, have unique watering needs that differ significantly from traditional plants. Unlike soil-based plants, air plants absorb moisture through their leaves rather than through roots, which requires a distinct approach to watering. To maintain healthy air plants, it is essential to understand and adopt the correct watering techniques.
Step-by-Step Guide on How to Water Air Plants:
-
Gather Your Supplies: You’ll need a clean bowl or sink, room temperature water, and a towel. If your water is heavily chlorinated, consider using bottled or rainwater or let tap water sit for a day to allow chlorine to dissipate.
-
Soak Your Air Plants: Submerge your air plants in the water. Ensure they are effectively covered, and let them soak for about 20 to 30 minutes. This duration is sufficient for them to absorb the necessary moisture through their leaves.
-
Shake Off Excess Water: After soaking, gently shake the plants to remove any excess water sitting between their leaves. Accumulated water can lead to rot, which is a common issue with air plants if left unchecked.
-
Allow to Air Dry: Place the air plants upside down on a towel in a well-ventilated area to dry completely. Proper air circulation is crucial to ensure no water remains trapped in the plant.
-
Adjust Frequency Accordingly: Watering frequency can vary based on environmental conditions. In high humidity areas, soaking once a week may suffice, while dryer climates may require additional misting or soaking sessions.
Additional Tips for Watering Air Plants:
-
Observation is Key: Monitor your air plants for signs of dehydration, such as brown leaf tips or curled leaves, which indicate they need more water. Conversely, if the leaves become mushy or develop dark spots, you may be overwatering.
-
Consider Season and Location: During warmer months or if placed near heat sources, air plants may require more frequent watering. Conversely, reduce the watering frequency in cooler months.
-
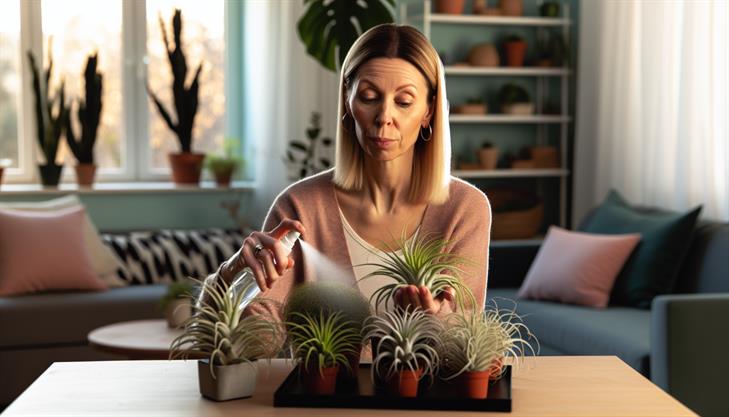
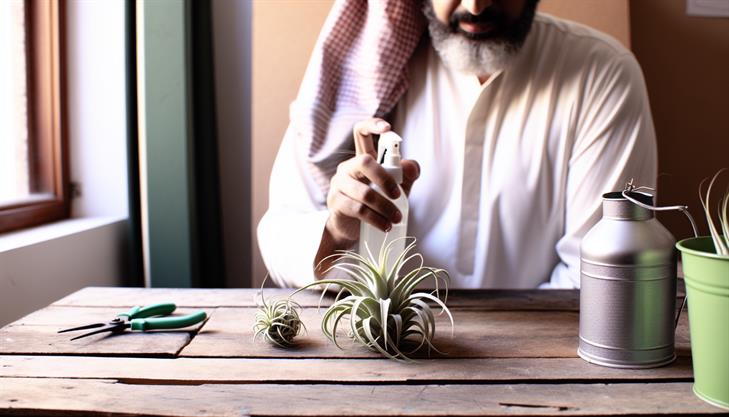
Utilize Misting Sparingly: Occasional misting can supplement their regular soaking routine, especially in extremely dry conditions. However, misting should not replace the soaking process.
By understanding these unique watering needs and following the above guidelines, you can ensure your air plants thrive and maintain their vibrant appearance. Always remain attentive to their subjective reactions to changes in care, as this will guide you to make necessary adjustments to your watering routine.
A Step-by-Step Guide to Properly Watering Your Air Plants
Air plants, also known as Tillandsias, are unique, low-maintenance plants that do not require soil to grow. Despite their easy-care nature, understanding how to water air plants properly is vital to keeping them healthy and vibrant. Here’s a comprehensive guide to help you master the art of watering your air plants.
Understanding Air Plant Water Needs
Air plants absorb moisture and nutrients through their leaves, making it essential to mimic their natural habitat as much as possible. They typically thrive in environments with high humidity and regular rainfall, so the right watering technique is crucial to their well-being.
Step-by-Step Guide to Watering Air Plants
-
Soaking Method: The most effective way to water air plants is by soaking them. Every 1-2 weeks, submerge your air plants in a bowl or basin filled with room temperature water. Ensure the plants are fully submerged and let them soak for 20-30 minutes. This method allows the plants to thoroughly hydrate.
-
Post-Soaking Drainage: After soaking, gently shake off any excess water and place the air plants upside down on a clean towel. Allow them to dry in a bright, well-ventilated area for a minimum of 4 hours. It’s crucial that they dry completely within this period to prevent rot, a common issue caused by prolonged moisture.
-
Spraying or Misting: To supplement soaking, especially in drier environments or during warmer months, you can mist your air plants 1-2 times a week. This helps to boost the humidity around the plants. However, misting should not replace the soaking method but rather complement it.
-
Adjust for Environment: The frequency and method of watering may vary depending on your climate. In humid areas, less frequent watering is needed, while drier or warmer climates might require a more frequent schedule.
Common Watering Issues and Tips
- Overwatering: This is a major concern as it can lead to root rot. Always ensure your air plants dry completely between waterings and avoid letting them sit in waterlogged conditions.
- Underwatering: Signs include curling leaves or a dull appearance. If you notice these symptoms, increase the frequency of soakings.
- Water Quality: Use rainwater, bottled water, or tap water that has been left out for 24 hours (to allow chlorine to dissipate). Avoid using distilled water as it lacks the minerals vital for plant health.
Additional Tips
- Position your air plants away from direct sunlight immediately after watering, as this can lead to sunburn on the moisture-laden leaves.
- During winter, you can reduce the frequency of watering but maintain regular misting to compensate for indoor heating’s drying effects.
- Regularly check your plants for any signs of pests or disease, as good watering practices contribute to pest-resistant plants.
By following this guide and adjusting the care according to your specific environmental conditions, you’ll ensure that your air plants remain healthy and thriving. Remember, learning how to water air plants is a process of paying attention to their reactions and adjusting care routines to meet their needs effectively.
Tips for Maintaining Optimum Moisture Levels for Air Plants
Watering air plants correctly is essential for their health and growth, as these unique plants rely heavily on environmental moisture rather than soil. Understanding how to water air plants properly can ensure they thrive in your care. Here’s a step-by-step guide to watering air plants, along with helpful tips and common pitfalls to avoid.
Step-by-Step Guide to Watering Air Plants
-
Remove the Air Plants:
Begin by gently removing your air plants from their container or mount. This helps prevent any residual water that might cause rotting if the plant is left in a non-draining environment. -
Submerge in Water:
Fill a bowl or sink with enough water to completely submerge your air plants. Use room-temperature water, ideally rainwater or bottled spring water. Tap water can be used, but allow it to sit overnight so chlorine and other chemicals dissipate. -
Soak Period:
Allow the air plants to soak for 20 to 30 minutes. During this time, they will absorb the moisture they need. For particularly dry conditions or dehydrated plants, you can extend soaking up to an hour once a month. -
Shake Off Excess Water:
After soaking, remove each air plant from the water and gently shake off excess droplets. It’s crucial to eliminate standing water from the crevices of the plant to prevent rot. -
Dry Completely:
Air plants must dry thoroughly before being placed back into their display. Lay them on a towel in a bright, but not direct, sunlit area with good air circulation. Exposure to a gentle breeze or a fan can accelerate drying. -
Return to Display:
Once completely dry, which can take a couple of hours, return your air plants to their container or mount.
Frequency of Watering
Air plants generally need watering once a week, but this can vary based on factors such as air humidity, temperature, and the specific type of air plant. In drier or hotter conditions, a bi-weekly soak might be necessary. Monitor your plants for signs of dehydration, such as curled or crispy leaves, to adjust your watering routine accordingly.
Tips and Considerations:
-
Misting:
As an addition to soaking, misting your air plants every few days can help maintain moisture levels, especially in arid climates. However, misting alone is not a substitute for soaking, as it doesn’t provide sufficient moisture. -
Avoid Overwatering:
One of the most common issues is overwatering, which leads to root rot. Ensure plants are always thoroughly dried before putting them back into closed displays. -
Seasonal Adjustments:
During winter months when indoor heating reduces humidity, you may need to water your air plants more frequently, while in more humid seasons, less frequent watering is advisable. -
Additional Advice for Setup:
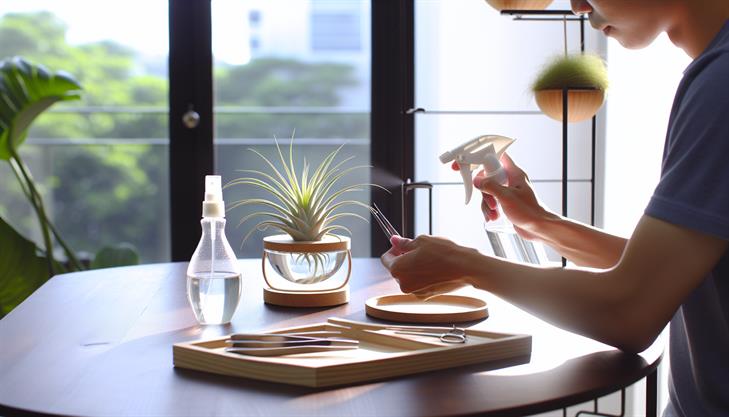
Consider using a hygrometer to monitor humidity levels in the air to ensure your air plants have an appropriate environment. Keeping air plants near a humidifier can also help maintain optimal moisture levels.
By following these guidelines, you can effectively maintain optimum moisture levels for your air plants, promoting their health and longevity. Adjusting your care routine based on environmental conditions and closely observing your plants will ensure they continue to thrive.
Using Tools and Accessories to Simplify Air Plant Care
Watering air plants properly is essential for their health and overall vitality. These unique plants—technically known as Tillandsia—draw moisture and nutrients from the air through their leaves, making their watering needs quite distinct from traditional houseplants. Below, you’ll find a comprehensive guide on how to water air plants effectively, along with tips and potential issues to watch out for.
Step-by-Step Watering Instructions for Air Plants
-
Gather Your Materials: Before starting, you’ll need a bowl or basin large enough to submerge your air plants, room temperature water (preferably rainwater or non-chlorinated water), and a towel for drying.
-
Submerge Your Air Plants: Fill the bowl with water, then place your air plants upside down in the water. Ensure they are fully submerged. Let them soak for about 20 to 60 minutes. This method allows them to absorb the water they need.
-
Gently Shake Off Excess Water: After soaking, gently shake each plant to remove any excess water, which helps prevent rot.
-
Dry Them Properly: Place your air plants upside down on a towel in a well-ventilated area to dry thoroughly. It’s crucial they dry completely within a few hours after watering, as lingering moisture can lead to rot.
-
Establish a Regular Watering Routine: Typically, air plants need to be watered once a week, but the frequency can vary based on environmental factors such as humidity and temperature. Increase watering frequency in a drier climate, while reducing it in a more humid environment.
Additional Tips and Advice for Watering Air Plants
-
Mist for Humidity: Besides regular soaking, you can mist your air plants once or twice a week, especially during dry months, to ensure they stay hydrated. Use a spray bottle to evenly mist the plants, ensuring not to soak them thoroughly.
-
Avoid Overwatering: One of the most common issues with air plants is rot caused by overwatering or inadequate drying. Always ensure your air plants dry completely before placing them back in their spot.
-
Consider Water Quality: Chlorinated water can harm air plants. If tap water is your only option, let it sit out for 24 hours to allow the chlorine to evaporate, or use filtered water instead.
-
Observe Your Plant’s Needs: Over time, you’ll get a better sense of how much water your air plant needs. If the leaves are wilted or curling, it may indicate they need more moisture.
-
Placement Matters: Air plants don’t need soil but do require good airflow. Place them in spots where they can dry quickly and receive indirect sunlight.
By following these steps and tips, you’re better equipped to keep your air plants healthy and thriving. Understanding how to water air plants correctly ensures they flourish, adding beauty and interest to your indoor garden spaces.
Troubleshooting Common Air Plant Watering Problems
Watering air plants, also known as Tillandsias, is a straightforward process, but it requires attention to detail to ensure these unique plants thrive. Here’s a step-by-step guide on how to water air plants effectively, along with troubleshooting common watering problems:
Step-by-Step Guide to Water Air Plants
-
Gather Your Supplies: Start with clean, room-temperature water. Distilled water or rainwater is ideal since tap water can contain minerals and chemicals harmful to air plants.
-
Soak the Plants: Submerge your air plants in a bowl or sink filled with water for 20 to 30 minutes. This soaking method mimics the natural hydration your plant would receive in its native humid environment, ensuring it absorbs enough moisture to thrive.
-
Shake Off Excess Water: After soaking, gently shake off excess water from your air plants. This step is crucial as it prevents water from collecting in the plant’s base, which can lead to rot.
-
Let Them Dry: Place the air plants in an upside-down position or on a towel in a bright, airy space to dry completely within 4 hours. Ensuring they dry thoroughly helps prevent rot and mold growth.
-
Create a Watering Schedule: Generally, air plants need watering once a week, but you may need to adjust this based on your local humidity levels. During dryer months or in arid climates, consider misting them in between regular waterings.
Common Watering Problems and Solutions
-
Rotting Tips: If you notice browning or soft spots, this could be due to water collecting in the plant’s crevices. Ensure you shake off water thoroughly post-soaking and position them correctly to dry.
-
Curling Leaves: Leaves curling inwards can indicate dehydration. Increase the frequency of watering or adjust your soaking sessions, especially if your environment is particularly dry.
-
Mold Growth: Mold signifies that the air plant isn’t drying properly. Improve air circulation where your air plants reside and ensure they have ample time to dry out thoroughly post-watering.
Additional Tips for Watering Air Plants
-
Environmental Considerations: Adjust watering habits based on your indoor climate. More humid environments require less frequent watering.
-
Avoid Overwatering: While it’s important to provide enough moisture, overwatering can be detrimental. If in doubt, opt for underwatering; air plants recover more easily from dryness than rot.
-
Positioning for Optimal Growth: Place your air plants in a location with bright, indirect light, which aids in drying and overall plant health. Avoid placing them in direct sunlight, as it can cause dehydration.
-
Regular Inspection: Regularly check your plants for signs of stress or disease. Early intervention can save your air plants from common watering-related issues.
By following these steps and tips, you’ll ensure your air plants are well-watered and healthy. Remember, each plant and environment is unique, so observe your plants closely and tweak your care routine based on their specific needs.
In conclusion, caring for air plants is a rewarding and straightforward process once you understand their unique needs. By soaking your air plants in water for about 15-30 minutes every one to two weeks, misting them regularly, and ensuring they are positioned in a well-ventilated space to dry thoroughly, you provide them with the foundation for thriving growth. Remember to adjust your care routine according to the season, as air plants may require more frequent watering during warmer months and less during cooler times. With these steps, your air plants can remain healthy and vibrant additions to your space.
As a final recommendation, consider using rainwater or distilled water instead of tap water to avoid exposure to harmful chemicals that could stress your plants. Applying these practices will help you maintain flourishing air plants that continue to enhance your home’s aesthetic for years to come. Happy growing!