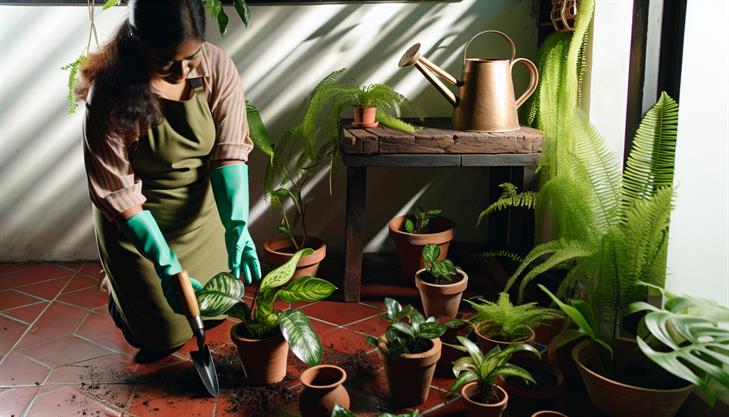
If you’ve ever admired the lush, glossy leaves of the ZZ plant and wished you could have more of them gracing your home or garden, then you’re in luck. Known for their adaptability and low-maintenance beauty, ZZ plants have become a beloved choice for both novice and seasoned plant enthusiasts. But did you know that propagating these resilient botanicals is not only possible but also incredibly rewarding? Whether you’re looking to expand your indoor jungle on a budget or gift a piece of greenery to friends, knowing how to propagate ZZ plants can open a world of possibilities. In this comprehensive guide, we’ll unravel the mysteries of ZZ plant propagation, providing you with expert tips and step-by-step instructions to multiply your green companions with ease. Dive in and discover how a little knowledge can grow your plant collection with minimal effort and maximum satisfaction.
Understanding ZZ Plant Propagation: Basic Methods
When it comes to propagating your ZZ Plant (Zamioculcas zamiifolia), there are several straightforward methods to expand your plant collection or share these resilient beauties with friends. Here’s a detailed guide to successfully propagate ZZ plants through different techniques, ensuring healthy new growth.
Stem Cutting
-
Choose a Healthy Stem: Start by selecting a mature, healthy stem from your ZZ plant. Ideally, it should be at least four inches long and have several leaves.
-
Make the Cut: Using a sharp and sterile knife or pruning scissors, make a clean cut at the base of the chosen stem.
-
Prepare the Cutting: Allow the cut end of the stem to air out for a few hours or overnight. This helps to prevent rot.
-
Rooting in Water or Soil:
- Water Propagation: Place the cut end in a clear jar or glass filled with water, ensuring it is submerging only the cut stem and not the leaves. Change the water every 2-3 weeks and wait for roots to develop, typically within 1-2 months.
- Soil Propagation: Insert the cutting into well-draining potting mix, water it lightly, and position it in a warm area with indirect light. Roots should begin to form in a couple of months.
-
Monitoring Growth: Look for new roots and shoots over the next few weeks. Be patient, as ZZ plants are slow to root.
Leaf Cutting
-
Select a Healthy Leaf: Use a healthy, mature leaf from your ZZ plant.
-
Make the Cut: Cut the leaf cleanly from the stem, ideally with a small portion of the stem (the leaf petiole) attached.
-
Callus Formation: Allow the cut to sit out and dry for a day or two to form a callus, reducing the risk of rot.
-
Planting: Push the callused end of the leaf into a pot filled with moist, well-draining potting mix.
-
Patience Required: Root development takes longer with leaf cuttings, typically 2-3 months before small bulbs and eventually roots appear.
Division Method
-
Remove from Pot: Carefully take the ZZ plant out from its pot, taking care not to damage the root ball.
-
Identify Natural Divisions: Look for natural divisions where the rhizomes (underground stems) can be separated.
-
Separate Carefully: Use your hands or a clean knife to divide each section, ensuring each division has at least one stalk and several roots attached.
-
Replant Divisions: Plant each division in its pot with well-draining soil and water lightly.
-
Care after Division: Place them in a spot with indirect sunlight and maintain a consistent watering schedule as they establish themselves.
Common Issues and Extra Tips
- Rot Prevention: Ensure containers and tools are sterile to prevent root rot, a common issue in propagation.
- Optimal Environment: Keep propagating plants in a warm, humid environment, ideally with temperatures between 65°F and 75°F (18°C and 24°C).
- Light Requirements: Place the plant in bright, indirect light to promote healthy root and shoot development.
- Be Patient: Propagation can be a slow process for ZZ plants, often taking several months to show significant growth due to their slow-growing nature.
By following these methods on "how to propagate ZZ plant", you can successfully expand your collection. Remember, the key is patience, as ZZ Plants take their time to establish new roots and shoots.
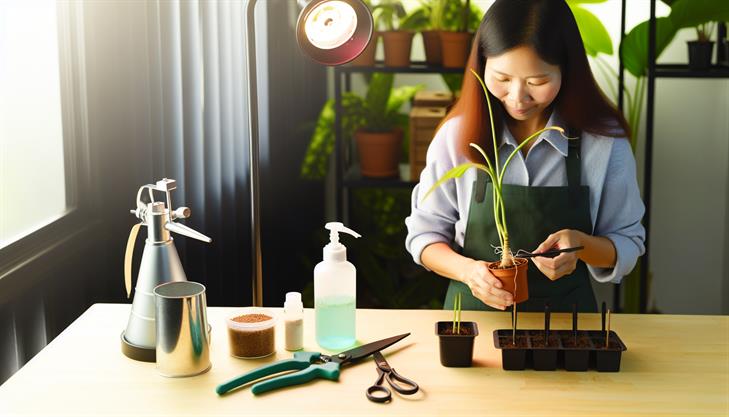
Essential Tools and Materials for Propagating ZZ Plants
Propagating ZZ plants can be a rewarding experience, offering a chance to expand your green collection with minimal effort. The process is simple and requires just a few essential tools and materials. Here’s a step-by-step guide on how to propagate ZZ plants effectively.
Tools and Materials Needed
Before you begin, gather the following items:
- A healthy ZZ plant: Choose a mature plant with sufficient stems.
- Sterilized scissors or pruning shears: Essential for clean, disease-free cuts.
- Small pots or containers: For planting cuttings or divisions.
- Well-draining potting soil: ZZ plants prefer soil that allows excess water to escape.
- Watering can or spray bottle: For maintaining consistent moisture levels.
- Clear plastic bag or propagation dome: Optionally to create a humid environment.
Propagation Methods
-
Leaf Cuttings
- Select a Leaf: Choose a healthy leaf from your ZZ plant. Look for mature leaves without damage.
- Make the Cut: Using sterilized scissors, cut the leaf stem cleanly near the base.
- Prepare the Soil: Fill a small pot with well-draining potting soil. A mix of cactus soil and perlite works well.
- Plant the Leaf: Place the cut end of the leaf into the soil about an inch deep. Firm the soil gently around it to ensure it stays upright.
- Water Lightly: Moisten the soil using a spray bottle to avoid overwatering.
- Create Humidity: Cover the pot with a clear plastic bag or propagation dome to maintain humidity, which promotes root growth.
-
Stem Cuttings
- Select a Stem: Choose a healthy stem that is at least a few inches long.
- Cut the Stem: Use sterilized shears to cut below a node, where leaves attach to the stem.
- Air Dry the Cut: Let the cut end dry for several hours to callous over, which helps prevent rot.
- Plant the Cuttings: Insert the cut end into a pot filled with well-draining soil. It should stand upright on its own.
- Water and Maintain: Gently water the soil and maintain a humid environment until roots develop.
-
Division
- Remove the Plant: Carefully take the entire ZZ plant out of its pot and shake off excess soil.
- Separate Rhizomes: Gently divide the root ball so that each portion has a couple of leaves and rhizomes.
- Replant: Place each division into a separate pot with fresh potting mix.
- Water Well: Water thoroughly to help the soil settle around the roots.
Common Issues and Tips
- Rot: Both leaf and stem cuttings are susceptible to rot if overwatered. Always allow the soil to dry out between waterings.
- Slow Growth: It’s normal for ZZ plant cuttings to take several weeks, or even months, to show noticeable growth. Be patient and consistent with care.
- Proper Lighting: Ensure your cuttings receive indirect sunlight. Direct sunlight can scorch leaves and impede root development.
By following these guidelines on how to propagate ZZ plants, you can enjoy new, thriving plants. Just remember to provide the cuttings with a steady environment, consistent moisture, and indirect light to encourage strong growth. With a little time and care, you’ll have more ZZ plants to brighten your spaces or share with friends.
Preparing the Optimal Environment for Root Development
Propagating the ZZ plant (Zamioculcas zamiifolia) is a rewarding process that allows you to expand your greenery collection or share the joy of plant parenting with others. Known for its hardiness and low maintenance, the ZZ plant is an excellent candidate for propagation. Here’s a detailed guide on how to propagate your ZZ plant, ensuring you create the optimal environment for root development.
Step 1: Choosing the Right Method
There are three popular methods for propagating a ZZ plant: division, leaf cuttings, and stem cuttings. Each method has its own advantages:
- Division: Best for mature plants with multiple rhizomes. This method provides instant gratification as you get a fully formed, albeit smaller, plant.
- Leaf Cuttings: Ideal for patient gardeners, as this method requires more time. It’s useful when you only have access to leaves.
- Stem Cuttings: Combines the benefits of both division and leaf cuttings, providing quicker results than leaf propagation while not disturbing the entire plant like division.
Step 2: Preparing Your Tools and Environment
Regardless of the method you choose, ensure you have the following supplies:
- A clean, sharp knife or pruning shears for making precise cuts.
- Small pots with drainage holes.
- Well-draining soil mix, ideally a cactus or succulent blend.
- A clean workspace to avoid contamination.
- A rooting hormone (optional, but helpful).
Step 3: Propagation Process
Division
- Remove the Plant from the Pot: Gently tip the plant out of its pot to inspect the root system.
- Separate the Rhizomes: Use your hands or a sterilized knife to divide the rhizomes. Ensure each section has roots and at least one stem.
- Pot the Divisions: Place each division in a pot filled with well-draining soil. Water lightly to settle the soil.
Leaf Cuttings
- Select Healthy Leaves: Look for mature, healthy leaves without any blemishes.
- Prepare the Cuttings: Cut each leaf at the base, close to the stem.
- Plant the Leaves: Stick the cut end into a small pot filled with soil. Keep the leaf upright.
- Maintain Humidity: Cover the pot with a clear plastic bag to create a mini greenhouse effect, keeping humidity levels high.
Stem Cuttings
- Choose a Healthy Stem: Pick a healthy stem with a few leaflets.
- Cut the Stem: Make a clean, angled cut just below a node.
- Apply Rooting Hormone: Dip the cut end in rooting hormone to encourage faster root growth.
- Place in Soil: Insert the cutting into soil, ensuring at least one node is underground.
- Water Sparingly: Moisten the soil just enough to keep it slightly damp.
Step 4: Caring for Cuttings
- Lighting: Place the cuttings or divisions in a bright, indirect light location to avoid scorching.
- Watering: Be cautious not to overwater. ZZ plants are drought-tolerant and too much moisture can lead to rot.
- Monitoring: Watch for new growth, which indicates successful rooting. This can take several weeks to months depending on the method.
Common Issues and Tips
- Overwatering: Root rot is the most common issue; ensure pots have adequate drainage and allow the soil to dry out slightly between watering.
- Pests: Keep an eye out for pests such as mealybugs or spider mites. Treat infestations promptly to prevent damage.
- Patience: Especially with leaf cuttings, patience is key. The process can take several months, but the results are worth the wait.
By preparing the optimal environment for root development, you can successfully propagate ZZ plants and enjoy their resilient beauty in multiple areas of your home or share them as gifts. Whether you’re dividing a mature plant or starting from smaller cuttings, each method offers a satisfying way to expand your plant collection.
Common Mistakes and How to Troubleshoot Them
Propagating a ZZ plant, scientifically known as Zamioculcas zamiifolia, is a rewarding task that allows you to multiply one plant into several. Known for their resilience and striking appearance, ZZ plants can be propagated through leaf cuttings or division. Below, we will delve into detailed steps on how to propagate a ZZ plant effectively, alongside troubleshooting common mistakes.
Propagating ZZ Plant via Leaf Cuttings
-
Select Healthy Leaves: Choose mature, healthy leaves from the ZZ plant. Avoid using damaged or yellowing leaves as they may not root effectively.
-
Cut the Leaf: Using a clean pair of scissors or garden pruners, cut off the leaf cleanly at its base. Aim for a stem segment about 2-3 inches long if possible.
-
Prepare the Cuttings: Lay the leaf cuttings out on a paper towel. Allow the cut end to callous over for a day or two. This reduces the risk of rot when the leaf is planted.
-
Plant the Leaf: Fill a small pot with a well-draining potting mix, such as a cactus or succulent mixture. Insert the cut end of the leaf about an inch deep into the soil, ensuring that it stands upright.
-
Water Appropriately: Moisten the soil lightly. ZZ plants are susceptible to rot, so be cautious of overwatering. Allow the soil to dry out completely before watering again.
-
Create a Mini-Greenhouse: Cover the pot with a clear plastic bag to create a humid environment, which will encourage rooting. Ensure there is some airflow to prevent mold growth.
-
Wait Patiently: Place the pot in a warm, indirect sunlight spot. Rooting can take a long time, sometimes up to several months. Be patient and keep an eye on soil moisture.
Propagating ZZ Plant through Division
-
Remove the Plant from the Pot: Gently take the entire ZZ plant out of its pot, taking care not to damage the roots.
-
Separate the Rhizomes: Examine the dense clump of underground rhizomes. Use a clean, sharp knife to divide these rhizomes, ensuring that each section has at least one stem shoot and roots.
-
Replant in Separate Pots: Pot each divided section in a new container filled with well-draining soil. Ensure each section is planted at the same depth it was growing previously.
-
Aftercare: Water the newly potted plants lightly and place them in a warm, bright location with indirect sunlight. Similar to leaf cuttings, avoid overwatering.
Common Issues and Troubleshooting
-
Rotting Cuttings: If the base of your leaf cuttings becomes mushy, it’s likely due to overwatering or insufficient callous formation before planting. Ensure cut ends are dry and reduce watering frequency.
-
Slow Rooting: ZZ plants naturally take time to root, particularly from leaf cuttings. Ensure they are kept in a warm environment with high humidity. Patience is key.
-
Yellowing Leaves: If leaves turn yellow, it could be a sign of too much direct sunlight or overwatering. Adjust their environment or watering schedule accordingly.
Additional Tips and Advice
-
Light Conditions: ZZ plants thrive in low to bright, indirect sunlight. Avoid placing them in direct sunlight as it can scorch their leaves.
-
Soil Selection: Always opt for a fast-draining mix to prevent water from sitting around the roots, which can lead to rot.
-
Temperature: ZZ plants prefer temperatures ranging from 65°F to 75°F. Keep them away from drafts and avoid sudden temperature changes.
By following these guidelines on how to propagate a ZZ plant, you’ll be well on your way to expanding your collection or sharing these hardy plants with friends and family. Whether using leaf cuttings or division, the process is straightforward and yields satisfying results with the right care and patience.

Caring for Newly Propagated ZZ Plants: Tips and Tricks
Propagating ZZ plants can be a rewarding process, allowing you to grow new plants from an existing one. It’s relatively straightforward, making it an excellent project for both beginner and experienced plant enthusiasts. Here’s a detailed guide on how to propagate your ZZ plant successfully:
Understanding the Basics
ZZ plants (Zamioculcas zamiifolia) are popular for their shiny leaves and low maintenance needs. When propagating these plants, you can choose between two main methods: stem cuttings or leaf cuttings. Each method has its advantages, but both require patience as ZZ plants typically grow slowly.
Method 1: Propagating via Stem Cuttings
-
Select the Right Stem: Begin by selecting a healthy stem from your ZZ plant. It should be mature, showing no signs of disease or pest damage.
-
Cut the Stem: Use a clean, sharp knife or scissors to cut a segment of the stem, approximately 5-7 inches long. Be sure to cut just above a leaf node.
-
Prepare the Cutting: Remove the leaves from the bottom 2 inches of the stem to prevent them from rotting when planted.
-
Rooting in Water:
- Place the cut end of the stem in a glass of water, ensuring the bare nodes are submerged.
- Change the water weekly to prevent bacteria growth.
- Position the glass in a warm, bright area, avoiding direct sunlight.
- Roots should develop in a few weeks, but it can take a couple of months.
-
Potting the Cutting: Once roots are about 1-2 inches long, plant the stem in a pot filled with well-draining soil. Keep the soil slightly moist as the plant acclimates.
Method 2: Propagating via Leaf Cuttings
-
Select a Healthy Leaf: Take a mature, healthy leaf from the plant.
-
Cut the Leaf with a Stem Section: Include a small section of the stem (petiole) attached to the leaf.
-
Rooting in Soil:
- Prepare a small pot with well-draining potting mix.
- Insert the cut end (petiole) into the soil, leaving the leaf exposed above ground.
- Water lightly to ensure the soil is moist but not soggy.
-
Monitor and Wait: Place the pot in a warm spot with indirect light. Ensure the soil remains slightly moist, checking occasionally.
-
Transplanting: Once the leaf cutting has developed small tubers and roots (this can take several months), you can transplant it to a larger pot.
Common Issues and Tips
-
Overwatering: ZZ plants are drought-tolerant, and excess watering can lead to root rot. Ensure good drainage and let the soil dry between waterings.
-
Patience is Key: ZZ plants are notorious for their slow growth. Don’t be concerned if you don’t see immediate progress.
-
Light Conditions: While ZZ plants can survive in low light, brighter, indirect light will promote faster growth.
-
Temperature: Maintain a warm, consistent temperature, ideally between 65-75°F (18-24°C), to encourage rooting.
By following these guidelines on how to propagate ZZ plants, you can expand your green collection or share with friends and family. With patience and attention, your new ZZ plants will thrive, adding lush beauty to your indoor space.
In conclusion, propagating a ZZ plant can be a rewarding endeavor for both novice and experienced plant enthusiasts. By understanding the various propagation methods—whether it’s division, leaf cuttings, or stem cuttings—you can effectively multiply your ZZ plant collection with ease. Remember to maintain patience as root development can take several weeks, and always ensure proper lighting and minimal watering to avoid common pitfalls like root rot.
Now that you’re equipped with these propagation techniques, it’s time to apply what you’ve learned and enjoy the process of growing new life. As a final tip, consider using a well-draining potting mix to provide the best environment for your newly propagated plants, enhancing their chances of thriving. Happy propagating!