If you’re looking for a simple yet rewarding way to enhance your indoor garden, propagating a spider plant could be your next green-thumb adventure. Known for their cascading foliage and vibrant green leaves striped with creamy white, spider plants not only enhance the aesthetic appeal of any space but also boast air-purifying qualities, making them a staple in homes and offices. However, what truly sets the spider plant apart is its ease of propagation, allowing you to create new plants with minimal effort while fostering a deeper connection with your greenery. Whether you’re an experienced gardener or a plant enthusiast just beginning your journey, learning how to propagate spider plants can be a delightful and cost-effective method to expand your collection or share the joy of gardening with friends and family. In this guide, we’ll walk you through each step of the way, ensuring you have all the knowledge needed to successfully multiply these charming plants and bring lush life into every corner of your home.
Understanding Spider Plant Propagation: An Introductory Guide
Spider plants, known for their hardy nature and charming appearance, are a popular choice among plant enthusiasts, and propagating them is an excellent way to expand your greenery. Here’s an easy-to-follow guide on how to propagate spider plants:
Materials Needed:
- A healthy spider plant
- Sharp scissors or pruning shears
- Small pots with drainage holes
- Potting soil
- Water
- Optional: Rooting hormone
Step-by-Step Instructions:
1. Identify Plantlets:
Begin by looking for plantlets, also known as "spiderettes" or "pups," which are small offshoots that dangle from the main plant. A mature mother plant typically produces these plantlets after flowering.
2. Prepare to Propagate:
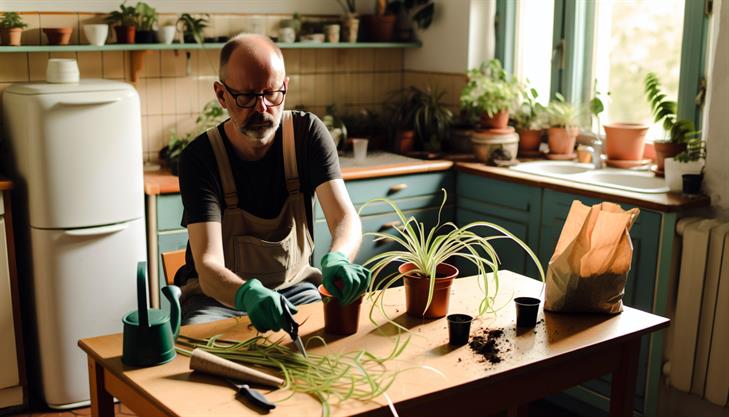
Before you begin, ensure that both your tools and hands are clean to prevent any potential diseases from affecting the plant. Ensure your workspace is ready with pots and soil prepped for the new plants.
3. Cut the Plantlets:
Once you’ve chosen healthy spiderettes, use a pair of clean, sharp scissors or pruning shears to cut them away from the mother plant. Cut the small stem that connects them, making sure the plantlet has a few roots or root nubs already formed.
4. Prepare the Containers:
Fill your pots with a good-quality potting soil that drains well. You can slightly dampen the soil to help settle it before planting the spiderettes.
5. Plant the Spiderettes:
Create a small hole with your finger or a stick in the soil, then place the base of the spiderette in the hole. Cover the roots gently with soil and pat it down lightly to secure the plantlet in place. If desired, dip the cut end into a rooting hormone before planting to encourage root development.
6. Watering:
After planting, water the soil until it’s well-moistened, but be cautious to avoid overwatering. Spider plants prefer soil that is kept mildly moist but not soggy. Excessive water can lead to root rot.
7. Position the Pots:
Place your newly potted spider plants in a location with bright, indirect sunlight. Direct sunlight can harm tender plantlets, while insufficient light may slow growth.
Troubleshooting Common Issues:
- Root Rot: Be mindful of overwatering and ensure pots have proper drainage to prevent root rot.
- Slow Growth: If plantlets show signs of stunted growth, they may need more indirect sunlight or possibly a fertilizer boost. Use a balanced, water-soluble fertilizer every 6-8 weeks.
- Yellowing Leaves: This can be a sign of overwatering, underwatering, or a need for more nutrients. Adjust water levels and consider fertilizing if necessary.
Additional Tips:
-
Water Propagation: You may also choose to propagate spider plants in water. To do this, simply place the cut pup in a container with water so that the base and root area are submerged. Once roots are about 1-2 inches long, transplant the spiderette into soil.
-
Temperature and Humidity: Spider plants thrive in temperatures between 65-75°F (18-24°C) and with moderate humidity.
Propagating spider plants is a simple yet rewarding endeavor, allowing you to share or expand these charming plants throughout your home or garden. With care and proper technique, your spiderettes will grow into lush, thriving new plants.
Step-by-Step Guide to Propagating Spider Plants in Water
Propagating a spider plant in water is a rewarding and straightforward process, perfect for both novice and seasoned gardeners. This method is not only efficient but also allows you to visually monitor root development, ensuring successful plant propagation. Below, you’ll find a step-by-step guide to help you propagate spider plants effectively and enhance your indoor garden.
Step 1: Identify Healthy Spiderettes
Spider plants produce offshoots, commonly known as spiderettes or plantlets, which are ideal candidates for propagation. Look for spiderettes that have roots or are at least a couple of inches long and appear healthy and vibrant. Make sure the parent plant is healthy to begin with, as this ensures a better chance of success.
Step 2: Cut the Spiderettes
Using a sharp, sterile pair of scissors or gardening shears, cut the spiderettes away from the main plant. It’s important to avoid damaging the parent plant during this process. Cut the plantlet as close as possible to its base where it connects with the parent plant.
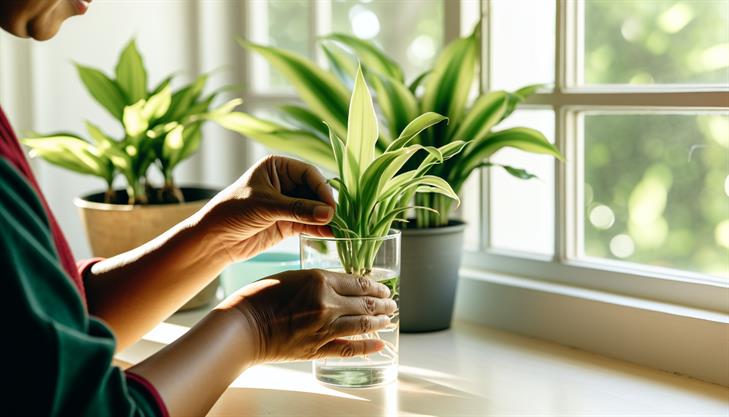
Step 3: Prepare a Water Container
Choose a small, clear container or glass for your spiderette. Fill it with fresh, lukewarm water, ensuring the container is deep enough to submerge the roots but not the entire spiderette. A clear glass will allow you to observe the root development.
Step 4: Place the Spiderette in Water
Gently place the base of the spiderette into the water, ensuring that the emerging root nodes are submerged. If needed, use a support to keep the plantlet stable, such as toothpicks or a paperclip gently positioned at the sides of the container to hold the plantlet above water.
Step 5: Positioning
Place the container in a well-lit area that receives indirect sunlight. Avoid direct sun exposure, which can scorch the young plants and inhibit root growth. A bright windowsill away from the direct sun or supplemented with grow lights can be optimal.
Step 6: Monitor and Change Water Regularly
Check the water every few days, refreshing it at least once a week to prevent stagnation and the growth of bacteria. Clean water promotes healthy root development. You should begin to see root growth within a couple of weeks.
Step 7: Transplanting
Once the roots of your spiderette have grown to about 1-2 inches in length, it’s ready to be transplanted into soil. Prepare a pot with well-draining potting mix, making a small hole in the center, and gently plant the newly rooted offspring. Water it thoroughly and place it back in a spot with indirect sunlight.
Common Issues and Tips
- Yellow Leaves: If the leaves of your spiderette begin to yellow, it may be due to overwatering, poor water quality, or direct sunlight. Adjust watering practices and reposition if necessary.
- Slow Root Growth: Ensure the plantlet receives enough indirect sunlight and the water is clean and nutrient-free.
Additional Advice
- Spider plants prefer to be slightly root-bound, so choose a moderate-sized pot when transplanting.
- Over time, spider plants can produce numerous offspring, allowing you to propagate multiple new plants and share them with family and friends.
By following these steps, you can successfully propagate spider plants and enjoy the lush, cascading greenery that these popular houseplants offer.
Proper Soil and Pot Choices for Healthy Spider Plant Growth
Propagating a spider plant is a rewarding process that can help you quickly expand your indoor garden or share these charming plants with friends and family. Here’s a detailed guide on how to propagate a spider plant successfully, from selecting the right shoot to nurturing the newly potted plantlets.
1. Identify Healthy Spider Plant Offshoots:
Spider plants are well-known for their cascading “spiderettes” or plantlets, which dangle from the mother plant. To start, choose healthy, vibrant plantlets. Look for ones that have a few leaves and visible roots forming at the base. These roots indicate that the plantlet is ready to be separated.
2. Prepare Your Tools:
Gather a pair of clean, sharp scissors or pruning shears, a pot filled with well-draining soil, and a container of water if you plan on water propagation initially. Using sanitized tools helps prevent disease transfer to the new plant.
3. Separate the Plantlet:
Using your scissors or shears, carefully cut the plantlet from the main plant. Make sure you leave a bit of stem attached to the base of the baby plant to encourage root growth.
4. Choose Your Propagation Method:
There are two primary methods to propagate spider plants: soil and water.
– Soil Propagation:
To propagate directly in soil, plant the cut-off plantlet in a small pot with fresh potting mix. Spider plants prefer a well-draining soil mixture. Water the soil lightly to settle it around the roots, but be careful not to overwater, as this can lead to root rot.
– Water Propagation:
Alternatively, place the plantlet in a small jar of water with the base submerged. Ensure only the roots, not the leaves, are in water. Place the jar in a bright, indirect light location. Change the water every few days to keep it fresh and oxygenated. Once the roots are about two inches long, transfer the plantlet into a pot with soil.
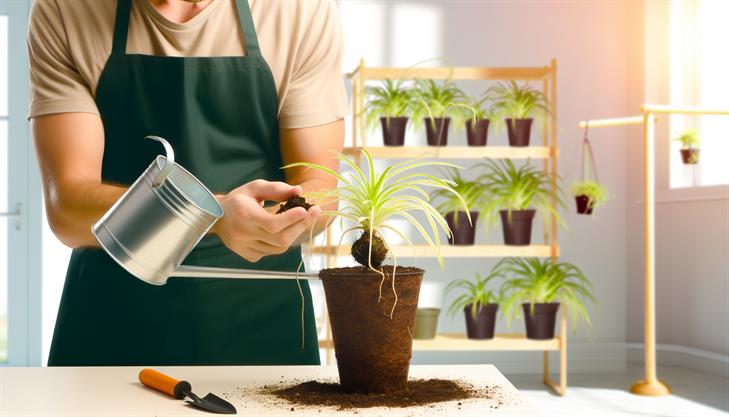
5. Pot and Care for Your New Plant:
Once rooted or planted directly into soil, the plantlet requires consistent care. Place the pot in a location with bright, indirect sunlight. Keep the soil consistently moist but not soggy. As the plant grows, adjust watering schedules depending on the humidity levels and time of year.
Common Issues and Tips:
- Root Rot: Be cautious of overwatering. Ensure the pot has drainage holes and excess water can easily escape.
- Improper Light: Spider plants thrive in bright, indirect sunlight. Too much direct sunlight can scorch their leaves, while too little light can stunt growth.
- Nutrient Boost: Consider a diluted liquid fertilizer once in the spring and summer to promote growth. Avoid over-fertilizing, as this can cause leaf tips to brown.
By following these simple steps, you can propagate spider plants effortlessly. Whether handed off as gifts or used to decorate your own space, these plantlets are a delightful addition to any collection.
Tips for Successful Rooting and Growth of Spider Plant Babies
Propagating spider plants is a rewarding and straightforward process, making it an excellent activity for both novice and seasoned gardeners. Spider plants, known for their long arching leaves and easy propagation, are perfect subjects to multiply into houseplants. Here’s how you can propagate spider plants effectively with a foolproof method.
Step-by-Step Guide to Propagate Spider Plant Babies
-
Identify Healthy Spider Plant Babies:
Start by identifying the mature "babies" or plantlets on your spider plant. Each plantlet should have at least a couple of leaves and visible root nubs. These are your candidates for propagation and should look healthy and vibrant. -
Prepare Your Tools:
Before beginning, prepare a sharp, clean pair of scissors or pruning shears. Disinfect the blades with rubbing alcohol to avoid transferring disease to the plant. -
Detach the Plantlets:
Gently snip the plantlets from the mother plant. It’s best to detach plantlets that already have some root formations for a quicker transition. -
Choose a Propagation Method:
Spider plants can be propagated in two main ways: in water or directly in soil.-
Propagating in Water:
- Fill a small jar or glass with water, ensuring only the roots come in contact with the water to prevent leaf rot.
- Place the plantlet in the jar with the root ends submerged.
- Position the jar where it gets indirect sunlight and wait for root development over the next 1-2 weeks. Change the water every few days to keep it fresh.
-
Propagating in Soil:
- Fill a small pot with a well-draining potting mix, such as a blend of regular potting soil and perlite.
- Make a small hole in the soil with your finger or a stick and gently plant the rooted end of the baby.
- Water the soil lightly to settle it around the roots and place the pot in a warm location with indirect sunlight.
-
-
Transitioning to Soil:
If you started the propagation in water and roots are approximately an inch or longer, transition the plantlet to soil by following the steps in the soil propagation method. Ensure the soil is moist initially to assist with bedding in.
Common Issues and Solutions
-
Lack of Root Growth: If you notice little to no root growth in water, ensure that you are using fresh water and that the plantlet receives sufficient indirect light.
-
Wilting or Yellowing Leaves: This could indicate overwatering in the soil. Ensure that the pot has good drainage and reduce watering frequency.
-
Root Rot: If propagating in water, make sure only the base of the plantlet is submerged to avoid rot. In soil, use a pot with drainage holes and avoid overwatering.
Additional Tips for Successful Growth
-
Optimal Light Conditions: While propagating, place your plantlets in a well-lit area that avoids direct sunlight, which can scorch the delicate leaves.
-
Potting Medium: For soil propagation, consider using a potting mix specifically designed for houseplants, as it provides the necessary nutrients for growth.
-
Nurturing New Plants: Once the plantlets are established, they can be treated like adult spider plants. Regular watering, occasional feeding, and ensuring indirect light will keep them thriving.
By following these steps and tips, you can propagate spider plants with ease, transforming a single plant into a lush collection. Consistent care and attention to environmental conditions will ensure that your new plants grow healthy and strong.
Common Problems and Troubleshooting in Spider Plant Propagation
Propagating a spider plant, also known as Chlorophytum comosum, is a rewarding process that can enhance your indoor garden while maintaining this popular houseplant’s health and vitality. With its distinctive arching leaves and delicate white flowers, the spider plant can produce spiderettes or plantlets, which are ideal for propagation. By following these detailed steps, you can ensure successful propagation and tackle any issues that may arise.
Step-by-Step Guide to Propagate Spider Plant:
-
Identify Mature Spiderettes:
Begin by identifying mature spiderettes, or offspring, which typically emerge from the parent plant on long stems. These should have developed their own roots or root nodes, signifying they’re ready for propagation. -
Choose a Propagation Method:
Spider plants can be propagated in soil or water. Both methods are effective, and your choice depends on personal preference and available materials. -
Propagation in Water:
- Cutting the Spiderette: Use sterilized scissors or pruning shears to carefully cut the spiderette from the mother plant, ensuring not to damage the plantlet.
- Placing in Water: Place the spiderette in a container of water with the root side submerged. Change the water every 5-7 days to prevent stagnation and encourage root development.
- Planting: Once roots grow to about 1-2 inches long, transfer the spiderette to a pot filled with potting soil.
-
Propagation in Soil:
- Rooting Directly in Soil: Fill a small pot with a well-draining potting mix. Gently press the spiderette into the soil, taking care to cover the root nodes but leaving the leaves above the soil surface.
- Watering and Care: Water the planted spiderette thoroughly and place the pot in indirect sunlight to enhance growth. Ensure the soil remains consistently moist but not waterlogged.
Common Problems and Troubleshooting:
- Root Rot Concerns: Overwatering can lead to root rot. Be mindful of not overwatering, especially in the initial stages. Ensure pots have adequate drainage holes.
- Stagnant Water Issues: If propagating in water, change the water frequently to prevent bacterial growth that can damage the roots.
- Slow Root Growth: If roots are not developing, check for sufficient light exposure and consider using a rooting hormone to stimulate root growth.
Additional Tips for Successful Propagation:
- Ideal Environment: Ensure the environment is warm and humid to facilitate steady growth, mimicking the plant’s natural tropical habitat.
- Timing: Spring or early summer is the best time to propagate spider plants, as these are their active growing seasons.
- Nutrient Boost: After the spiderette is established in soil, a light feeding with balanced houseplant fertilizer can promote healthy development.
Propagation is a straightforward and fulfilling way to multiply your spider plants and refresh your home with vibrant greenery. By following these steps and being aware of potential issues, you’ll find success in cultivating a thriving spider plant collection.
In conclusion, propagating a spider plant is a straightforward and rewarding process that can enhance both your indoor garden and your understanding of plant care. By following the key methods of propagation, including using plantlets, cutting off stolons, and ensuring the right environmental conditions, you can effectively multiply your spider plants with ease. Remember to maintain a warm, well-lit environment and consistently water your new plants to encourage robust growth. Don’t be afraid to experiment with different propagation techniques to find what best suits your space and lifestyle.
As a final tip, consider implementing a regular care routine for your propagated spider plants. This includes occasional fertilizing during the growing season and keeping an eye out for any signs of pests or diseases. With patience and dedication, your indoor garden will thrive, and your spider plant collection will flourish. Happy propagating!