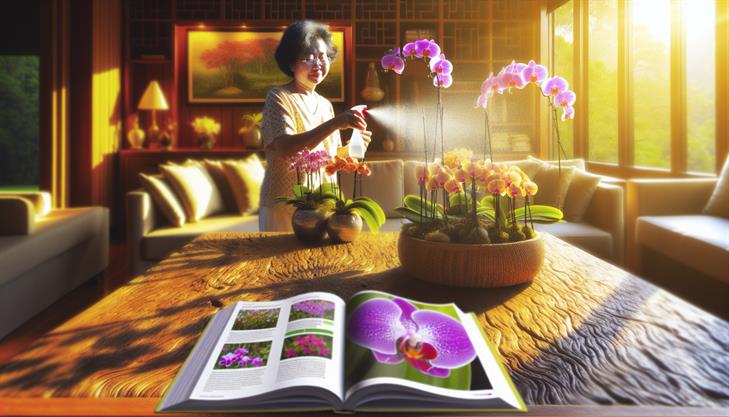
Bringing an orchid into your home is like inviting a piece of the wild rainforest to grace your living space with its vibrant beauty and exotic charm. These stunning plants, with their elegant blooms and captivating structure, have long been a symbol of refined taste and natural elegance. However, behind their dazzling appearance lies a myth of complexity that often intimidates budding plant enthusiasts. If you’ve ever hesitated to nurture an orchid due to tales of their demanding nature, you’re not alone! Yet, the truth is, with a bit of know-how, caring for an orchid indoors can be a delightful and rewarding experience.
In this guide, we’ll debunk the myths and unravel the mysteries of orchid care, transforming what might seem like a horticultural challenge into an enjoyable journey of growth and beauty. You’ll discover practical tips to ensure your orchid thrives, from mastering the art of watering to perfecting light conditions, and even coaxing those breathtaking blooms. Whether you’re a seasoned plant lover or a curious beginner, this guide will equip you with the knowledge to create the perfect environment for your orchid to flourish, turning any dull corner into a dazzling showcase of nature’s artistry.
How to Choose the Right Orchid for Your Indoor Space
Choosing the right orchid for your indoor space requires a thoughtful approach, as different species have varying needs in terms of light, temperature, and humidity. Here’s a guide to help you select and care for an orchid plant indoors, ensuring it not only survives but thrives:
1. Evaluating Light Conditions:
Orchids are generally categorized based on their light requirements: low, medium, or bright indirect light. Identify the primary light source in your room:
- Low Light: For areas with minimal natural light, consider species like the Phalaenopsis orchid, which is tolerant of lower light conditions.
- Medium Light: If your space receives filtered sunlight, Cattleya orchids are a suitable choice.
- Bright Indirect Light: For brightly lit rooms that do not receive direct sun, opt for Vanda orchids.
2. Understanding Temperature Needs:
Most orchids prefer temperatures between 60°F to 80°F (15°C to 27°C). Check your species’ specific needs:
- Warm-Growing Orchids: Phalaenopsis and Vanda species thrive in warmer conditions.
- Cool-Growing Orchids: Cymbidium orchids prefer cooler climates but can adapt indoors if not too hot.
3. Selecting the Right Pot and Soil:
Orchids require a pot with good drainage. Choose plastic or clay pots with numerous drainage holes:
- Use a specialized orchid potting mix, typically containing bark, perlite, and sphagnum moss, which facilitates aeration and root health.
4. Watering Your Orchid:
Overwatering is a common issue, but proper hydration is essential:
- Check the potting mix: Water when it feels dry to the touch, about once a week.
- Use room-temperature water and avoid letting the plant sit in excess water, which can lead to root rot.
5. Maintaining Humidity Levels:
Orchids love humidity, ideally around 50% to 75%:
- Use a room humidifier or place a tray of water and pebbles under the pot to boost humidity.
- Misting the leaves can also help, but avoid wetting the flowers to prevent spots.
6. Fertilizing for Growth:
Regular feeding supports blooms:
- Use a balanced orchid fertilizer diluted to half strength every two to four weeks during the growing season (typically spring and summer).
7. Addressing Common Issues:
Be proactive in preventing problems:
- Yellowing leaves: Often due to overwatering or insufficient light.
- Wrinkled leaves: Indicative of dehydration—adjust your watering routine.
- No blooms: Insufficient light is a frequent culprit. Ensure your orchid receives adequate light for its species.
8. Repotting:
Orchids need repotting every 1-2 years:
- Do this right after flowering when new growth appears, using fresh potting mix.
By carefully selecting an orchid suited to your specific indoor environment and tending to its unique needs, you can enjoy a vibrant, healthy plant that enriches your space. Keep in mind, patience is key with orchids, as some can take time to adapt to their surroundings and show off their beautiful blooms.
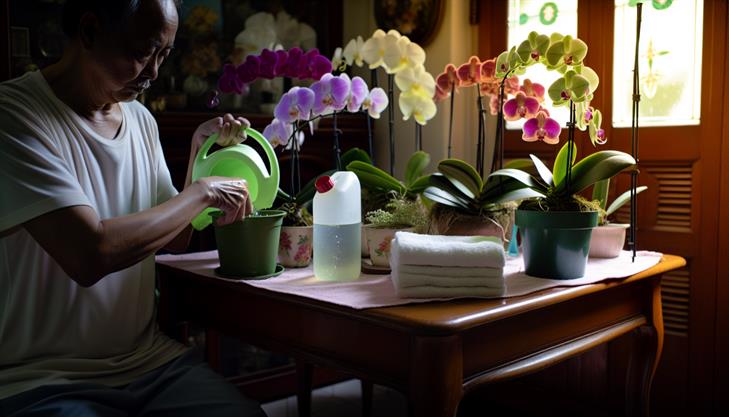
Essential Steps for Watering and Feeding Indoor Orchids
Caring for an orchid plant indoors can seem daunting, but with the right approach, these stunning flowers can thrive beautifully inside your home. Here’s a detailed guide to help you master the art of watering and feeding your indoor orchids.
1. Understanding Orchid Needs
Before diving into the specific steps, it’s essential to understand that orchids have unique needs compared to other houseplants. They originate from tropical climates and often grow on trees rather than in soil, which influences their care requirements.
2. Proper Watering Techniques
Identify the Right Frequency: The key to healthy orchids is watering them just enough, without overdoing it. Most indoor orchids need watering every 7 to 10 days. However, this can vary depending on humidity and temperature.
Method:
- Morning Routine: Water your orchids in the morning to allow adequate time for evaporation, preventing fungal diseases.
- Soak but Don’t Drown: Water the orchid thoroughly until it drains from the pot’s bottom, ensuring the root system absorbs enough moisture. Always empty the saucer under the pot, as orchids dislike sitting in water.
Monitor Moisture Levels: Insert your finger approximately an inch into the potting medium. If it feels dry, it’s time to water; if moist, wait a few more days.
3. Optimal Fertilization
Orchids require specific nutrients to support their growth and blooming cycle. Using a balanced fertilizer can help promote vibrant blooms.
Feeding Steps:
- Choose the Right Fertilizer: A balanced, water-soluble orchid fertilizer, such as 20-20-20, is ideal. Make sure it contains essential macronutrients and micronutrients.
- Dilution is Key: Mix the fertilizer at half the recommended strength mentioned on the package to avoid over-fertilization.
- Schedule: Feed your orchids every two weeks during the growing season (spring through summer) and once a month during the rest period (fall and winter).
4. Potting Medium and Repotting
Orchids are often potted in bark, sphagnum moss, or a special orchid mix. Repotting every 1-2 years ensures they remain healthy.
Repotting Steps:
- Gently remove the orchid from its pot, shaking off old medium.
- Trim any rotten or dead roots with sterilized scissors.
- Place the plant in a larger pot (if needed), and fill it with fresh orchid medium to allow adequate air circulation and drainage.
5. Light and Temperature Requirements
Orchids thrive in bright, indirect sunlight. A north or east-facing window is usually ideal.
Consider:
- Temperature: Maintain a temperature range of 65-75°F (18-24°C) during the day, slightly cooler at night.
- Light Adjustments: If leaves appear yellow, the plant may be getting too much light; dark green leaves often indicate insufficient light.
6. Humidity Control
Orchids require a humidity level of around 50-70%. You can increase humidity by misting the leaves, placing the plant on a humidity tray, or using a humidifier.
7. Common Issues and Troubleshooting
- Overwatering: Yellowing leaves or mushy roots indicate overwatering. Allow your orchid to dry out before resuming a more cautious watering schedule.
- Pests: Watch for common pests like mealybugs or aphids. A mild soap solution can often remedy minor infestations.
- Lack of Blooms: If your orchid isn’t flowering, try adjusting light exposure or check if fertilization is adequate.
By following these comprehensive steps, caring for an orchid plant indoors becomes significantly more manageable. Consistent attention to watering, feeding, and environmental conditions will help your orchids flourish in style, adding their exotic charm to your indoor spaces.
Lighting and Temperature: Creating the Perfect Environment
Caring for an orchid plant indoors can be a rewarding experience, offering vibrant blooms and a touch of elegance to your home. Ensuring the right lighting and temperature is crucial to creating the perfect environment for your orchid to thrive. Here’s a comprehensive guide on how to care for an orchid plant indoors:
Understanding Lighting Needs
Orchids require a delicate balance of light—not too much, nor too little. Ideally, place your orchid in a room with bright, indirect sunlight. A north or east-facing window works well, as these provide gentle sunlight that won’t scorch the leaves. If your space lacks natural light, consider using fluorescent lights, positioning them approximately 12 inches above the plant. Monitor the leaves; if they are dark green, your orchid needs more light, while yellow leaves may indicate too much sun.
Maintaining the Right Temperature
Orchids naturally prefer temperatures that fluctuate between day and night. Aim to keep the daytime temperature between 65°F and 75°F (18°C to 24°C), while allowing it to drop to 60°F (15°C) at night to mimic their natural habitat. Extreme temperatures can stress the plant, so avoid drafts and heat sources like radiators or air conditioners.
Providing Adequate Humidity
Orchids thrive in humidity levels of about 50% to 70%. If your home is dry, especially during winter months, consider placing a humidity tray beneath the plant. Simply fill a shallow tray with water and pebbles, and place the orchid pot on top, ensuring it doesn’t sit directly in water. Alternatively, a humidifier can effectively raise humidity in the room.
Watering Wisely
The key to watering orchids is consistency without over-saturation. Water your orchid once a week with lukewarm water, allowing it to drain completely. Water more frequently if your home is particularly dry, ensuring the potting medium remains moist but not wet. For convenience, placing the pot in the sink is a practical method for watering.
Choosing the Right Potting Medium
Unlike typical houseplants, orchids thrive in special potting mediums, such as bark mix or sphagnum moss, which allow proper air circulation around the roots. Repot your orchid every one to two years, or when the medium decomposes, to promote healthy growth. Select a pot with drainage holes to prevent root rot.
Fertilization Routine
Feed your orchid with a balanced orchid fertilizer once a month during the growing season (spring and summer). Reduce fertilizing during the rest phase in fall and winter. Always dilute the fertilizer to half the recommended strength to avoid overfeeding.
Identifying and Solving Common Issues
Watch for signs of distress such as wilting leaves or lack of blooms. Wilting can be a sign of inadequate watering or root rot, while lack of blooms often indicates insufficient lighting or fluctuating temperatures. Adjust conditions as needed based on these signs.
Creating the perfect environment for your orchid plant indoors involves paying close attention to lighting, temperature, and overall care. By following these guidelines, you’ll ensure a healthy, vibrant orchid that blooms beautifully within your home. Whether you’re a beginner or an experienced plant enthusiast, these tips will guide you in mastering how to care for an orchid plant indoors.
Pruning and Repotting: Maintaining Orchid Health
Caring for an orchid plant indoors involves understanding its unique needs and providing the right environment to ensure it thrives. Orchids are known for their beauty and elegance, but they can sometimes appear daunting for beginners. However, with the right information, maintaining orchids indoors can be straightforward and rewarding.
Understanding Orchid Basics
Different orchid species might have varying requirements, but the most popular indoor orchid, the Phalaenopsis, generally serves as a good reference for indoor care.
1. Optimal Lighting Conditions:
Orchids need bright, indirect sunlight. Direct sun can scorch their leaves, so placing your orchid plant near an east or west-facing window is ideal. If natural light is limited, consider using a fluorescent grow light to supplement.
2. Temperature and Humidity:
Orchids thrive in temperatures ranging from 60°F (15°C) at night to 75°F (24°C) during the day. Maintaining humidity levels around 50-70% is vital. If your indoor environment is dry, a humidity tray filled with water and pebbles beneath the plant can help, or use a room humidifier.
3. Watering Techniques:
Understanding how to water an orchid is crucial. Orchids prefer being watered thoroughly but infrequently. Water the orchid once a week, ensuring that the potting mix is dry to the touch between waterings. Use tepid water and allow it to drain completely to prevent root rot.
4. Pruning and Repotting:
Regular pruning helps maintain orchid health. Once blooms fade, cut the flower spike about an inch above the node closest to the plant. Repotting orchids is generally necessary every 1-2 years or when the potting medium breaks down. Select a pot with drainage holes and specialized orchid potting mix, which usually contains bark, perlite, and charcoal to provide adequate aeration.
5. Fertilization:
Feed your orchid every 2 weeks with a balanced orchid fertilizer during the growing season (spring and summer) and reduce to once a month in the fall and winter. Always follow the fertilizer’s instructions to avoid overfeeding.
Common Issues and Solutions:
- Yellowing Leaves: Often a sign of overwatering or too much direct sunlight. Adjust your care regimen accordingly.
- Leaf Spots or Mold: Poor air circulation or high humidity may cause mold. Ensure good ventilation and check that the plant is not sitting in water.
- Bud Blast: This occurs due to abrupt environmental changes. Ensure consistent temperature and humidity to stabilize your plant.
Additional Care Tips:
- Clean the leaves occasionally with a damp cloth to remove dust, promoting better photosynthesis.
- Rotate the plant occasionally to ensure even growth.
- Be patient; orchids can experience periods of dormancy where they might not bloom for a few months.
Learning how to care for an orchid plant indoors is a journey of understanding and responding to its needs. With attention and care, your orchid will reward you with beautiful blooms and a touch of elegance in your home.

Troubleshooting Common Indoor Orchid Problems
Caring for an orchid plant indoors can be a rewarding endeavor, adding both beauty and a touch of nature to your home. Here’s a comprehensive guide to help you nurture your indoor orchid, ensuring it stays healthy and blooms beautifully.
1. Choosing the Right Spot
The first step in caring for an orchid plant indoors is selecting the ideal location. Orchids thrive in bright, indirect light. Place your orchid near an east or west-facing window. If natural light is limited, consider supplementing with fluorescent lights, placing them about 12 inches above the plant.
2. Potting and Re-potting
Choosing the right potting mix is crucial for orchid care. Orchids prefer a well-draining medium such as bark, sphagnum moss, or a blend designed specifically for orchids. Re-pot your orchid every 1-2 years, especially if you notice the medium breaking down, roots growing out excessively, or the plant becoming top-heavy.
3. Watering Routine
Orchids require careful watering; overwatering is one of the most common issues. Water your orchid every 7-10 days, allowing the potting mix to dry out between waterings. Use tepid water, and make sure excess water drains completely to prevent root rot.
4. Humidity and Air Circulation
Orchids enjoy a humid environment. Aim for humidity levels between 40-60%. You can increase humidity by placing a tray of water with pebbles beneath the orchid or using a room humidifier. Good air circulation is also vital—ensure there’s gentle airflow around the plant to prevent fungal infections.
5. Feeding Schedule
Feed your orchid plant with a balanced orchid fertilizer every two weeks during the growing season (spring and summer), and once a month during the dormant phase (fall and winter). Always follow the instructions on the fertilizer to avoid overfeeding.
6. Temperature Preferences
Orchids typically prefer temperatures between 60°F at night and 75-85°F during the day. Keeping your plant away from drafts, vents, or sudden temperature changes will help maintain these conditions.
Troubleshooting Common Problems
-
Yellowing Leaves: This could indicate overwatering. Check the root condition and ensure your plant is drying out adequately between waterings.
-
No Blooms: If your orchid isn’t blooming, it might need more light or a temperature drop at night to simulate its natural environment.
-
Pest Infestations: Common pests include mealybugs and spider mites. Remove them by wiping leaves with a mixture of water and mild soap, or use a specialized orchid insecticide.
Extra Tips for Success
Regularly clean the leaves with water to prevent dust accumulation and enhance photosynthesis. Also, rotate your plant occasionally for uniform growth. Monitoring your orchid daily will help you catch any issues early and adjust care as needed.
By following these guidelines, you can ensure your orchid plant thrives indoors, adding elegance and a vibrant display of colors to your living space.
In conclusion, caring for an orchid plant indoors requires attention to several key factors, including the right amount of light, consistent watering practices, appropriate humidity levels, and proper fertilization. Understanding the specific needs of your orchid variety can greatly enhance its growth and bloom potential. Ensure that your orchid is placed in an east-facing window or under a grow light to provide it with sufficient indirect light. Be mindful of not overwatering by adhering to a routine that allows the potting medium to dry out slightly between waterings. Increasing humidity with a humidifier or a humidity tray can also create a more favorable environment for your orchid to thrive. Regularly fertilizing with a balanced orchid-specific fertilizer will supply essential nutrients for robust growth.
Remember that orchids are resilient plants that can be incredibly rewarding to grow. As you apply these tips, take note of how your plant responds, and adjust your care routine as needed. By cultivating a deeper understanding of your orchid’s preferences, you can enjoy the elegance and beauty of these remarkable flowers indoors.
As a final tip, consider rotating your orchid every few weeks. This ensures even light exposure, promoting balanced growth and preventing your plant from leaning towards one side. Embrace the learning process, and with patience and dedication, your indoor orchid can flourish, bringing a touch of tropical allure to your home.