Are you enchanted by the lush, iconic Swiss cheese-like leaves of the Monstera Deliciosa, and wish you had more of these striking plants gracing your home? Whether you’re a budding plant enthusiast or a seasoned green thumb, propagating your own Monstera Deliciosa can be a deeply rewarding experience, bringing you closer to nature while expanding your indoor jungle effortlessly. But where do you begin in turning one leafy wonder into many? This guide is your ticket to mastering the art of propagation. Understanding how to successfully propagate Monstera Deliciosa not only allows you to cultivate your collection but also ensures that these captivating plants thrive under your care. Dive in to discover tried-and-true techniques, insider tips, and everything you need to know to embark on this exciting horticultural journey. Your home won’t just be greener; it will come alive with flourishing beauty!
Understanding Monstera Deliciosa and Its Propagation Methods
Monstera deliciosa, commonly known as the Swiss cheese plant, is a favorite among plant enthusiasts for its unique, fenestrated leaves. Understanding how to propagate Monstera deliciosa can help you grow your collection or share this stunning plant with friends. Propagation not only allows for the enjoyment of more houseplants but also ensures you have backup specimens should the original plant face any challenges. Here’s a step-by-step guide on how to successfully propagate Monstera deliciosa.
Propagation Methods Overview
Monstera deliciosa can primarily be propagated using stem cuttings, which is the most common method. Other techniques, like air layering, can also be effective. This guide will focus on the stem cutting approach, as it’s straightforward and convenient for most plant enthusiasts.
Step-by-Step Propagation Instructions
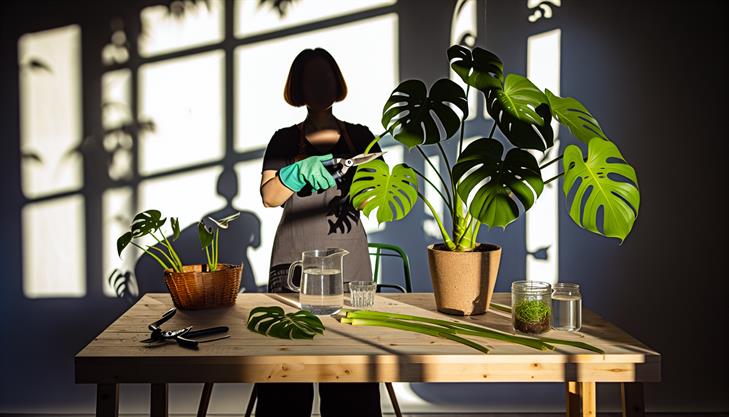
1. Selecting and Cutting the Stem
- Choose the Right Stem: Look for a healthy, mature stem with at least one node. A node is the knobby part of the stem from which roots and leaves grow. Ideally, the stem should have at least one leaf to support photosynthesis as the cutting establishes itself.
- Tools Needed: Use a clean, sharp pair of scissors or pruning shears to minimize damage to the plant and reduce the risk of infection.
- Make the Cut: Cut just below the node, ensuring that the cut portion has at least one node.
2. Preparing the Cutting
- Leaf Preparation: If your cutting has more than two leaves, remove extras, keeping only one or two. This helps the plant focus its energy on developing roots.
- Callus Formation: Allow the cutting to air dry for a few hours. This will help the cut end form a callus, reducing the chance of rot when you place it in water or soil.
3. Rooting the Cutting
- Water Propagation: Place the cutting in a clean jar filled with water, ensuring the node is submerged. Place the jar in a location with bright, indirect light.
- Soil Propagation: Alternatively, plant the cutting directly into a pot filled with a moist, well-draining potting mix. Ensure the node is buried beneath the soil surface.
4. Caring for the Cutting
- Environment: Maintain a warm and humid environment for your cutting. You can cover the pot with a plastic bag to retain humidity, making sure the bag doesn’t touch the leaves.
- Light: Provide bright, indirect sunlight. Direct sunlight can scorch the leaves and impede root development.
- Water: If propagating in water, change it every few days to keep it fresh and oxygen-rich. For soil propagation, keep the soil consistently moist but not waterlogged.
Common Issues and Tips
- Rot: Be cautious of rot, especially for cuttings propagated in water. If the water becomes murky or the cutting shows signs of rotting, like losing its robustness, replace the water and trim off any decaying parts.
- Slow Root Growth: Root establishment can take a few weeks to a couple of months. Patience is key. If roots aren’t forming, ensure the cutting receives adequate indirect light and warmth.
- Transition to Soil: Once roots are a few inches long in water propagation, you can transplant the cutting into soil. This transition should be done carefully to avoid damaging the new roots.
By understanding and applying these propagation techniques, you can successfully grow new Monstera deliciosa plants, adding to your indoor jungle. Always remember that each stem cutting is unique, and patience often yields the best results. With proper care and attention, your propagated Monstera will thrive and become a stunning centerpiece in your home.
Preparing Your Tools and Environment for Successful Propagation
Propagating Monstera deliciosa, commonly known as the Swiss Cheese Plant, is one of the most effective ways to expand your indoor plant collection. This plant is not only admired for its beautiful foliage but also for its relatively straightforward propagation process. Below is a comprehensive guide to help you prepare your tools and environment for a successful propagation journey.
Gather the Essential Tools and Materials
To kickstart the propagation of Monstera deliciosa, ensure you have the following ready:
- Healthy Monstera Plant: Start by selecting a healthy plant that shows no signs of disease or pest infestation.
- Sharp Pruning Shears or Scissors: These are crucial for making clean cuts, preventing damage to the plant tissues.
- Rooting Hormone (Optional): While not necessary, using a rooting hormone can encourage faster root development.
- Pot or Container with Drainage Holes: Choose a suitable container to accommodate the cutting as it grows.
- Well-Draining Potting Mix: A mix that includes perlite or orchid bark works well to replicate the plant’s natural environment.
- Water and a Small Jar or Glass: If you opt for water propagation, a clear jar will help you monitor root growth.
Step-by-Step Instructions for Propagating Monstera Deliciosa
Step 1: Select the Cutting
- Identify the Perfect Stem: Look for a stem with at least one aerial root (brown nodule) and a couple of healthy leaves. This ensures the cutting has enough resources to develop roots effectively.
Step 2: Make the Cut
- Cut Below the Node: Using clean, sharp pruning shears, make a cut about 1/4 inch below the node. Cutting below a node is crucial as this is where new roots will typically emerge.
Step 3: Choose Your Propagation Method
Water Propagation:
- Place in Water: Submerge the cut end, ensuring the node and any aerial roots are underwater. Avoid submerging leaves, as this can lead to rot.
- Monitor and Change the Water: Change the water every 1-2 days to keep it fresh and oxygenated. Roots should start to form in 2-4 weeks.
Soil Propagation:
- Prepare the Pot: Fill your pot with the well-draining potting mix.
- Plant the Cutting: Insert the cut end about 2 inches into the soil, ensuring the node is buried.
- Maintain Moisture: Keep the soil consistently moist but not waterlogged to encourage root growth.
Common Issues and Tips
- Avoid Overwatering: Both water and soil propagations require balance. Ensure that the cuttings in water are not in stagnant water, and soil cuttings are not sitting in overly wet soil.
- Optimal Temperature and Humidity: Monstera deliciosas thrive in environments with high humidity and temperatures ranging from 65°F to 85°F (18°C to 29°C). You might consider using a humidifier or covering the pot with a plastic bag to boost humidity.
- Patience is Key: Root growth might vary. Some cuttings will show roots quickly, while others may take more time.
Additional Advice
To maximize the success of your propagation:
- Propagate During Spring or Summer: These seasons are when the plant is in its active growing phase and most likely to root successfully.
- Monitor for Pests: Keep an eye out for any pest infestation, as cuttings can be more vulnerable during the rooting stage.
By following these detailed steps, you should see your Monstera deliciosa cutting flourish, setting you up for successful propagation results. Whether you choose water or soil propagation, patience and proper care will soon reward you with a thriving new plant.
Step-by-Step Guide: Propagating Monstera Deliciosa from Cuttings
Propagating Monstera Deliciosa from cuttings is a rewarding process that allows plant enthusiasts to expand their collection or share their love of plants with friends. This process is relatively simple and requires minimal materials, making it accessible for both novice and experienced gardeners alike. Follow this guide to successfully propagate your Monstera Deliciosa and enhance your indoor jungle.
Step 1: Gather Your Materials
Before you begin, ensure you have the necessary materials on hand:
- Sharp, clean pruning shears or scissors
- A glass or jar for water propagation, or a small pot with well-draining soil if using soil propagation
- A clean cutting board or surface
- Rooting hormone (optional, but can enhance success)
Step 2: Select the Right Stem Cutting
Choosing the correct stem is crucial when learning how to propagate Monstera Deliciosa. Look for a healthy stem with at least two or more leaves and a few visible aerial roots. Choose a stem that is about 6-12 inches long to ensure it has sufficient energy to grow.
Step 3: Make the Cut
Using your clean, sharp shears, make a clean cut just below a node. A node is the knobby part on the stem where leaves and roots grow. Ensuring a clean cut prevents disease and promotes healthy root growth.
Step 4: Prepare the Cutting
If desired, dip the cut end of the stem in rooting hormone. This is particularly beneficial if you’re using soil propagation, as it can speed up the rooting process.
Step 5: Begin Propagation
Water Propagation:
- Place the cutting in a clear glass of water, ensuring the nodes are submerged while the leaves remain above water to prevent rot.
- Change the water every few days to keep it fresh and oxygenated.
- Place the glass in a warm, bright area out of direct sunlight to promote growth.
Soil Propagation:
- Plant the cutting in moist, well-draining soil, with the nodes buried and leaves above the surface.
- Water the soil lightly to keep it just damp, avoiding oversaturation.
- Position the pot in a well-lit area without direct sun exposure.
Step 6: Monitor the Cutting
It can take several weeks for roots to develop, so patience is key. Check weekly for root growth in water or any new leaf sprouts if planted in soil.
Step 7: Transplant
Once the roots reach about 2-3 inches long (in water) or new growth is evident (in soil), it’s time to move the Monstera to a larger pot with well-draining potting mix. Ensure the pot has drainage holes to avoid waterlogging the roots.
Troubleshooting Common Issues
- Yellowing Leaves: This can indicate overwatering in both water and soil propagation. Adjust water levels accordingly.
- Slow Growth: Ensure your cutting is receiving enough indirect light. Consider relocating to a brighter area.
- Root Rot: If roots appear mushy, trim away any rot, and replace the water or amend the soil with better drainage.
Bonus Tips for Success
- Be patient and avoid overhandling the cutting during the rooting phase.
- Humidity can improve rooting success, so consider placing the cutting near a humidifier or using a humidity dome.
By following these steps on how to propagate Monstera Deliciosa, you’ll soon have a thriving new plant ready to flourish in your home or to share with others. Remember, propagation takes time and care, but watching a cutting grow into a new plant is immensely gratifying.
Tips for Nurturing and Growing Healthy Monstera Cuttings
Propagating Monstera deliciosa can be a rewarding experience, transforming a single plant into many. Here’s a step-by-step guide on how to propagate Monstera deliciosa successfully:
Step 1: Gather Your Supplies
Before you start, ensure you have the following items: a sharp, clean pair of scissors or pruning shears, a container or pot, fresh potting soil or water for rooting, and optional rooting hormone.
Step 2: Choose the Right Cutting
Select a healthy stem with a node for your Monstera cutting. The node is crucial as this is where roots will develop. Ideally, choose a stem with a mature leaf and at least one visible node, ensuring it is disease-free and vibrant.
Step 3: Make the Cutting
Make a clean cut approximately a quarter-inch below the node. If you’re cutting a larger stem section, make sure each segment has one or two nodes. Clean cuts can help reduce the risk of disease and rot.
Step 4: Rooting Method Choice
There are two popular methods to root Monstera cuttings: water propagation and soil propagation.
-
Water Propagation: Place the cutting in a jar or glass of water, submerging the node while keeping the leaves above water. Change the water every week to prevent bacteria buildup. This method allows you to visually monitor root development.
-
Soil Propagation: Plant the cutting in a small pot with well-draining potting soil. For best results, moisten the soil first. To enhance rooting, you can dip the cut end in rooting hormone before planting it.
Step 5: Optimal Environment
Position your cutting in a location with indirect bright light and maintain a warm temperature. High humidity promotes root growth; consider placing a plastic bag loosely over the plant to create a mini greenhouse effect.
Step 6: Monitor Progress and Watering
Whether in water or soil, monitor your cutting for root growth, which typically starts within a few weeks. In soil, ensure the substrate remains moist, not soggy. Overwatering can lead to rot, so always check the top inch of soil for dryness before watering.
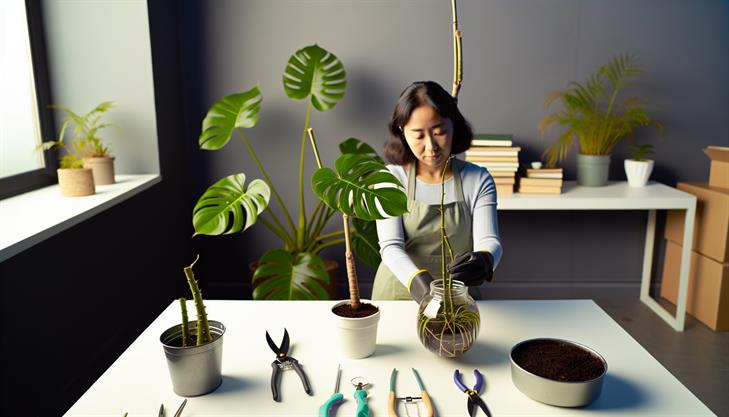
Step 7: Transplanting (If Started in Water)
Once roots are at least a couple of inches long, the water-propagated cutting can be transferred to soil. Choose a pot slightly larger than the root mass, using a high-quality potting mix.
Common Issues and Solutions
- Yellowing Leaves: This can indicate overwatering or insufficient light. Adjust accordingly by allowing the soil to dry slightly or relocating the plant.
- Root Rot in Soil: Ensure the soil is well-draining and reduce frequency of watering.
- Stagnant Water in Water Propagation: Regularly change the water to ensure oxygenation and reduce pathogens.
By following these steps, you’ll have a lush Monstera deliciosa thriving in your home, potentially ready for more propagation! Remember that patience is key, as root development varies based on environmental conditions. Happy growing!

Troubleshooting Common Problems in Monstera Propagation
Propagating Monstera deliciosa is a rewarding endeavor for plant enthusiasts looking to expand their indoor jungle. Whether you’re an experienced gardener or a beginner, following the correct propagation process can help you successfully create new plants. Here’s a comprehensive guide to help you propagate Monstera deliciosa with ease.
Selecting the Right Cutting
1. Choose a Healthy Plant: Start with a healthy Monstera, as the health of the parent plant significantly affects the success of propagation. Look for plants with lush, green leaves free of pests or disease.
2. Identify a Node: Find a suitable stem with a node — the area from which roots will grow. The node is a small bump or ring on the stem, often located near a leaf or aerial root.
3. Make the Cut: Using a clean, sharp knife or scissors, cut the stem just below the node. Aim for a cutting that is 4-6 inches long with at least two leaves.
Preparing the Cutting
4. Remove Lower Leaves: Strip away the leaves closest to the cut end, leaving one or two leaves at the top. This reduces water loss and directs energy into root development.
5. Optional Step – Use Rooting Hormone: Although not mandatory, dipping the cut end in rooting hormone can accelerate root growth.
Choosing a Propagation Method
Water Propagation
6. Place in Water: Submerge the cut end and node in a jar of water. Ensure no leaves are underwater to prevent rot.
7. Change Water Regularly: Replace the water every 5-7 days to keep it fresh and oxygenated.
8. Wait for Roots to Develop: Within 2-4 weeks, roots should start to appear. Wait until they are at least 2 inches long before potting.
Soil Propagation
9. Prepare a Pot: Fill a pot with well-draining soil, such as a mixture of potting soil and perlite or orchid bark.
10. Plant the Cutting: Insert the node into the soil and water it lightly. The soil should be moist but never soggy.
11. Provide Proper Conditions: Position the pot in a warm, bright area with indirect sunlight. Maintain high humidity by misting or using a humidity tray.
Troubleshooting Common Issues
-
Yellow Leaves: Often caused by overwatering or poor drainage. Ensure the pot and soil allow for proper water flow.
-
No Root Growth: May result from insufficient light or too low temperatures. Adjust the environment and try using rooting hormone for added boost.
-
Cutting Rotting in Water: Ensure only the stem is submerged and change the water frequently to prevent bacterial growth.
Additional Tips for Success
-
Provide Humidity: Monstera thrives in humid environments. Mist cuttings regularly or place them near a humidifier.
-
Patience is Key: Be patient as the cutting takes time to establish. Consistent care will yield the best results.
-
Consider Aerial Roots: If your cutting has aerial roots, include them in your propagation process as they can enhance root development.
By understanding these steps and considerations, propagating Monstera deliciosa can be both fun and effective. Remember, each plant is unique, so adapt these guidelines to fit your specific environment and watch your new Monstera thrive!
In conclusion, propagating Monstera deliciosa can be a rewarding and enjoyable process, allowing plant enthusiasts to expand their collection with minimal effort. By following the key steps of selecting a healthy cutting with a node, preparing the cutting by trimming excess leaves, and providing proper care during rooting, you set the stage for a successful propagation. Remember to acclimate your cuttings to their new environment gradually and keep a close eye on their water and light requirements.
Now that you are equipped with the knowledge to propagate your Monstera deliciosa, it’s time to embrace this practical aspect of plant care and experience the growth of your green family firsthand. Don’t hesitate to experiment and adjust your methods based on the unique needs of your plants, as every Monstera can respond differently.
As a final tip, consider adding a monthly schedule to inspect root development and overall plant health during the propagation phase. This proactive approach ensures any issues are addressed promptly, supporting the overall success of your propagation efforts. Happy planting!