Introducing the fiddle leaf fig—an icon of modern houseplant collections with its dramatically large, veined leaves and statuesque presence. If you’ve ever been captivated by its striking beauty and wondered how to expand your indoor jungle without breaking the bank, you’ve landed in the right spot. Propagating a fiddle leaf fig not only elevates your plant care skills, but also allows you to multiply these beloved greenery masterpieces from the comfort of your home. Whether you’re a seasoned plant enthusiast or a curious beginner, understanding the propagation process opens up a world of possibilities—transforming you into a confident plant parent with a lush, thriving indoor garden. In this comprehensive guide, we’ll walk you through the step-by-step techniques of propagating fiddle leaf figs, ensuring you gain the knowledge and confidence to grow your very own verdant masterpiece. Stay with us, and you might find that the journey is as rewarding as the destination.
Preparing Your Fiddle Leaf Fig for Propagation
Propagating a fiddle leaf fig is a rewarding way to expand your collection of these beautiful and trendy houseplants. By following some simple steps, you can successfully propagate your fiddle leaf fig and enjoy new plants in no time. This guide will take you through the entire process, offering practical advice and tips to ensure success.
Step 1: Select a Healthy Parent Plant
The first step in propagating a fiddle leaf fig is selecting a healthy and robust parent plant. Look for a plant with strong, vibrant leaves and an overall good health condition. Avoid using a plant that appears to be stressed or has any signs of disease, as the success rate of propagation may be lower.
Step 2: Choose Your Cutting
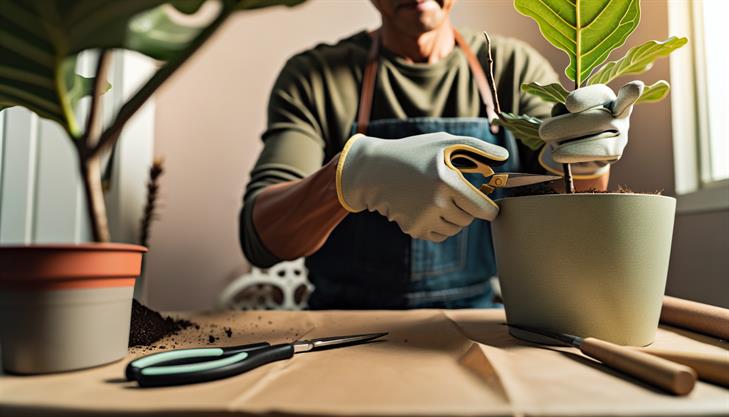
Once you’ve identified a healthy parent plant, choose a stem to cut. A suitable stem will typically include at least one leaf and an inch or more of stem beneath it. Ideally, select a stem that is younger and partially matured—about 6 inches long. Use clean, sharp pruning shears or scissors to make a precise cut, angled slightly to increase the surface area for rooting.
Step 3: Prepare the Cutting for Rooting
Remove the lower leaves of the cutting, leaving one or two leaves at the top. This minimizes water loss during the rooting process and encourages rooting because the plant can focus more energy on developing roots rather than sustaining leaves. Leave the cut end to dry for about an hour—this reduces the risk of rot in water or soil.
Step 4: Rooting the Cutting
You have two main options for rooting: water or soil. Both methods are effective, so your choice depends on preference.
-
Water Propagation: Place the cut end of the stem in a clean glass of water. Make sure only the stem is submerged while leaves remain above water. Place the glass in a warm spot that receives bright but indirect sunlight. Change the water weekly to prevent bacterial growth.
-
Soil Propagation: Fill a pot with well-draining potting mix, ideally one that includes perlite or coarse sand, to encourage root growth. Dip the cut end of the stem in rooting hormone to speed up the rooting process, and plant it an inch deep into the soil. Water the soil lightly. It’s beneficial to cover the pot with a plastic bag or a propagation dome to create a mini greenhouse effect that maintains high humidity.
Step 5: Monitoring and Care
Regardless of the method, regularly monitor your cutting for signs of root development. If you opted for water propagation, roots often start appearing within 2 to 4 weeks. For soil propagation, gently tug the cutting after a few weeks to check for resistance, which indicates root growth.
Common Issues and Tips
- Rotting: If cuttings rot, consider using sterilized tools and ensuring cuts are allowed to callous over before placing them in water or soil.
- Lack of Root Growth: Ensure that the plant is getting sufficient indirect sunlight and warmth; fiddle leaf figs thrive in temperatures between 65-75°F (18-24°C).
- Maintaining Humidity: Consider misting your cuttings or maintaining a consistent humidity level if the air is dry, especially with soil propagation.
Final Steps
Once your cuttings have developed a robust root system, typically 2 inches in length, transplant them into individual pots with a well-draining potting mix. Water them gently and continue to provide bright, indirect light. Over the following weeks, watch as new leaves begin to unfurl, indicating that you’ve successfully propagated a fiddle leaf fig!
By carefully following these steps on how to propagate fiddle leaf figs, you can enjoy the satisfaction of growing new plants, enhancing your indoor greenery, and even sharing plants with friends and family.
The Best Methods for Propagating Fiddle Leaf Fig
Propagating a fiddle leaf fig (Ficus lyrata) can be an exciting and rewarding process for plant enthusiasts. Whether you’re looking to expand your indoor garden or share this popular houseplant with friends, understanding the best methods can help ensure success.
1. Choose the Right Time and Tools:
The best time to propagate a fiddle leaf fig is during its active growing season in the spring or summer. You’ll need a healthy parent plant, clean pruning shears, a glass or jar for water propagation, and pots with well-draining soil for planting cuttings.
2. Select the Ideal Cutting:
Choose a branch that is healthy and at least 6-12 inches long with 2-3 leaves. Ensure the cutting is free from disease or pests, as this will increase the chances of successful root development.
3. Make the Cut:
Use sterilized pruning shears to make a clean cut just below a node, where the leaf joins the stem. This area typically supports root growth best. Cut at a 45-degree angle to create a larger rooting surface.
4. Water Propagation Method:
Fill a jar with room temperature water and place the cutting inside, ensuring the cut end is submerged, but the leaves are above the water. Position the jar in a spot with bright, indirect sunlight, as direct sunlight can harm the cutting.
5. Monitor and Change Water:
Change the water every 5-7 days to prevent bacterial growth and decay. Within 3-4 weeks, you should notice roots forming. Wait until the roots reach a few inches in length before proceeding.
6. Soil Propagation Method:
Prepare a pot with well-draining soil, ideally a mix designed for houseplants with some perlite for drainage. Dip the cut end of the stem into rooting hormone to encourage root growth (optional but recommended for faster rooting).
Plant the cutting in the soil, firming it gently to eliminate air pockets. Water the soil lightly to keep it moist but not waterlogged.
7. Acclimation and Care:
Whichever method you choose, once the cuttings have developed roots, gradually acclimate them to your usual indoor conditions. Transplant the rooted cutting into a larger pot when necessary, ensuring ample space for growth.
Common Issues and Tips:
- Leaf Droop: Excess water may cause leaf droop; allow soil to dry slightly between waterings.
- Root Rot: Avoid overwatering, which leads to root rot, particularly in soil propagation.
- Patience: Rooting can take several weeks; patience and consistent care are key.
- Humidity: Enhance root growth by maintaining higher humidity around cuttings. A plastic cover or regular misting can help.
By following these steps, you’ll be well on your way to successfully propagating your fiddle leaf fig, contributing to your indoor jungle or sharing your love of plants with others.

Essential Tools for Successful Fiddle Leaf Fig Propagation
Propagating a fiddle leaf fig can be a rewarding way to expand your plant collection. Whether you’re a seasoned gardener or a beginner, understanding how to propagate fiddle leaf fig plants helps ensure your efforts result in healthy new growth. Here is a detailed guide to help you through the process smoothly:
Step-by-Step Guide to Propagate Fiddle Leaf Fig
1. Choosing the Right Time
For best results, attempt propagation during the growing season, typically spring or early summer. This is when the plant’s natural growth processes are most active, increasing the likelihood of successful root development.
2. Selecting a Healthy Leaf or Stem
Identify a healthy leaf or stem with at least two nodes (points where leaves attach) and ensure it’s free from pests or diseases. Using sharp, sterilized pruning shears or scissors, make a clean cut just below a node.
3. Preparing Your Cutting
Once you’ve cut a section of stem, remove any leaves from the bottom node to prevent rot. If you’re using a leaf cutting, ensure it includes a small portion of the stem. Allow the cutting to dry and callous over for a few hours; this reduces the risk of rot and encourages successful rooting.
4. Rooting in Water
Fill a clean jar with water and place your cutting inside, making sure that the nodes are submerged but the leaves remain above the waterline. Position the jar in a warm, bright spot out of direct sunlight.
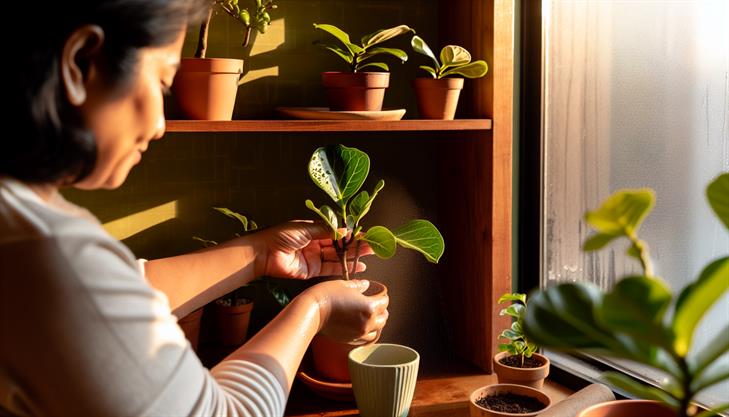
5. Transferring to Soil
Once roots develop, typically within 3 to 6 weeks, your cutting is ready to be planted. Select a pot with drainage holes, and fill it with well-draining potting mix. Gently plant the rooted cutting and water it sparsely, ensuring that the soil remains damp but not soggy.
Common Issues and Tips
- Rotting Cuttings: If your cutting is rotting, it may have been submerged for too long. Ensure that only the nodes are in water and change it regularly to maintain cleanliness.
- Root Development: If roots fail to appear after several weeks, try applying a rooting hormone to enhance growth. Be patient, as some cuttings take longer than others.
Additional Advice for Success
- Consistent Environment: Place your cutting in a consistent environment. Sudden changes in temperature or humidity can stress the plant, hindering root development.
- Acclimatization: Gradually acclimate your newly potted cutting to its new environment. Start with indirect light, moving to brighter conditions slowly to prevent shock.
Propagating a fiddle leaf fig can be a gratifying process with the right tools and techniques. By following this guide on how to propagate fiddle leaf fig plants, you’ll have a greater chance of success in growing vibrant, healthy new additions to your plant family.
Caring for Your New Fiddle Leaf Fig Cuttings
Propagating your fiddle leaf fig can be a rewarding process, offering not only the satisfaction of nurturing new life but also expanding your plant collection. Here is a comprehensive guide on how to propagate fiddle leaf fig cuttings effectively.
Step-by-Step Guide to Propagating Fiddle Leaf Fig
1. Select a Healthy Parent Plant:
- Begin by choosing a mature and healthy fiddle leaf fig. Look for a plant with strong, vibrant leaves and sturdy stems. A plant in optimal health will increase the likelihood of successful propagation.
2. Gather the Right Tools:
- You’ll need a pair of sharp, clean pruning shears or scissors, a container with water, and rooting hormone (optional but beneficial for promoting root growth).
3. Take the Cuttings:
- Identify a branch with a minimum of two nodes (the spot where leaves connect to the stem). Cut a section of the stem approximately 6-12 inches long, making sure the cut is clean and angled for better water uptake.
4. Prepare the Cuttings:
- Remove the leaves from the bottom half of the cutting to prevent rot in water. You can dip the cut end into a rooting hormone to encourage root development, although this is not strictly necessary.
5. Root in Water or Soil:
- In Water: Place the cut end in a jar of room temperature water. Ensure that the nodes are submerged, as roots will develop from these points. Change the water every few days to keep it fresh and prevent bacteria build-up.
- In Soil: Alternatively, plant the cutting directly into a pot filled with a well-draining potting mix. Water the soil thoroughly, ensuring it remains moist but not waterlogged.
6. Provide Optimal Growing Conditions:
- Position the cuttings in a warm, bright environment, ideally receiving indirect sunlight. Avoid placing them in direct sunlight, which can scorch the delicate cuttings.
Monitoring and Maintenance
Humidity and Temperature:
- Fiddle leaf fig cuttings thrive in higher humidity and warmer temperatures, ideally between 65-75°F (18-24°C). To boost humidity, cover the cuttings with a clear plastic bag or use a humidity tray.
Root Development:
- Roots may start to develop in as little as 3-6 weeks. If propagating in water, watch for visible roots forming. If root rot occurs, indicated by brown mushy spots, trim the affected areas and refresh the water.
Transplanting Your New Plant:
- When roots are about 2-4 inches long, it’s time to pot your new fiddle leaf fig plant. If initially rooted in water, gently transplant it into a pot with a good quality potting mix. Maintain consistent moisture levels for the first few weeks after transplanting.
Troubleshooting Common Issues
- Yellowing Leaves: This might indicate overwatering or inadequate light. Adjust water levels or relocate to a brighter area.
- Slow Root Growth: Ensure you’re using clean tools and containers. Also, confirm that the cuttings receive sufficient indirect sunlight.
Extra Tips for Successful Propagation
- Use high-quality potting soil, rich in nutrients, for the soil propagation method.
- Sterilize your tools before cutting to prevent disease spread.
- Maintain patience; propagation can take a few months to yield a thriving young plant.
By following these detailed steps on how to propagate fiddle leaf fig cuttings, you’ll increase your chances of growing a healthy new plant that thrives and enhances your living space.
Troubleshooting Common Propagation Problems
Propagating a fiddle leaf fig can be a rewarding way to expand your plant collection or to share this popular houseplant with friends and family. By following these step-by-step instructions and understanding potential common problems, you can successfully propagate your fiddle leaf fig with ease.
Step-by-Step Guide to Propagate Fiddle Leaf Fig
-
Prepare Your Tools and Environment
- Ensure you have a clean pair of pruning shears or a sharp knife to avoid contaminating the cutting with bacteria.
- Select a healthy fiddle leaf fig plant to take cuttings from, ideally one that is mature and has a few branches or a robust set of leaves.
-
Select and Take a Cutting
- Choose a part of the branch that is at least 6 inches long with several healthy leaves.
- Make a clean cut just below a node (a node is where leaves attach to the stem). This node is crucial as it encourages root development.
-
Remove Lower Leaves
- Snip off the leaves on the bottom half of your cutting to reduce water loss and facilitate root growth.
-
Prepare the Cutting
- Some gardeners choose to dip the cut end in rooting hormone to promote faster root development, though this is optional.
- Allow the cutting to dry and heal for about an hour. This helps prevent rotting once in water or soil.
-
Choose Your Propagation Medium
- Water Method: Place the cutting in a clean jar filled with room-temperature water. Position it in a bright, indirect light location. Change the water every 1-2 weeks to keep it fresh and encourage rooting.
- Soil Method: Plant the cutting in a pot with a well-draining soil mix. Water lightly and maintain consistent humidity by covering the pot with a plastic bag or placing it in a propagation chamber.
-
Monitor Growth
- Roots typically emerge within 3-4 weeks. In water, you’ll see roots forming, while in soil, you’ll need to look for signs like new leaf growth as evidence of rooting.
Troubleshooting Common Propagation Problems
-
Rotting Cutting: If the cutting becomes mushy or discolored, it may have rotted. This typically happens due to excessive moisture or poor air circulation. Allow cuttings to callous properly before placing in water or soil, and ensure water is clean and soil is well-draining.
-
No Root Growth: If there’s no sign of root growth after a few weeks, consider the environment. Ensure the cuttings are receiving enough indirect sunlight and warmth. Using a heating mat can expedite root formation.
-
Leaf Wilting or Dropping: It’s common for some leaves to wilt initially. Focus on maintaining humidity and avoid overwatering, especially with soil propagation.
Additional Tips
- Patience is Key: Fiddle leaf figs are known for their slow growth rate. Be patient, as propagation might take several weeks to a couple of months.
- Humidity and Light: Maintain a consistent environment with high humidity, using a spray bottle if necessary, and place cuttings where they receive bright but indirect sunlight.
- Transition Slowly: Once roots are established, gradually transition your new plant into a bigger pot. Start with smaller increments to avoid shocking the plant with too much change at once.
By carefully following these steps on how to propagate a fiddle leaf fig, you increase your chances of success, ensuring that your new plants grow healthy and strong. Happy propagating!
In conclusion, propagating a fiddle leaf fig can be a rewarding endeavor that allows you to expand your collection with little cost and watch as your new plants thrive and grow. We’ve covered the essential steps, including selecting a healthy mother plant, choosing between water propagation and soil propagation, and providing the right conditions for root development. By following these steps, you can ensure a higher success rate and enjoy the satisfaction of nurturing your own plants from stem cuttings.
Now that you have the knowledge, give it a try! Whether you opt to propagate in water to watch the roots develop or in soil for a more natural growth process, remember to be patient and consistent in providing the right care for your cuttings.
As a final tip, always monitor humidity levels, as fiddle leaf figs thrive in more humid environments. Consider misting your cuttings occasionally or placing them near a humidifier to simulate their natural habitat. With dedication and a bit of patience, you’ll soon have vibrant new fiddle leaf fig plants to beautify your space. Happy propagating!