Imagine transforming a single peperomia plant into a flourishing array of greenery that breathes fresh life into your home, all without spending a dime. Not only do these charming plants bring a touch of nature indoors, but learning how to propagate them can also be an immensely satisfying and rewarding journey. With their varied textures and vibrant foliage, peperomias are a favorite among plant enthusiasts, making them an excellent candidate for propagation experiments. Whether you’re a budding plant parent or an experienced gardener looking to expand your collection, mastering the art of peperomia propagation unlocks the door to endless possibilities. This guide will walk you through each step with ease, offering tips, tricks, and insider secrets to ensure success. By the end, you’ll not only bolster your botanical know-how but also foster a deeper connection with this beloved species. Ready to grow your green thumb and home garden? Let’s dive in!
Understanding Peperomia: A Beginner’s Guide
Peperomia, a delightful choice for plant enthusiasts, not only thrives with minimal care but is also easy to propagate. Whether you’re a beginner plant parent or simply looking to expand your collection, learning how to propagate peperomia can be a rewarding experience. Here’s a step-by-step guide to help you multiply your peperomia plants successfully.
Step-by-Step Guide to Propagating Peperomia
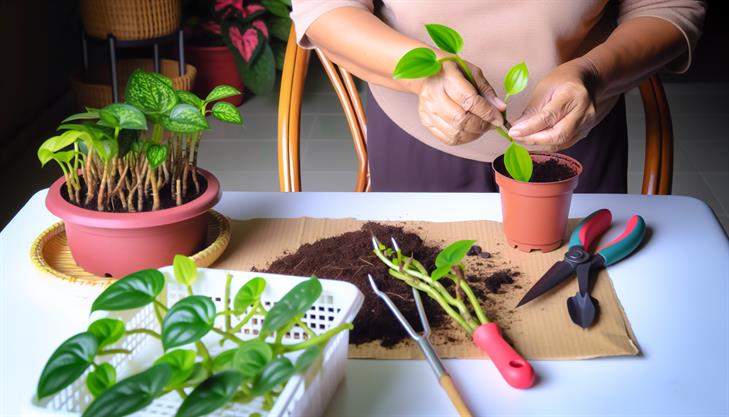
Step 1: Select Healthy Leaves or Stems
Begin by choosing a healthy peperomia plant as your propagation source. Look for vibrant, disease-free leaves or stems. If you’re using leaves for propagation, opt for mature ones that are firm and well-established.
Step 2: Choose Your Propagation Method
Peperomia can be propagated via two main methods: leaf cuttings and stem cuttings.
-
Leaf Cuttings: If using leaves, cut a healthy leaf close to the base with a sharp, sterile knife or scissors. You can use the whole leaf or cut it into sections, ensuring each section includes a vein.
-
Stem Cuttings: For stem cuttings, select a section of the stem with at least one node and a couple of leaves. Cut just below the node to enhance root development.
Step 3: Prepare the Cuttings
Let the cuttings sit for a few hours to callus over. This helps prevent rot once they’re placed in the soil or water.
Step 4: Rooting the Cuttings
You have options when it comes to rooting your cuttings:
-
Soil Propagation: Fill a small pot with a well-draining potting mix, which can be a blend specifically for succulents if available. Insert the cut end of the leaf or stem into the soil about half an inch deep. Water the soil lightly, ensuring it’s moist but not waterlogged.
-
Water Propagation: Alternatively, place your cuttings in a small container of water. Ensure the bottom of the cuttings is submerged but leaves are above water. Place it in a bright area away from direct sunlight. Remember to change the water every few days to keep it fresh.
Step 5: Provide Ideal Conditions
Peperomias prefer bright, indirect light. Ensure the cuttings are placed in a spot that meets these lighting requirements. Maintain a consistent temperature and consider using a humidity dome or clear plastic cover to increase humidity, enhancing rooting success.
Step 6: Monitor Growth
Roots should start forming in a few weeks. If propagating in water, you’ll notice roots appearing more visibly. For soil propagation, gently tug the cutting after a month to check for resistance, indicating root development.
Troubleshooting Common Issues
- Rotting Cuttings: If your cuttings rot, it may be due to excessively wet soil or contaminated equipment. Ensuring proper drainage and using clean tools can mitigate this issue.
- Poor Root Formation: Insufficient light or humidity can affect root growth. Adjusting the light exposure or increasing humidity around the cuttings can improve success.
Additional Tips
- Use rooting hormone powder to aid root development before planting the cuttings in soil.
- Patience is key as some peperomia species take longer to root than others.
- Once established, gradually acclimate your new peperomia plants to their environment before regular watering and care.
By following these steps, you should successfully multiply your peperomia plants, enjoying their lush, diverse foliage throughout your living space. Experiment with different propagation techniques to see what works best for you, and remember, the process is both educational and rewarding!
Step-by-Step Instructions to Propagate Peperomia
Propagating peperomia is a rewarding and straightforward process that allows you to multiply your plants and share their beauty with others. Here’s a detailed guide to help you successfully propagate peperomia through stem and leaf cuttings, which are the two most popular methods.
Materials Needed:
- Peperomia plant
- Sterile scissors or a sharp knife
- Small pots with drainage holes
- Potting mix (preferably a well-draining soil)
- Water
- Plastic bag or clear plastic container (optional, for humidity)
Step 1: Choose the Right Time
Propagating peperomia is best done during its active growing season, typically in the spring or early summer. However, with proper care, you can attempt propagation year-round.
Step 2: Select a Healthy Parent Plant
Ensure the parent plant is healthy and free from pests or diseases. A strong, vibrant plant increases the likelihood of successful propagation.
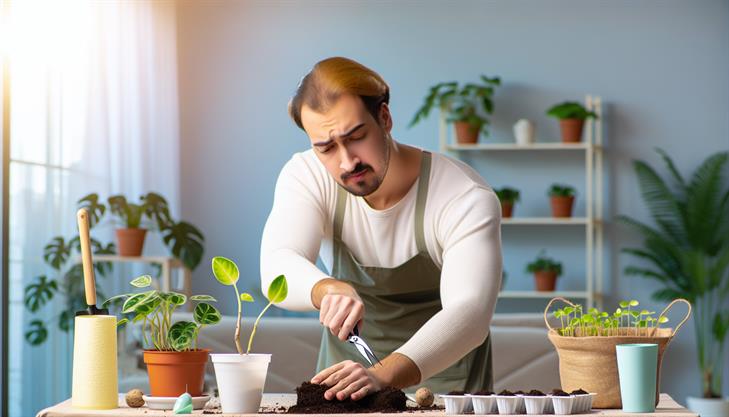
Step 3: Take Cuttings
For stem cuttings, select a stem with several healthy leaves. Using sterile scissors, cut a section about 3-5 inches long just below a node (the point where leaves attach to the stem). If you’re going for leaf cuttings, choose a mature, healthy leaf and make a clean cut close to the stem.
Step 4: Prepare the Cuttings
Remove the lower leaves from the stem cuttings, leaving 2-3 leaves at the top. For leaf cuttings, slice the leaf into sections, ensuring each piece has a part of the vein, which is essential for root development.
Step 5: Plant the Cuttings
Fill small pots with a peat-based potting mix or a blend of perlite and regular potting soil to ensure good drainage. Insert the stem cuttings into the soil about an inch deep. For leaf cuttings, gently lay the leaf sections onto the soil surface, vein side down, and press lightly.
Step 6: Provide Ideal Conditions
Water the cuttings lightly to moisten the soil but avoid overwatering. Cover the pots with a plastic bag or place them inside a clear plastic container to maintain high humidity, which helps root formation. Ensure the cuttings receive bright, indirect light and maintain a temperature of 65-75°F (18-24°C).
Step 7: Monitor Growth
Check the cuttings regularly for moisture and rewater when the soil feels dry. Remove the plastic covering periodically to allow airflow and prevent mold. Depending on conditions, roots should begin to form in 2-4 weeks. Look for new growth as a sign of successful propagation.
Common Issues and Tips:
- Overwatering: Avoid excess moisture, which can lead to root rot. Ensure the pots have proper drainage.
- Light: Insufficient light can delay rooting. Ensure your cuttings receive enough indirect sunlight.
- Humidity: If the air in your growing environment is too dry, consider using a humidity tray or misting the cuttings.
By following these step-by-step instructions, you can effectively propagate peperomia and expand your collection of these charming plants. Whether you’re using stem or leaf cuttings, patience and the right conditions are key to success. Enjoy the process and the satisfaction of nurturing new life from your peperomia plant!
Essential Tips for Optimal Growth Conditions
Propagation of peperomia plants is a rewarding endeavor, allowing plant enthusiasts to expand their gardens or share their favorite varieties with friends. To successfully propagate peperomia, follow these step-by-step instructions designed for novice and experienced gardeners alike.
Step 1: Choose Your Propagation Method
Peperomias can be propagated via stem cuttings, leaf cuttings, or division. Each method has its unique advantages:
- Stem Cuttings: This is the most common method, providing higher success rates.
- Leaf Cuttings: Suitable for certain varieties, like Peperomia rotundifolia.
- Division: Ideal for mature plants, typically done during repotting.
Step 2: Gather the Necessary Tools and Materials
Before beginning, ensure you have sharp scissors or pruning shears, a small pot with drainage holes, well-draining potting mix, and optionally, rooting hormone.
Step 3: Take Cuttings
- Stem Cuttings: Cut a healthy stem about 3-4 inches long, just below a node (where leaves meet the stem). Ensure it has at least one or two leaves.
- Leaf Cuttings: For this method, remove a healthy leaf, including its petiole (the small stalk attaching the leaf to the stem). Cut the end of the petiole at a 45-degree angle.
- Division: Carefully divide the root ball of the plant into smaller sections, ensuring each section has roots attached.
Step 4: Prepare the Cuttings
- Allow the cuttings to dry for a few hours to form a callus over the cut edges, which helps prevent rot. If using rooting hormone, dip the cut ends into the powder for better rooting success.
Step 5: Plant the Cuttings
- Fill a pot with well-draining potting mix, suitable for succulents or cacti. Moisten the soil lightly.
- For stem and leaf cuttings, gently insert the cut end into the soil, burying it about an inch deep.
- For divided sections, plant each portion in its pot, ensuring that the roots are adequately covered.
Step 6: Provide Optimal Growth Conditions
- Place the pots in a warm location with bright, indirect light. Avoid direct sunlight, which can damage young cuttings.
- Maintain a consistent moisture level in the soil, avoiding overwatering. The soil should be slightly damp but not soggy.
Step 7: Monitor Growth
Over the following weeks, monitor the cuttings for signs of growth. New leaves or roots signify successful propagation. During this period, mist the cuttings occasionally to increase humidity around them, which can help with root development.
Common Issues and Solutions
- Yellowing Leaves: This may indicate overwatering. Allow the soil to dry out slightly between waterings.
- No Root Development: Ensure the cuttings receive adequate light and warmth. Consider using a humidity dome to increase moisture in the environment.
Additional Tips
- Propagate your peperomias during spring or early summer for the best success as the plants are in their active growing phase.
- Be patient; some types of peperomia may take several weeks to show signs of growth.
By following these detailed instructions on how to propagate peperomia, you’ll ensure the health and vitality of your new plants, expanding your indoor garden with ease.
Tools and Techniques for Effective Propagation
Propagating peperomia is a rewarding process that allows plant lovers to expand their collection or share plants with friends. Recognized for their unique foliage and easy care, peperomias are popular houseplants that can be propagated effectively through various methods. Here’s a comprehensive guide on how to propagate peperomia successfully.
Methods of Peperomia Propagation
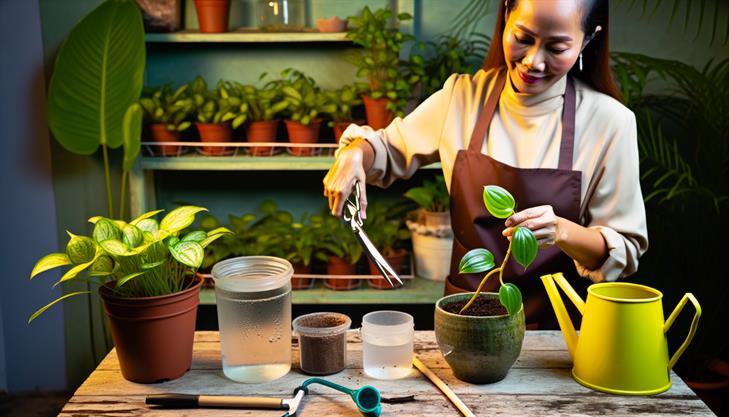
1. Leaf Cuttings
This method is one of the most popular ways to propagate peperomia. Here’s how to do it:
-
Choose a Healthy Leaf: Start by selecting a mature, healthy leaf from the parent plant. Ensure the leaf is free from pests and diseases.
-
Cut the Leaf: Cut the leaf with a sharp, sterilized knife or scissors, ideally making a clean cut along the petiole (the stalk that attaches the leaf to the stem). Leave a part of the petiole attached to the leaf.
-
Prepare the Soil: Use a well-draining potting mix. A mix specifically designed for succulents and cacti works well due to its excellent drainage properties.
-
Insert the Leaf: Plant the cut leaf into the soil, ensuring the petiole is buried adequately to keep the leaf stable. The leaf should stand upright in the soil.
-
Water Sparingly: Water the soil lightly, ensuring it stays moist but not waterlogged. Overwatering can lead to root rot.
-
Provide Suitable Conditions: Place the pot in a warm area with indirect sunlight. Maintain a humid environment by covering the pot with a plastic bag, but allow for some airflow to prevent mold growth.
-
Wait for Roots and Shoots: In about 4-6 weeks, you should notice new roots forming, followed by little shoots. Once a few leaves have developed, the new peperomia plant can be potted individually.
2. Stem Cuttings
This method is particularly effective for varieties with thicker stems.
-
Select and Cut a Stem: Choose a healthy stem with a few leaves. Use sterilized scissors to cut a piece that has at least 2-3 nodes (the points where leaves attach to the stem).
-
Rooting Hormone (Optional): Dip the cut end of the stem in rooting hormone to promote faster root development, though this is optional.
-
Pot the Cutting: Place the stem cutting into a pot of well-draining soil, burying it deep enough to keep it stable.
-
Water and Wait: Water lightly and place the cutting in a location with bright, indirect sunlight. Ensure the soil remains moist but not oversaturated.
-
Watch for Growth: In a few weeks, roots should form, followed by new leaf growth. Once the plant is established, it can be repotted.
Common Issues and Tips
-
Overwatering: This is a common challenge in peperomia propagation. Ensure the potting mix is well-draining and only water when the top inch of soil feels dry.
-
Light Conditions: While peperomias enjoy bright, indirect light, too much direct sunlight can scorch the leaves, and too little light can hinder growth.
-
Humidity: Maintaining a humid environment can significantly aid in successful propagation. Using a humidity tray or regularly misting the plant can be beneficial.
-
Temperature: Peperomias prefer a warm environment, ideally between 65°F and 75°F (18°C – 24°C).
Following these detailed steps for how to propagate peperomia will help ensure that your new plants grow strong and healthy. Whether by leaf cuttings or stem cuttings, these techniques provide a delightful way to multiply your favorite peperomia varieties. Keep an eye on the growing conditions and adjust as necessary to overcome potential issues, and you’ll soon enjoy a thriving peperomia collection.
Troubleshooting Common Propagation Challenges
Propagating Peperomia plants is a rewarding way to increase your indoor green collection without much effort. Known for their attractive foliage and easy care, Peperomia varieties are perfect candidates for propagation. Whether you’re a seasoned gardener or a beginner, this guide will walk you through the steps of how to propagate Peperomia, along with troubleshooting tips for common propagation challenges.
Select the Right Method
-
Leaf Cuttings: The most common way to propagate Peperomia is through leaf cuttings. This method is particularly effective for Peperomia species with fleshy leaves.
-
Stem Cuttings: Some species, such as Peperomia scandens, are better suited for stem cuttings.
-
Division: For mature plants with multiple stems, dividing the plant can be an effective method.
Materials Needed
- Healthy Peperomia plant
- Clean, sharp scissors or a knife
- Pot with drainage holes
- Potting mix suitable for succulents or a light, well-draining medium
- Water
- Transparent plastic bag or propagation dome (optional for humidity control)
Step-by-Step Instructions
For Leaf Cuttings:
-
Choose a Healthy Leaf: Select a mature, healthy leaf from your Peperomia plant.
-
Cut and Prepare: Using sterile scissors, cut the leaf and leave a small stem (petiole) attached. Slice the leaf horizontally, if desired, to increase rooting chances, leaving both halves with sufficient leaf material.
-
Prepare the Pot: Fill a small pot with a well-draining potting mix. It’s crucial to have a substrate that won’t retain too much moisture, as Peperomias dislike being waterlogged.
-
Plant the Cutting: Insert the leaf pieces into the soil with the cut side down. Ensure it is stable and won’t tip over.
-
Create Humidity (Optional but Recommended): Cover the pot with a transparent plastic bag or a propagation dome to maintain humidity, aiding quicker root formation.
-
Place in a Bright, Indirect Light: Position your pot in a location receiving bright, indirect sunlight. Avoid direct sun as it can scorch the cuttings.
-
Water Sparingly: Lightly water the soil, ensuring it is slightly moist. Water again when the top inch of the soil dries out.
-
Monitor Root Growth: Roots should begin to develop in 4-6 weeks. You’ll notice new growth signaling successful propagation.
For Stem Cuttings:
-
Select and Cut: Choose a healthy, non-flowering stem with several leaves. Cut below a node (the point on a stem where leaves attach) using a clean tool.
-
Remove Lower Leaves: Strip the leaves from the lower half of the cutting to prevent rot.
-
Setup in Water or Soil: You can root stem cuttings in water by placing the bottom ends in a jar, or plant them directly into the soil mix as described above.
-
Care and Monitor Growth: Follow similar care instructions for light and watering. If rooting in water, transfer to soil once roots are a couple of inches long.
Common Issues and Troubleshooting Tips
-
Rotting: This is a common problem if the potting medium retains too much moisture. Use a well-draining soil mix and ensure pots have drainage holes.
-
Mold: If you observe mold growth, reduce humidity and increase airflow. Remove any affected cuttings to prevent spreading.
-
Lack of Growth: If there’s no visible growth after several weeks, ensure your cuttings are receiving enough but not excessive light and warmth.
-
Humidity Imbalance: If the environment is too dry, consider using a propagation dome or a plastic bag to maintain adequate humidity.
By following these steps and advice on how to propagate Peperomia, you can successfully expand your plant collection, enjoying the rewards of watching new Peperomia grow from cuttings. With proper attention, your propagated plants will thrive and bring lasting beauty to your home.
In conclusion, propagating peperomia is a rewarding endeavor that allows you to expand your indoor garden easily and enjoy the beauty of this diverse plant family. By mastering the propagation techniques of leaf cuttings, stem cuttings, and division, you can ensure the successful growth of new plants. Remember to choose healthy parent plants, use clean tools, and provide the appropriate environment for rooting, such as adequate light and consistent moisture. As you gain confidence and experience, you’ll find that propagating peperomia not only enhances your gardening skills but also brings a sense of accomplishment and connection to nature.
Now that you have all the essential knowledge, it’s time to put it into practice and watch as your new peperomia plants thrive. For an extra boost, try using a rooting hormone to increase your success rate, especially with more challenging varieties. Happy propagating!