Houseplants have a magical way of transforming our living spaces into vibrant, lush sanctuaries, and few do it with as much flare as the striking bromeliad. With their bold colors and dramatic foliage, bromeliads can instantly turn an ordinary room into a tropical paradise. But these exotic beauties are more than just a visual treat—they’re a testament to nature’s marvelous diversity and adaptability. However, inviting a bromeliad into your home comes with a responsibility: understanding its unique needs to ensure it thrives. In this comprehensive guide, we’ll unravel the secrets to successful bromeliad care, elevating you from novice to plant whisperer. Discover why nurturing this resilient plant is an art worth mastering, and how doing so can enrich your home and spirit. Whether you’re a seasoned green thumb or a budding plant parent, our expert tips will help you unlock the full potential of your bromeliad, making it bloom in more ways than one. Dive in, and let’s turn your living space into a thriving oasis!
Essential Bromeliad Care: Light and Water Requirements
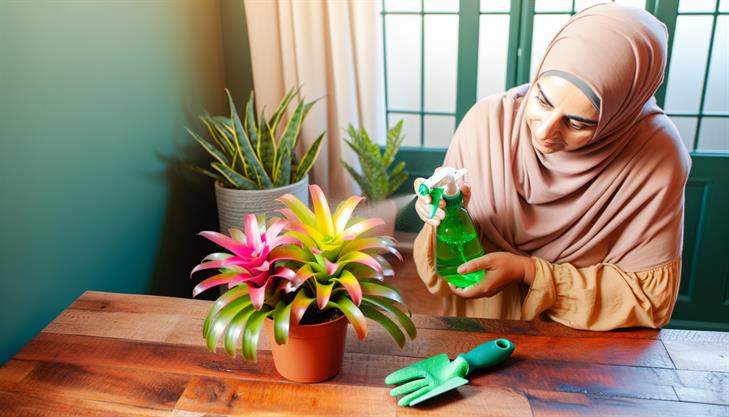
Caring for a bromeliad plant can be a rewarding experience, as these striking plants add a touch of the exotic to any home or garden. To ensure your bromeliad thrives, focusing on its light and water requirements is essential. Understanding these aspects will help you provide your plant with the optimal environment for growth.
Light Requirements
Bromeliads are native to tropical climates, so they typically prefer bright, indirect light. Here’s a step-by-step guide to ensuring your bromeliad receives the best lighting:
-
Assess the Location: Place your bromeliad in a spot where it can get plenty of indirect sunlight. If you live in an area with intense sunlight, such as a south or west-facing window, consider using sheer curtains to diffuse the light.
-
Monitor Sun Exposure: Avoid placing your bromeliad in direct sunlight as this can scorch the leaves. If the plant seems to be struggling, try moving it to a different location to see if the lighting conditions improve its growth.
-
Use Artificial Light if Necessary: If natural lighting is inadequate, especially during winter months, consider using a grow light to supplement. Aim to provide a balance of both red and blue spectrum light to mimic natural sunlight effectively.
Water Requirements
Watering is another vital component of bromeliad care, significantly affecting the plant’s health:
-
Check the Medium: Bromeliads prefer their potting medium to dry out between waterings. Ensure the potting mix is well-draining to prevent root rot.
-
Water the Central Cup: Most bromeliads have a central cup or tank formed by their leaves. To water, fill this cup about once a week, emptying old water to prevent stagnation which can lead to fungus or decay.
-
Avoid Overwatering: Allow the top inch of the potting mix to dry out before watering. Overwatering can cause the roots to rot, so always test the soil moisture with your finger before adding water.
-
Use Distilled or Rainwater: Bromeliads are sensitive to chemicals found in tap water; instead, use distilled or rainwater to avoid the buildup of harmful substances.
Additional Care Tips
- Humidity: Bromeliads enjoy high humidity. If your home is dry, especially in winter, consider using a humidifier or placing the pot on a tray filled with pebbles and water (make sure the pot doesn’t sit directly in the water).
- Temperature: Aim to maintain temperatures between 70°F and 90°F (21°C to 32°C) during the day and not lower than 50°F (10°C) at night to keep your bromeliad comfortable.
- Fertilization: Fertilize your bromeliad every 1-2 months during the growing season with a diluted, balanced liquid fertilizer. Avoid fertilizing the central cup to prevent nutrient burn.
Common Issues
- Leaf Browning: Often a sign of too much direct sunlight or underwatering. Adjust either light exposure or your watering routine.
- Root Rot: Typically caused by overwatering. Ensure proper drainage and reduce watering frequency.
- Leggy Growth: May be due to insufficient light. Relocate your plant to a brighter area and monitor closely.
By paying careful attention to the light and water needs of your bromeliad plant, along with a few supplementary measures, you can enjoy this unique plant’s beauty for years to come. Whether you’re a beginner or an experienced gardener, following these guidelines will ensure your bromeliad is healthy and vibrant.
Optimal Soil and Fertilization Techniques for Bromeliads
Caring for a bromeliad plant involves understanding its unique requirements to thrive indoors or outdoors. These tropical plants are admired for their striking foliage and vibrant blooms, making them a popular choice among plant enthusiasts. By following these optimal soil and fertilization techniques, you can ensure your bromeliad remains healthy and vibrant.
Choosing the Right Soil
Bromeliads can grow either in soil or as epiphytes (air plants). If you prefer soil cultivation, it’s essential to use a well-draining mix to prevent root rot. You can purchase a commercial mix designed for bromeliads or make your own by combining equal parts of orchid bark, peat moss, and perlite. This combination will provide the necessary aeration and drainage.
Potting Tips
Choose a pot with drainage holes to ensure excess water can escape. A shallow pot is often sufficient as bromeliads have a relatively small root system. When potting, set the bromeliad at the same depth it was previously growing, being careful not to bury the central cup where new leaves and blooms arise.
Optimum Light Conditions
Set your bromeliad in a spot that receives bright, indirect sunlight. Too much direct sunlight can scorch the leaves, while insufficient light may result in dull foliage and slow growth. If growing indoors, an east or west-facing window is ideal. Outdoors, place them in a shaded area that avoids the harshest midday sun.
Watering Technique
Bromeliads are unique in their water absorption through the central cup formed by their leaves. Keep this cup filled with fresh water, changing it weekly to prevent stagnation and bacterial growth. Water the soil occasionally but allow it to dry out between waterings. Overwatering can cause root rot, one of the most common issues with bromeliad care.
Humidity and Temperature Needs
Being tropical plants, bromeliads prefer a humid environment. If indoor air is dry, especially during winter, consider using a humidifier or placing the pot on a tray of pebbles and water to increase humidity. They thrive in temperatures between 70°F and 90°F (21°C to 32°C) but can tolerate a minimum of 50°F (10°C) without damage.
Fertilization Practices
Fertilize your bromeliad sparingly, as too much can harm the plant. Use a balanced, water-soluble fertilizer once a month during the growing season (spring through summer). Dilute the fertilizer to half-strength and apply it directly to the soil or as a gentle spray on the leaves, avoiding the central cup to prevent buildup.
Common Issues and Solutions
- Brown Leaf Tips: This can indicate low humidity or excessive fertilizer. Increase ambient humidity and reduce fertilization frequency.
- Root Rot: Often caused by overwatering. Ensure proper drainage and allow the soil to dry out before watering again.
- Lack of Blooms: Insufficient light can result in poor flowering. Gradually move your bromeliad to an area with more indirect sunlight.
Additional Care Advice
Remove any dead or damaged leaves to maintain plant health, and don’t hesitate to wipe the leaves with a damp cloth to keep them dust-free, allowing for maximum light absorption.
By following these optimal care practices, your bromeliad plant can flourish, providing a stunning display of its vibrant, long-lasting blooms and helping enhance your living space.

Tips for Encouraging Blooming in Bromeliad Plants
Caring for a bromeliad plant is an engaging and rewarding experience, as these exotic plants add a vibrant touch to any indoor or outdoor space. Whether you’re a seasoned gardener or a beginner, understanding how to care for a bromeliad is simple with the right steps and knowledge.
Selecting the Right Environment
Light Requirements: Bromeliads thrive in bright, indirect sunlight. Direct sunlight can scorch their leaves, so it’s ideal to place them near a window with filtered light or under a sheer curtain. For outdoor care, a spot with partial shade is perfect.
Temperature and Humidity: These tropical plants prefer temperatures between 60-80°F (15-27°C) and high humidity levels. In drier climates, consider using a humidifier or placing your bromeliad on a tray filled with pebbles and water to boost humidity around the plant.
Potting and Soil
Choosing the Right Container: A well-draining pot is crucial. Bromeliads do not like standing water, which can lead to root rot. A pot with drainage holes is essential to ensure excess water can escape.
Soil Mix: Use a light and airy potting mix to mimic their natural growing conditions. A cactus or orchid mix is a good starting point, and you can combine it with peat, perlite, or bark to improve drainage.
Watering your Bromeliad
Central Cup Method: Bromeliads typically have a central ‘cup’ or tank formed by their leaves. This is the main watering source. Fill the cup with distilled or rainwater, changing it out occasionally to prevent stagnation.
Soil: Keep the soil slightly moist but never soggy. Allow the top inch of soil to dry out before watering again. Always empty any excess water that collects in the pot’s saucer.
Feeding your Bromeliad
Fertilization: Bromeliads are light feeders. Use a balanced, water-soluble fertilizer diluted to one-quarter strength. Apply it every 1-2 months during the growing season by spraying lightly on the leaves or adding it to the central cup.
Encouraging Blooming
Patience and Encouragement: Most bromeliads bloom once and can take several years to do so. However, there are a few tricks to encourage blooming. Place the plant in a plastic bag with a ripe apple for a week. The ethylene gas emitted by the apple can stimulate blooming.
Common Issues and Solutions
Leaf Browning: This often indicates too much direct sunlight or an excess of fertilizer. Adjust the exposure and fertilization to resolve these issues.
Rotting Roots: Overwatering is the primary cause. Ensure proper drainage and allow soil to dry before re-watering.
Pests: Bromeliads can occasionally attract pests such as scale or aphids. Treat infestations with insecticidal soap or neem oil spray.
Final Tips
- Repotging: Bromeliads need not be repotted often. Do this only when they outgrow their pot or if significant water drainage issues occur.
- Pruning: Trim any dead or dying leaves with sterilized scissors to maintain the plant’s health and appearance.
By following these care guidelines for bromeliads, you can enjoy the beauty and vibrant colors these unique plants offer for years. Whether you’re nurturing these plants indoors or outside, they will thrive with just a bit of attention and the right growing conditions.
Common Bromeliad Pests and How to Handle Them
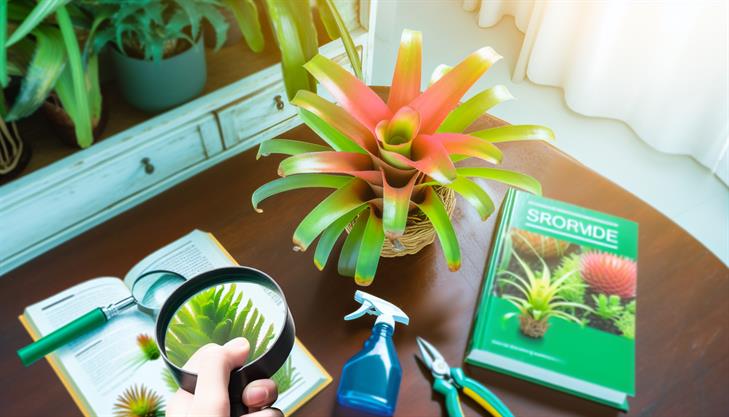
Caring for a bromeliad plant can be a rewarding experience given their vibrant colors and unique structures, which add an exotic touch to any home or garden. These tropical beauties are relatively low-maintenance, but like any plant, they do require some specific care to thrive. Below is a comprehensive guide to ensure your bromeliad flourishes.
Understanding Bromeliad Basics
Bromeliads are epiphytic plants, meaning they typically grow on other plants in their natural habitat. However, they don’t extract nutrients from their hosts. Instead, they gather nutrients from the air, rainwater, and debris that falls into their central cup or tank. Knowing this helps us simulate their natural conditions, essential for proper bromeliad care.
Light Requirements
Bromeliads thrive in bright, indirect sunlight. Direct sun can scorch the leaves, while too little light can hinder their blooming. To replicate their ideal environment, place your bromeliad near an east or west-facing window where it can receive filtered light. If your bromeliad is not receiving enough light, consider supplementing with fluorescent or LED grow lights.
Watering Needs
Watering is a crucial aspect of how to care for a bromeliad plant properly:
-
Water the Central Cup: Bromeliads have a unique central cup where water collects. Keep this cup filled with fresh water but ensure it doesn’t become stagnant by flushing it out every couple of weeks.
-
Soil Moisture: While watering the central cup is crucial, the potting medium should be kept slightly moist but not waterlogged. Allow the top inch of the soil to dry out before watering again.
-
Humidity: As tropical plants, bromeliads thrive in higher humidity. If you live in a dry climate, consider placing a small humidifier nearby or misting the plant occasionally.
Temperature Considerations
Bromeliads prefer temperatures between 70-90°F (21-32°C) during the day and not below 50°F (10°C) at night. Sudden temperature fluctuations should be avoided, as they can stress the plant and affect its growth.
Feeding Your Bromeliad
Fertilizing isn’t always necessary, but for optimal growth, use a bromeliad-specific fertilizer every 1-2 months during the growing season. A balanced liquid houseplant fertilizer diluted to half strength can also work. Apply this directly into the central cup or spray it on the leaves.
Repotting and Substrate
Bromeliads do not require frequent repotting and can thrive for years in the same pot. When repotting is necessary, typically after flowering, use a well-draining potting mix. A combination of orchid bark, peat, and perlite or sand is ideal.
Common Issues and Troubleshooting
-
Leaf Browning: Usually a sign of too much direct sunlight or low humidity. Adjust the light exposure and increase humidity around the plant.
-
Root Rot: Often caused by overwatering or using a non-draining soil mix. Ensure excess water can drain freely and keep the soil lightly moist, not soggy.
-
Pests: Bromeliads can occasionally attract pests like mealybugs and scale. If detected, treat with a mild insecticidal soap or neem oil spray, ensuring the plant is clean and rinsed.
Additional Tips for Success
- Rotate the bromeliad every couple of weeks to ensure even light distribution.
- Avoid using copper-based fungicides or sprays, as bromeliads are sensitive to copper.
- After a bromeliad flowers, it will eventually die, but it often produces offsets, or "pups," which can be removed and replanted to grow new bromeliads.
By following these guidelines, you can successfully nurture your bromeliad plant, ensuring it remains a striking centerpiece in your home or garden. As you develop your green thumb, you’ll appreciate the resilience and unique beauty bromeliads bring to your plant collection.
Troubleshooting Bromeliad Care: Solving Growth Issues
Caring for a bromeliad plant can be a rewarding experience, as these tropical beauties add a splash of color and vibrancy to any space. Proper bromeliad care involves understanding their specific needs and addressing any growth issues that may arise. Here’s a comprehensive guide to ensure your bromeliad thrives.
Understanding Bromeliad Needs
-
Lighting: Bromeliads prefer bright, indirect light. Direct sunlight can scorch their leaves, so place them near a window with filtered light or use sheer curtains. If growing indoors, an east or west-facing window is ideal.
-
Watering: Bromeliads are adapted to store water in their central cup, which is the heart of the rosette formed by their leaves. Fill this cup with distilled or rainwater to avoid mineral build-up. Ensure the soil is lightly moist – not soggy. Water sparingly, allowing the top inch of potting mix to dry out between waterings.
-
Humidity and Airflow: As tropical plants, bromeliads thrive in humidity. Maintain a room humidity level of 50-60%. Use a pebble tray with water or a humidifier to increase humidity. Good airflow is vital, so avoid tightly sealed areas that can hinder air circulation.
-
Temperature: Ideal temperatures range from 60°F to 80°F (16°C to 27°C). Avoid temperatures below 50°F (10°C), as bromeliads are susceptible to cold damage.
Planting and Repotting Bromeliads
-
Potting Mix: Use a well-draining mix, such as orchid soil or a combination of peat moss, bark, and perlite, which mimics their natural growing conditions. Ensure the pot has drainage holes to prevent waterlogging.
-
Repotting: Bromeliads typically require repotting every 1-2 years. If your plant outgrows its container or starts to produce pups (offsets), it’s time for a repot. Carefully separate the pups and plant them in their own pots.
Fertilizing Bromeliads
Feed bromeliads sparingly, as they are not heavy feeders. Use a diluted balanced liquid fertilizer once every 1-2 months during the growing season (spring and summer). Apply fertilizer directly to the soil, avoiding the central cup to prevent any risk of damage.
Common Bromeliad Care Issues and Solutions
-
Brown Leaf Tips: Often caused by low humidity or using tap water, which may contain harmful minerals. Increase humidity and use distilled or rainwater.
-
Pests: Watch for mealybugs and scale, which can be removed with insecticidal soap or by wiping leaves with a soft cloth dipped in soapy water.
-
Root Rot: Typically due to overwatering. Ensure the soil is well-draining and never allow the plant to sit in water.
-
No Flowering: If your bromeliad isn’t blooming, ensure it receives enough light. Exposure to ethylene gas (from ripe bananas or apples placed near the plant) can also stimulate flowering.
Additional Tips
-
Decorative Use: As bromeliads age, they may produce beautiful long-lasting flowers. Utilize their blooms in decorative displays or simply enjoy them in their natural pot.
-
Propagation: Once a bromeliad flowers, it eventually dies, but not before sending out pups. Wait until the pups are at least one-third the size of the mother plant before removing and planting them separately.
By following these care instructions and addressing issues promptly, you’ll maintain a healthy, vibrant bromeliad plant that adorns your home or garden for years to come. This guide ensures that even novice gardeners can master how to care for a bromeliad plant successfully.
In conclusion, caring for a bromeliad plant involves understanding its unique needs and providing an environment that mimics its natural habitat. To ensure your bromeliad thrives, remember to provide bright, indirect light and maintain a consistent watering schedule, ensuring the central cup is filled with water while allowing proper drainage to prevent rot. Keep an eye on humidity levels and enrich the soil with adequate nutrients to support its growth. By applying these essential care tips, you can enjoy the vibrant beauty and exotic charm of your bromeliad for years to come.
As a final recommendation, consider periodically rotating your bromeliad to ensure even exposure to light from all directions, which can promote balanced growth and enhance its overall health. Happy gardening!