Imagine bringing a touch of the tropical rainforest into your living room, with lush, vibrant foliage that effortlessly elevates your space. The Swiss cheese plant, or Monstera deliciosa, makes this dream a reality with its strikingly unique leaves, each one a masterpiece in its own right. But what if you could multiply this verdant glory to fill not just one corner, but every nook and cranny of your home? Propagating the Swiss cheese plant is the key to cultivating your own indoor jungle oasis. Whether you’re an enthusiastic plant novice or a seasoned green thumb, mastering the art of propagation is both an achievable goal and a rewarding journey. This guide will unlock the secrets to successfully propagating your beloved Monstera, providing simple, detailed steps to ensure your plant family not only grows but thrives. Get ready to deepen your connection with nature, save a few pretty pennies, and impress fellow plant lovers, all by learning to propagate this leafy beauty like a pro.
Understanding the Right Time to Propagate
Propagating a Swiss cheese plant, scientifically known as Monstera deliciosa, can be a rewarding experience for any plant enthusiast. This beautiful and popular houseplant is not only striking with its unique, holey leaves, but it’s also quite forgiving and easy to propagate. Here’s a comprehensive guide on how to propagate a Swiss cheese plant effectively.
Best Time for Propagation
Understanding the right time to propagate your Swiss cheese plant is crucial for success. The best time to propagate Monstera deliciosa is during the spring or early summer. This period corresponds with the plant’s active growing season, ensuring the new cuttings have the best chance to root successfully.
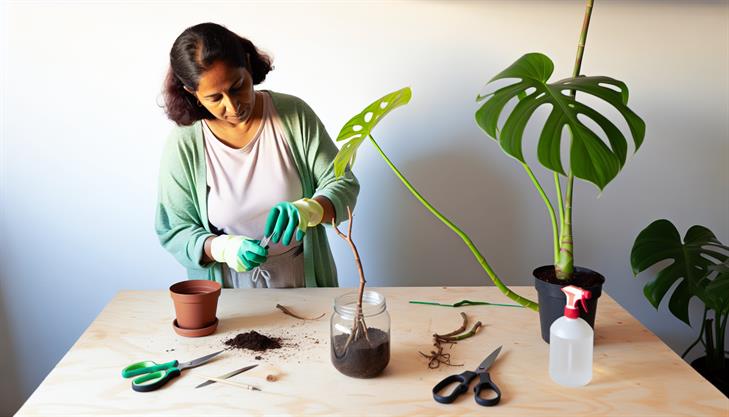
Tools and Materials Needed
- Sharp, clean pruning shears or a knife
- A clean glass jar or container
- Rooting hormone (optional)
- Well-draining potting soil
- Small pot with drainage holes
Step-by-Step Guide
-
Select a Healthy Stem: Look for a stem that is healthy and at least 12 inches long. Ensure it has at least one or two nodes, as these are crucial for root development. A node is a small bump on the stem where leaves and roots can grow.
-
Make the Cut: Using your sharp, sterilized pruning shears or knife, make a clean cut just below a node. Be careful to cut at an angle to increase the surface area for rooting.
-
Prepare the Cutting:
- Remove any leaves that are close to the node to prevent them from rotting once placed in water.
- If you’re using rooting hormone, now is the time to apply it to the cut end, though this step is optional.
-
Root in Water:
- Place the cutting in a glass of water, ensuring that at least one node is submerged.
- Position the glass in a location with bright, indirect sunlight.
- Replace the water every few days to keep it clean and to prevent bacterial growth.
-
Monitor Root Development: Over the next few weeks, roots should begin to emerge from the submerged node. Once the roots are a few inches long, the cutting is ready to be potted.
-
Potting the Cutting:
- Fill a small pot with well-draining potting soil.
- Make a hole in the soil, carefully transfer the rooted cutting into the hole, and gently pack the soil around it to provide stability.
- Water the newly potted plant, ensuring excess water can drain away.
Common Issues and Tips
-
Yellowing Leaves: If you notice yellowing leaves on the cutting, this could be a sign of overwatering or inadequate sunlight. Adjust water levels and check the plant’s light conditions.
-
Root Rot: Ensure you replace water regularly when rooting in water and use well-draining soil to avoid root rot.
-
Optimal Conditions: Keep the newly propagated plant in a warm environment with high humidity to promote growth. A humidifier can be helpful if your home is dry.
Remember, patience is key when propagating plants. With these steps, you should soon have a thriving new Swiss cheese plant ready to enhance any space. Happy propagating!
Step-by-Step Guide to Propagating from Cuttings
Propagating a Swiss cheese plant, scientifically known as Monstera deliciosa, from cuttings is a rewarding and accessible method that allows plant enthusiasts to expand their collection or share with friends. This guide provides a detailed, step-by-step approach to successfully propagate your Swiss cheese plant, ensuring healthy new growth.
Step 1: Select a Healthy Parent Plant
To begin the propagation process, choose a healthy Swiss cheese plant. Look for vibrant, mature leaves with no signs of disease or pest damage. The ideal parent plant should be vigorous and free from any deficiencies, ensuring that your cutting will be robust.
Step 2: Take a Cutting
Using sharp, sterilized scissors or pruning shears, take a cutting that includes at least two to three nodes. The node is a small bump on the stem where roots typically emerge. A cutting with an aerial root attached is even more advantageous. Make a clean cut about ½ inch below the node.
Step 3: Prepare the Cutting
Remove any leaves from the bottom node of the cutting, retaining one or two leaves at the top. This prevents rot and focuses energy on root development. If there’s an aerial root, ensure it’s intact as it aids faster rooting.
Step 4: Rooting the Cutting
You can root your Swiss cheese plant cutting in either water or soil. For water propagation, submerge the node (not the leaves) in a jar filled with clean, non-chlorinated water. Keep the jar in a warm, indirect sunlight location, changing the water every few days to prevent stagnation and promote healthy root growth.
For soil propagation, dip the base of the cutting into rooting hormone, which can enhance root development. Plant the cutting in a pot filled with well-draining peat-based potting mix. Water thoroughly and place it in a warm spot with indirect light.
Step 5: Monitor the Cutting
Keep the humidity high to encourage root growth. You can achieve this by covering the cutting loosely with a clear plastic bag, ensuring some airflow to prevent mold. Whether in water or soil, monitor the cutting regularly for root development, which can take 2-4 weeks.
Step 6: Transplant the Cutting
Once roots are several inches long, it’s time to pot your Swiss cheese plant cutting. If initially propagated in water, gently transfer it into a pot with rich, well-aerated soil. Provide support with a stake if necessary, and water the plant, ensuring good drainage.
Common Issues and Tips
-
Rotting: Avoid submerging leaves in water or overly wet soil to prevent rot.
-
Slow Rooting: Ensure the cutting receives adequate warmth and humidity. If growth seems stalled, consider adding a heat mat under the pot for warmer soil conditions.
-
Humidity: Regular misting or a humidifier can help maintain the ideal humidity levels for your new plant.
By following these steps, you can propagate your Swiss cheese plant successfully, adding an exciting new element to your indoor garden. Remember that patience is key; with the right conditions and care, your cutting will soon become a thriving plant.

Tips for Successful Root Development
Propagating a Swiss cheese plant, scientifically known as Monstera deliciosa, is a rewarding and straightforward way to expand your collection of these popular houseplants. This process involves creating new plants from cuttings, ensuring you have healthy, thriving new growth. Follow these steps to successfully propagate your Swiss cheese plant and ensure successful root development:
Step 1: Choose the Right Time
Propagation is best done during the plant’s active growing season, which is typically in spring or early summer. This allows the cutting to establish roots more quickly due to the increased growth rate during these months.
Step 2: Select a Healthy Parent Plant
Select a mature Swiss cheese plant that is healthy and thriving. Look for bright green leaves and a plant free from pests or disease. A healthy plant will significantly increase your chances of successful propagation.
Step 3: Take a Cutting
Use a clean, sharp knife or pruning shears to take a cutting from the plant. Choose a stem that has at least one node—a small bump where leaves and aerial roots grow—and ideally a leaf attached. This node is crucial as it will form the roots of the new plant.
Step 4: Prepare the Cutting
Trim the cutting to about 4-6 inches long, ensuring there’s one to two leaves. Remove any excess leaves or stems from the cutting, leaving only a couple of leaves to reduce stress on the cutting as it develops roots.
Step 5: Rooting Medium
You have the option of rooting your cutting in either water or soil:
-
Water Propagation: Place the cutting in a clear jar or glass with the cut end submerged in water. Ensure the node is submerged, but the leaves are not. Change the water every few days to keep it fresh and prevent bacterial growth. Roots typically appear in a couple of weeks.
-
Soil Propagation: Plant the cutting directly into potting soil. Use a mix that retains some moisture but also provides good drainage, like a peat-based mix with perlite. Keep the soil consistently damp, but be cautious not to overwater.
Step 6: Provide the Right Environment
Place the cutting in a warm, humid environment with indirect light. A spot near a bright window, but out of direct sunlight, is ideal. You may also cover the cutting with a plastic bag or use a humidity dome to maintain high humidity, which aids in root development.
Step 7: Monitor and Maintain
Regularly check your cutting for root development. In water, you should see roots developing within two to three weeks. For soil propagation, lightly tug on the cutting after a month; if you feel resistance, roots are forming. Avoid disturbing new roots as they are quite delicate.
Troubleshooting Common Issues
- Yellowing Leaves: This could indicate overwatering or too much light exposure. Adjust your care routine accordingly.
- No Root Growth: Check that the node is correctly submerged and consider raising the humidity or temperature.
- Mold or Rot: Be sure to refresh water frequently for water propagation and ensure good drainage for soil propagation.
Additional Tips
- Use Rooting Hormone: Although not necessary, a rooting hormone can speed up the root development process.
- Be Patient: Some cuttings may take longer to develop roots. Giving them adequate time in ideal conditions is crucial.
By following these steps and tips for propagating your Swiss cheese plant, you’ll be well on your way to successfully growing new plants. Whether you choose to root cuttings in water or soil, each method will yield a satisfying extension of your botanical collection with little effort.
Best Tools and Materials for Propagation
Propagating a Swiss cheese plant, also known as Monstera deliciosa, is a rewarding and straightforward process that allows you to expand your plant collection or share cuttings with friends. This popular houseplant is known for its unique leaf patterns, making it a favorite among plant enthusiasts. Here’s a detailed step-by-step guide on how to propagate a Swiss cheese plant successfully:
What You’ll Need
Before starting the propagation process, gather the necessary tools and materials:
- Sharp pruning shears or scissors
- A clean jar or glass of water
- Potting mix (a mix designed for aroids works best)
- Small pots with drainage holes
- Rooting hormone (optional, but can aid in faster root growth)
- A healthy parent plant
Step-by-Step Guide to Propagation
Step 1: Select a Healthy Cutting
Begin by selecting a healthy stem from your Monstera deliciosa. Choose a stem with at least two to three leaves and a visible node (the bump where leaves and aerial roots emerge). Nodes are crucial as new roots will develop from them. Use sharp, sterilized pruning shears to make a clean cut just below the node.
Step 2: Prepare the Cutting
Remove any leaves close to the node to prevent them from rotting in water. If you’re using rooting hormone, dip the cut end into the powder to promote root development.
Step 3: Root the Cutting
Place the cutting in a clean jar or glass filled with water, ensuring the node is submerged while the leaves remain above the waterline. Position the jar in a warm, bright area with indirect sunlight. Direct sunlight can scorch the leaves and hinder root growth.
Step 4: Wait for Roots to Develop
Monitor the water level frequently, replenishing it as needed to keep the node submerged. Within a few weeks, you should see roots beginning to form. Once the roots are approximately 2-4 inches long, they are ready for planting.
Step 5: Pot the Cutting
Fill a small pot with a well-draining potting mix, ideally formulated for aroids. Create a hole in the center and gently place the rooted cutting into the soil, making sure the roots are well-covered. Firmly press the soil around the base to stabilize the plant.
Step 6: Care for the New Plant
Water the freshly potted Monstera cutting thoroughly and place it in a location that receives indirect sunlight. Maintain consistent moisture, allowing the top inch of the soil to dry out between waterings. You can also mist the cutting occasionally to mimic the plant’s natural humid environment.
Common Issues and Tips
- Root Rot: Excess water can lead to root rot, so ensure your pot has sufficient drainage and avoid overwatering.
- Yellowing Leaves: This can be a sign of too much sunlight or overwatering. Adjust the plant’s position or watering frequency accordingly.
- Slow Growth: If roots are slow to emerge, try a warmer environment or consider using a heat mat to encourage faster root development.
By following these steps, you’ll be able to propagate a Swiss cheese plant effectively. Be patient, as the rooting process can take some time, but with proper care, your new plant will thrive and eventually develop those iconic split leaves. Happy propagating!

Troubleshooting Common Propagation Problems
Propagating a Swiss cheese plant, scientifically known as Monstera deliciosa, can be a rewarding venture for plant enthusiasts. This distinctive plant, known for its iconic hole-punched leaves, is relatively easy to propagate using a few straightforward techniques. By following these step-by-step instructions, you can successfully propagate your Swiss cheese plant and cultivate a lush, new addition to your indoor garden.
Step-by-Step Guide to Propagate Swiss Cheese Plant
-
Select the Right Cutting:
- To start your propagation journey, choose a healthy stem from your existing Monstera deliciosa. Preferably, select a stem with at least one node. The node is a crucial part as it’s the small bump on the stem from which roots and new growth will emerge.
-
Make the Cut:
- Using a clean, sharp knife or pruning shears, cut the stem just below the chosen node. Ensure the cutting is 4 to 6 inches long and has a few leaves on it. The node should remain intact, as it’s essential for root development.
-
Rooting in Water:
- Place the cutting in a jar filled with room temperature water, ensuring that the node is submerged while the leaves are above water. This method enables you to observe root growth. Change the water every few days to prevent stagnation and mold growth.
-
Transition to Soil:
- Once roots have developed to about an inch long, generally within 2-4 weeks, transplant the cutting into a pot filled with rich, well-draining potting soil. Monstera plants thrive in soil that retains moisture but doesn’t become waterlogged, so ensure your pot has drainage holes.
-
Provide the Right Environment:
- After planting, place the potted cutting in a warm environment with indirect sunlight. Monsteras prefer bright, filtered light and a warm ambient temperature.
Tips and Troubleshooting for Successful Propagation
- Humidity: Monsteras love humidity. If your home is dry, consider misting your plant regularly or placing it near a humidifier to encourage growth.
- Proper Watering: Avoid overwatering as this can lead to root rot. Water the plant when the top inch of soil feels dry.
- Common Issues: If your cutting isn’t developing roots, it might be due to insufficient light or water that isn’t changed regularly. Adjust the light conditions or refresh the water more often as needed.
Additional Advice
- Fertilization: Once your propagated plant is established, feed it with a balanced liquid fertilizer every month during the growing season (spring and summer) to stimulate vigorous growth.
- Pruning: Regularly prune any yellowing leaves to maintain plant health and encourage robust growth.
By adhering to these guidelines on how to propagate your Swiss cheese plant, you’ll be well on your way to growing these charming, lush plants successfully. Whether you’re multiplying your plant collection or sharing cuttings with friends, propagation is a cost-effective and satisfying endeavor.
In conclusion, propagating your Swiss cheese plant, or Monstera deliciosa, is a rewarding process that can fill your home with lush, vibrant greenery. By following the simple methods outlined above—whether through stem cuttings, division, or air layering—you can successfully cultivate new plants with ease. Remember to choose healthy parent plants and provide your cuttings with the ideal conditions: bright, indirect light and a warm, humid environment to encourage robust root development.
Now that you are equipped with these techniques, we invite you to try your hand at propagation. Not only does it offer a sustainable way to expand your plant collection, but it also deepens your understanding and connection with these fascinating plants.
As a final tip, always keep an eye on your propagations, ensuring they do not dry out and are free from pests. This vigilance will promote healthy growth and quicker establishment. Happy propagating, and enjoy watching your new Swiss cheese plants thrive!