If you’re a gardening enthusiast dreaming of vibrant blooms and bountiful harvests, knowing when to plant seeds indoors can make all the difference in bringing that vision to life. Timing is everything, and understanding the perfect moment to begin nurturing your budding plants could be the key to a thriving garden. Whether you’re coaxing delicate flowers into bloom or cultivating a vegetable patch right in your kitchen, the art and science of seed starting indoors is essential for jump-starting your growing season. This guide will demystify the process, transforming your green thumb aspirations into a flourishing reality. Dive into this essential read to unlock the secrets of optimal planting times, and ensure your garden not only grows but thrives with vitality and vigor.
Understanding Seed Starting: The Basics of Indoor Planting
Starting seeds indoors is an essential practice for gardeners looking to get a jump on the growing season. By understanding when to plant seeds indoors, you can ensure your plants have a strong start and are ready for transplanting. Here’s a comprehensive guide to help you succeed.
Determine the Last Frost Date:
The first step in deciding when to plant seeds indoors is determining your area’s last projected frost date. This date is crucial as it helps you plan backward to establish your seed-starting schedule. You can find local frost dates through online gardening resources or by contacting your local extension office.
Plan Your Seed Starting Schedule:
Once you have your last frost date, examine the seed packet for specific planting instructions. Most seed packets provide guidelines such as "Start indoors 6-8 weeks before last frost." Adjust your schedule based on these instructions. For instance, if your last frost date is May 15, and a seed packet suggests starting 8 weeks in advance, you would begin around mid-March.
Consider Plant Type and Growth Times:
Different plant species have varied growth requirements. For example, slower-growing plants like tomatoes and peppers benefit from an earlier start indoors, while faster-growing plants like cucumbers and squash may not need as long. Look for recommendations on seed packets or consult specific growing guides for each plant type.
Set Up Your Indoor Planting Area:
Choose a suitable place with proper light and temperature conditions. A south-facing window can work, but supplemental grow lights often yield better results. Maintain a consistent temperature around 65-75°F (18-24°C) to foster strong seedling growth.
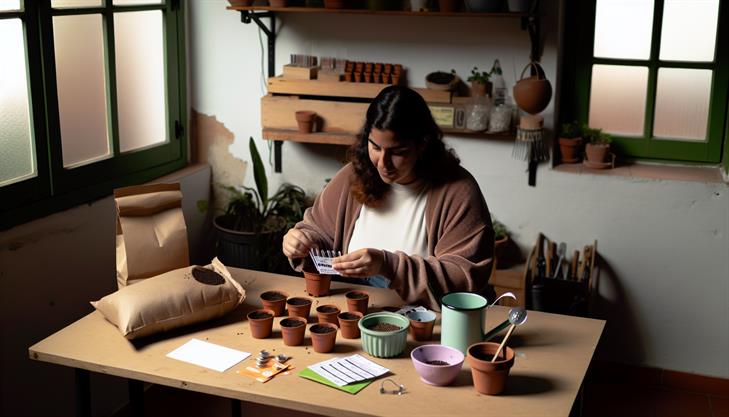
Prepare Your Equipment:
Gather trays, seedling containers, or peat pots, and fill them with a high-quality seed-starting mix. This type of soil is lightweight and retains moisture while providing excellent drainage, crucial factors for healthy seed development.
Sow Seeds Correctly:
Moisten the seed-starting mix before sowing seeds to ensure even moisture distribution. Plant seeds at the recommended depth, which is usually about twice as deep as the seed is wide. Cover the seeds gently and label each container with the plant variety and sowing date.
Provide Adequate Light and Water:
Use a grow light 2-4 inches above the seedlings to prevent leggy growth, and keep it on for 12-16 hours daily. Water carefully, ensuring the soil is damp but not waterlogged, as overwatering can lead to mold or rotting.
Manage Common Issues:
Watch out for problems like damping-off, a fungal disease that affects seedlings. To mitigate this, ensure proper airflow and avoid overly wet soil. Another issue is insufficient light, which results in spindly, weak seedlings. Adjust your grow lights’ height and intensity if necessary.
Harden Off Seedlings:
Before moving seedlings outdoors, acclimate them by gradually exposing them to outdoor conditions. Start by placing them outside for a few hours daily, slowly increasing exposure over a week or two. This process helps prevent transplant shock.
By carefully timing and managing your indoor seed starting, you’ll be well on your way to a successful planting season. With proper planning and attention to detail, your indoor seedlings will transition smoothly into healthy garden plants.
Best Timing: Aligning Indoor Planting with Your Climate Zone
Understanding the optimal timing for planting seeds indoors is crucial to fostering healthy and thriving plants. Aligning indoor seed starting with your specific climate zone ensures that your seedlings are robust and ready for outdoor planting when the conditions are just right. Here’s a step-by-step guide to help you get started:
Determine Your Climate Zone
Begin by identifying your USDA Hardiness Zone or equivalent regional climate zone. This classification provides valuable information about your area’s average minimum winter temperatures, helping you predict the last frost date. You can typically find this information through local extension services or online resources.
Calculate Planting Dates
Once you know your climate zone and last frost date, you can estimate the best time to sow seeds indoors:
-
Check Seed Packet Instructions: Most seed packets provide specific instructions on when to start seeds indoors relative to the last frost date. Common timing is six to eight weeks before the last expected frost.
-
Create a Planting Schedule: Make a list of plants you wish to grow and plot their indoor planting dates on a calendar. For example, if you’re in Zone 6 with a last frost date around May 15th, you could start tomatoes indoors by March 15th.
Gather Your Materials
To ensure success when starting seeds indoors, prepare the necessary materials:
-
Seedling Trays or Pots: Use containers like seed trays, pots, or recycled materials that have good drainage.
-
Seed-starting Mix: Choose a light, sterile mix specifically designed for seed starting to prevent disease and ensure good drainage.
-
Lighting Setup: Invest in grow lights if natural light availability is limited. Seedlings need about 14-16 hours of light per day to thrive.
-
Heat Mat (optional): For seeds that require warm temperatures to germinate, a heat mat can help ensure consistent warmth.
Planting Your Seeds
-
Fill Containers: Fill your chosen containers with a moistened seed-starting mix.
-
Plant the Seeds: Plant seeds at the depth specified on the packet. A general rule is to plant them at a depth two to three times their diameter.
-
Water Gently: Use a misting bottle to keep the soil moist but not waterlogged. Watering from below can also help prevent damping off, a common fungal issue.
-
Cover and Warm: Covering your containers with a plastic dome or wrap can help retain moisture and warmth. Remove the covering once seedlings emerge to provide adequate airflow.
Transition to Outdoor Planting
As the last frost date approaches, begin acclimating your seedlings to outdoor conditions—a process known as hardening off:
-
Gradual Exposure: About seven to ten days before the intended outdoor planting date, start placing seedlings outside in a sheltered area for a few hours each day, gradually increasing exposure to sunlight and wind.
-
Monitor Conditions: Keep an eye on weather forecasts, particularly nighttime temperatures. Ensure conditions are favorable before permanently planting your seedlings outdoors.
Troubleshooting and Tips
-
Leggy Seedlings: Insufficient light is often the cause. Make sure your seedlings are close enough to the light source and increase light exposure as needed.
-
Overwatering Issues: Ensure good drainage and be cautious with watering frequency to prevent root rot.
-
Labeling: Keep track of varieties by labeling containers clearly from the start.
By aligning your indoor seed planting activities with your climate zone and following these best practices, you can enjoy a flourishing garden that’s well-prepared for the season ahead.

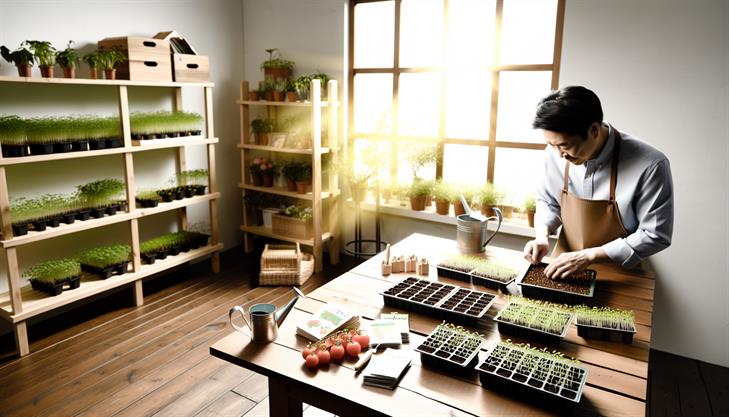
Tools and Supplies: Essential Equipment for Successful Seed Starting
To ensure a successful start to your gardening season, knowing when to plant seeds indoors is crucial. Timing is everything, and the goal is to have your young plants ready for transplant when the outdoor conditions are ideal for growth. Here’s a step-by-step guide to help you determine the optimal time for indoor seed starting, along with tips to avoid common pitfalls.
Understanding Frost Dates
Before planting seeds indoors, identify the average last frost date for your region. Frost dates are a key indicator as they help determine the best time to start seeds indoors. You can typically find this information through local agricultural extensions or online resources. Once you have the last frost date, calculate 6 to 8 weeks prior as the starting window for most seeds.
Seed Packet Guidelines
Seed packets are a valuable resource, often providing specific instructions about when to plant seeds indoors. Each type of plant has a unique timeline. For example, tomatoes and peppers typically require an 8-week head start, while cucumbers and squash are better started 4 weeks before the planting date. Always refer to the seed packet to tailor your planting calendar based on expert recommendations.
Setting Up Your Indoor Environment
Creating an ideal indoor growing environment is crucial for seed germination and healthy growth. Here’s a simple setup guide:
-
Lighting: Use fluorescent grow lights positioned 2-4 inches above the seedlings. Adjust the height as the plants grow, maintaining consistent light exposure for 14-16 hours a day.
-
Temperature: Most seeds germinate well between 65-75°F (18-24°C). Using a seedling heat mat can help maintain even soil temperatures, especially in cooler areas.
-
Containers and Soil: Opt for shallow trays or peat pots filled with high-quality, well-draining seed-starting mix. Avoid garden soil, which can be too dense and harbor diseases.
Planting the Seeds
Once your setup is ready, follow these steps:
-
Sow the Seeds: Plant seeds at a depth three times their diameter. Smaller seeds can be lightly pressed into the surface and covered with a thin layer of soil.
-
Watering: Moisten the soil before planting, and use a mister to keep the soil damp without waterlogging.
-
Labeling: Clearly label each container with the plant type and planting date to avoid any mix-ups as they grow.
Monitor and Adjust
As seedlings emerge, watch for common issues such as damping-off, a fungal disease that can kill young plants. To prevent this, ensure proper airflow and avoid overwatering. Additionally, seedlings should be rotated regularly to prevent them from leaning toward the light source.
Transition to Outdoors
About a week before the last frost, harden off your seedlings by gradually exposing them to outdoor conditions. Start by placing them in a sheltered, shady spot for a few hours, gradually increasing exposure to direct sunlight and outdoor temperatures.
By understanding when to plant seeds indoors and setting up the environment correctly, you will give your plants a strong start. Proper timing and attention to their early needs help ensure a bountiful garden once they’re transplanted outside.
Step-by-Step Guide to Planting Seeds Indoors for Beginners
Knowing when to plant seeds indoors is crucial for ensuring your garden thrives and blossoms at the right time. The timing depends heavily on the type of plant you’re growing and your local climate. Here’s a step-by-step guide to help you determine the optimal timeframe for starting seeds indoors.
1. Determine Your Region’s Last Frost Date
The first step in figuring out the best time to plant seeds indoors is determining the last frost date for your region. This date marks the average last occurrence of frost in your area and is essential for scheduling your planting. You can find this information through local gardening groups, online agricultural resources, or the USDA Plant Hardiness Zone Map.
2. Read Seed Packet Instructions
Different plants have varying indoor seed-starting times, typically noted on their seed packets. Most seed packets indicate when to start seeds indoors relative to the last frost date. For example, if a seed packet advises starting seeds "6-8 weeks before the last frost date," and your area’s last frost date is May 1st, you should begin planting around the first week of March.
3. Consider the Growth Requirements of Your Plants
Each plant has specific requirements. For instance, fast-growing varieties such as lettuce or radishes might need only 4 weeks from seed starting to planting outside, while slower-growing plants like tomatoes or peppers often require 8 weeks or more.
4. Set Up Your Indoor Growing Environment
Once you’ve determined the timing, set up an indoor growing environment. You will need containers with drainage holes, potting soil, proper lighting (fluorescent or LED grow lights work well), and a warm location since most seeds need consistent warmth (65°F–70°F or 18°C–21°C) for germination.
5. Monitor Germination and Growth
After planting, keep the soil moist but not waterlogged. Use a spray bottle for even watering. Ensure sufficient light exposure by placing seedlings under grow lights for 10-14 hours per day. Rotate trays to prevent seedlings from leaning towards the light source.
6. Watch for Common Issues
Be vigilant about common issues such as "damping off," a disease causing seedlings to collapse. To avoid this, provide good air circulation and avoid overly wet conditions. Additionally, be patient if germination seems slow. Temperature and moisture levels can affect how quickly seeds sprout.
7. Harden Off Your Seedlings
About a week or two before transplanting, begin the hardening-off process. Gradually expose seedlings to outdoor conditions by placing them outside for a few hours daily, increasing time and exposure to sunlight gradually.
By following these steps, you can maximize your success with planting seeds indoors, ensuring a healthy transition to outdoor gardening. Remember, patience and care are key to nurturing vibrant and resilient plants.
Troubleshooting Common Indoor Seed Planting Challenges
Starting indoor seed planting allows you to get a jumpstart on your garden, ensuring healthy, thriving plants ready to transplant outside when the weather allows. Knowing when to plant seeds indoors can vary greatly depending on your local climate, the type of plant, and other seasonal factors.
Understanding Your Planting Zone
The first step to determining the optimal time to plant seeds indoors is understanding your local planting zone, which dictates the average last frost date. Typically, seed packets offer specific advice based on these frost dates, mentioning when to start seeds indoors before moving them outdoors. For example, the USDA Plant Hardiness Zone Map is a helpful guide in the United States.
General Guidelines for Indoor Seed Starting
-
Research Your Plant Varieties: Different plants have different indoor starting times. For instance, slow-growing plants like peppers and tomatoes should be started 6-8 weeks before the last frost date. Faster-growing plants like cucumbers or sunflowers might only need 3-4 weeks.
-
Gather Your Supplies:
- Seed Starting Mix: Choose a lightweight, sterile mix specifically for seed starting.
- Containers: Use seed trays, peat pots, or recycled containers with drainage holes.
- Light Source: A sunny windowsill may suffice, but a grow light is often necessary to ensure seedlings get enough light.
-
Sowing Seeds:
- Fill your chosen containers with the seed starting mix.
- Moisten the mix with water before planting.
- Plant seeds according to the depth and spacing instructions on the seed packet.
- Cover containers with plastic wrap or a plastic dome to create humidity, and place them in a warm location.
-
Monitoring Growth:
- Temperature and Humidity: Most seeds germinate best at temperatures between 65-75°F (18-24°C). Maintain consistent moisture without waterlogging.
- Light: Once seedlings emerge, ensure they receive 12-16 hours of light daily. An adjustable grow light keeps light levels consistent as your plants grow.
-
Transplanting:
- About a week before moving seedlings outdoors, harden them by gradually exposing them to outdoor conditions, increasing their time outside each day.
Common Challenges and Troubleshooting
- Leggy Seedlings: This typically occurs when there’s insufficient light. Move seedlings to a brighter spot or use a grow light to remedy this issue.
- Damping Off: A fungal disease that causes seedlings to collapse. Avoid excessive watering and ensure good air circulation by removing plastic covers once seeds germinate.
- Slow Germination: Slow germination can result from incorrect temperatures or old seeds. Check recommended germination temperatures and ensure seeds are fresh.
Additional Tips
- Succession Planting: To extend harvest periods, start seeds for the same crop every few weeks.
- Labeling: Clearly label each seed tray with the plant type and date of planting to ease management.
- Record Keeping: A garden journal helps track what works and allows you to refine your schedule over time.
By planning carefully and addressing common issues proactively, indoor seed planting can be a rewarding experience that sets your garden up for flourishing success. Happy planting!
In conclusion, understanding when to plant seeds indoors is crucial for cultivating a healthy and thriving garden. By beginning the process six to twelve weeks before the last expected frost, researching the specific needs of your chosen plants, and using the right materials and environment, you can effectively jump-start your growing season. Remember to take into consideration your local climate, the type of seeds you are sowing, and the ultimate timing of transplanting outdoors.
Applying these strategies will not only enhance your gardening success but also provide ample time for seedlings to mature, increasing your yield when the weather turns favorable. As you embark on your seed-starting journey, keep experimenting and adjusting your methods according to your observations and results.
A final tip: maintain a gardening journal where you can note down the planting dates, germination times, and any adjustments you make. This will serve as a valuable resource for refining your approach in future growing seasons. Happy planting!