
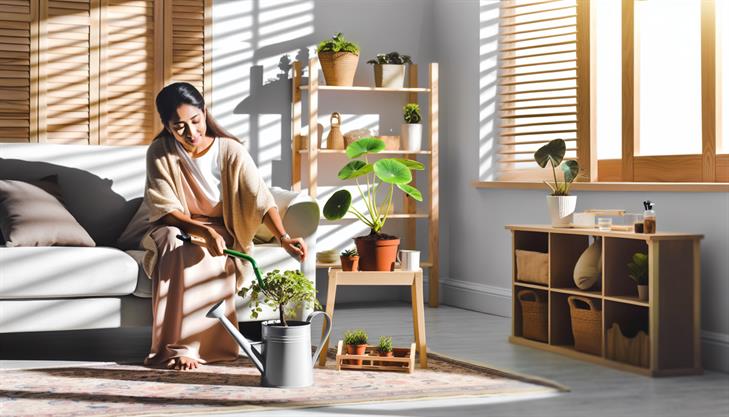
Whether you’re a seasoned plant enthusiast or just beginning to dabble in the world of indoor greenery, the umbrella plant (Schefflera) can effortlessly enhance your space with its lush, tropical foliage. But here’s the exciting part: instead of purchasing multiple plants, you can multiply this vibrant beauty right in the comfort of your home. Propagating an umbrella plant not only breathes life into every corner of your living environment but also deepens your bond with nature as you nurture new growth from existing stems. This skill is essential not just for creating an indoor jungle but also for saving money and learning a sustainable gardening practice. In this guide, we’ll walk you through the essentials of umbrella plant propagation, providing you with the knowledge to transform a single plant into a thriving collection. Whether you’re aiming to gift a plant to a friend or expand your own green haven, this post will equip you with the wisdom to multiply your leafy companions successfully. Dive in to discover the rewarding journey of plant propagation and let your green thumb flourish!
Choosing the Right Time to Propagate Your Umbrella Plant
Propagating an umbrella plant, scientifically known as Schefflera, can be a rewarding way to expand your collection of this lush and vibrant houseplant. Timing is crucial when it comes to propagation, as the right season and environmental conditions can significantly affect your success rate.
Optimal Time for Propagation
The best time to propagate your umbrella plant is during the spring and early summer months. This is when the plant is actively growing, meaning it’s more likely to root quickly. During this period, the increased light and warmth help stimulate growth, offering the perfect conditions for your propagation efforts.
How to Propagate Umbrella Plant: A Step-by-Step Guide
Materials You’ll Need:
- Sharp pruning shears or scissors
- A clean glass or jar
- Potting soil
- Planting pot
- Rooting hormone (optional)
- Plastic bag or a propagation dome
Steps for Successful Propagation:
-
Select a Healthy Stem: Begin by choosing a healthy, vibrant stem from the mother plant. Look for a stem with several leaves, at least 4-6 inches long, and no signs of disease or pest damage.
-
Make the Cut: Using sharp pruning shears, cut the stem just below a leaf node. A leaf node is a small swelling on the stem where leaves emerge, which encourages root development.
-
Prepare the Cuttings: Remove the leaves from the lower half of the cutting. This step reduces the amount of energy the cutting needs to focus on sustaining leaves, enabling it to concentrate on rooting.
-
Optional Use of Rooting Hormone: Dip the cut end of the stem into water, then into rooting hormone powder. Rooting hormone can significantly increase the odds of successful propagation by speeding up the root development process.
-
Place in Water: Submerge the stem in a glass or jar filled with water, ensuring the leaf node is underwater, but leaves are not submerged. Place the container in a warm, well-lit area that receives indirect sunlight.
-
Monitor Root Development: Replace the water every few days to prevent stagnation and monitor the cuttings. Within 4-6 weeks, roots should begin to form. Be patient, as root growth can take some time.
-
Transplanting to Soil: Once roots are about an inch long, carefully transfer the cutting to a pot filled with well-draining potting soil. Water it gently to help the roots establish in the new medium.
-
Create a Humid Environment: Cover the new plant with a plastic bag or use a propagation dome to maintain humidity. Remove the bag or dome once a day to prevent mold growth.
Common Issues and Additional Tips:
-
Root Rot: Using stale water or not changing it frequently can lead to root rot. To avoid this, use fresh, room-temperature water each time you refill the jar.
-
Lack of Growth: If your umbrella plant cutting refuses to develop roots, ensure it’s receiving enough light and check that the cutting is not too large as larger cuttings may struggle.
-
Temperature and Light: Ensure your cutting is kept in an environment where the temperature remains above 60°F (15°C), as cooler temperatures can hinder growth.
By following these tips and instructions on how to propagate umbrella plant, you can successfully grow new plants from cuttings. With patience and care, you’ll have a thriving collection in no time.
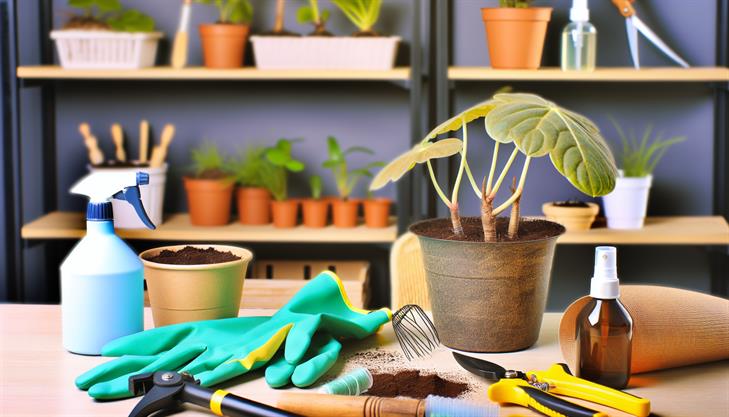
Essential Tools and Materials Needed for Propagation
Propagating an umbrella plant, also known scientifically as Schefflera, is a rewarding task that can easily be accomplished at home with the right tools and techniques. This guide will walk you through the process, ensuring successful propagation of your umbrella plant.
Tools and Materials Needed
Before you start, gather the following essential tools and materials:
- Sharp Pruning Shears or Scissors: For making clean cuts.
- Rooting Hormone (optional): Encourages quicker root development.
- Clean Container or Pot: For rooting the cuttings.
- Potting Mix or Soil: A well-draining soil is ideal.
- Plastic Bag or Cling Film: Helps create a humid environment.
- Watering Can or Spray Bottle: To keep soil moist.
- Healthy Umbrella Plant: Source of cuttings.
Steps for Propagating Umbrella Plant
1. Choose a Healthy Parent Plant
Select a vigorous, healthy umbrella plant. Look for branches that are sturdy and free of pests or disease. A healthy plant increases the probability of successful propagation.
2. Make the Cuttings
Use sharp pruning shears to take a cutting from the plant. Ideally, choose a stem that is about 4 to 6 inches long with several nodes (leaf joints). Make your cut just below a node, as this is where roots are most likely to sprout.
3. Prepare the Cuttings
Remove the leaves from the bottom half of the cutting. If desired, dip the cut end of the stem into rooting hormone to boost root growth, although this step is optional.
4. Plant the Cuttings
Fill a clean container or pot with well-draining potting mix. Insert the cutting into the soil, ensuring at least one node is covered. Firmly pat down the soil around the cutting to stabilize it.
5. Create a Humid Environment
Place a plastic bag or cling film loosely over the container to retain humidity, crucial for encouraging root development. Make sure it’s not touching the leaves; you can use sticks to support it if necessary.
6. Position and Watering
Place the pot in a warm location with bright, indirect sunlight. Keep the soil consistently moist but not waterlogged. Mist the cutting occasionally to maintain humidity levels.
7. Monitor Development
Check the cutting regularly for growth. In about four to six weeks, you should notice new roots forming. Tug gently to check root development; if there is resistance, roots have likely formed.
Common Issues and Tips
- Yellowing Leaves: This could be a sign of overwatering. Ensure that your pot has good drainage, and adjust watering accordingly.
- No Root Growth: Ensure the cutting is in a warm environment and receiving sufficient indirect light. Applying rooting hormone may help.
- Mold Growth: Excess humidity can cause mold. Air out the setup occasionally to prevent mold while maintaining necessary moisture.
Successfully propagating an umbrella plant requires attention to detail and patience. By following these steps and ensuring the right conditions, your new plant should thrive and grow into a healthy addition to your indoor garden. Remember, every plant is different, so don’t be discouraged if it doesn’t happen immediately. With practice and observation, you’ll hone your propagation skills.
Step-by-Step Instructions for Propagating Your Umbrella Plant
Propagating your umbrella plant, also known as Schefflera, can be a rewarding endeavor for plant enthusiasts. This versatile and hardy plant can be multiplied through simple propagation techniques. Below are step-by-step instructions on how to propagate an umbrella plant, along with helpful tips and advice to ensure success.
Step 1: Choose the Right Time and Tools
Before beginning the propagation process, it’s essential to choose the right time of year. The best time to propagate an umbrella plant is during spring or early summer when the plant is actively growing. Gather the necessary tools including a sharp, sterile knife or scissors, a small pot, well-draining potting mix, and a plastic bag.
Step 2: Select a Healthy Cutting
To propagate an umbrella plant, start by selecting a healthy stem cutting. Look for a branch that is mature but not too woody and has at least two or three pairs of leaves. Carefully cut a 4-6 inch long piece below a node, as this is where new roots will develop.
Step 3: Prepare the Cutting
Remove the lower leaves from the cutting, leaving two pairs of leaves at the top. This step is crucial because it helps direct the plant’s energy towards root development rather than sustaining too many leaves.
Step 4: Rooting the Cutting
Dip the cut end of the stem into rooting hormone powder to encourage faster root growth. This step is optional but can significantly increase the chances of successful propagation.
Step 5: Plant the Cutting
Fill a small pot with a well-draining potting mix that retains enough moisture but allows excess water to escape. Make a hole in the soil using your finger or a dowel, and gently insert the cutting into the hole. Firm the soil around the cutting to stabilize it.
Step 6: Create a Humid Environment
Cover the pot with a clear plastic bag to create a mini greenhouse effect, which maintains humidity and warmth—conditions favorable for root growth. Make sure the plastic does not touch the leaves. Use sticks or stakes to support the bag if necessary.
Step 7: Provide the Right Conditions
Place the covered pot in a warm location with bright, indirect light. Avoid direct sunlight, as this can scorch the cutting. Keep the soil slightly moist by misting it with water when it appears dry, but avoid overwatering, which could lead to rot.
Step 8: Monitor the Progress
Over the next few weeks, check the cutting regularly to ensure it remains healthy. After about four to six weeks, gently tug on the cutting. If you feel resistance, roots have likely developed, and you can begin acclimatizing the plant to normal indoor conditions by gradually reducing humidity.
Common Issues and Additional Tips
- Yellowing Leaves: This may indicate overwatering. Ensure your pot has good drainage, and only water when the top inch of soil feels dry.
- Stunted Growth: Insufficient light or nutrients can cause slow growth. Ensure the plant receives adequate indirect sunlight and consider feeding with a balanced houseplant fertilizer.
- Pest Management: Watch out for pests like aphids or spider mites. Wipe leaves with a damp cloth and use insecticidal soap if necessary.
By following these step-by-step instructions on how to propagate your umbrella plant, you can expand your indoor garden with ease. Remember, patience and observation are key. Each cutting may take a different amount of time to root, so don’t be discouraged if it takes a little longer than expected. With the right care, your new plant will thrive and bring add greenery to your space.
Tips for Ensuring Healthy Growth Post-Propagation
Propagating an umbrella plant, scientifically known as Schefflera, can be a gratifying process, resulting in more lush greenery for your space. Whether you are a seasoned gardener or just beginning, propagation can be straightforward if you follow these steps carefully. Here’s a detailed guide on how to propagate an umbrella plant effectively:
Step-by-Step Guide to Propagate an Umbrella Plant
Step 1: Choose the Right Time
The best time to propagate an umbrella plant is during the spring or early summer months when the plant is actively growing. You’ll have a higher success rate as the plant is naturally in its growth phase.
Step 2: Gather Your Materials
To propagate an umbrella plant, you’ll need:
- A healthy parent Schefflera plant
- Sharp, clean pruning shears
- Rooting hormone (optional but recommended)
- A small pot with drainage holes
- Potting soil
- A plastic bag or clear plastic wrap
Step 3: Select a Healthy Stem
Choose a vigorous, healthy stem from the umbrella plant with a few leaves on it. Ensure there is no sign of disease or pests.
Step 4: Cut the Stem
Using your pruning shears, cut a 4-6 inch section just below a node (where a leaf joins the stem). This node is crucial, as it will help develop roots.
Step 5: Prepare the Cutting
Remove the lower leaves, leaving a few at the top. Dipping the cut end into rooting hormone can enhance root development but is not strictly necessary.
Step 6: Plant the Cutting
Fill a small pot with a well-draining potting mix. Make a small hole with your finger or a stick and insert the cutting, ensuring the first leaf node is slightly buried. Lightly pat the soil around the cutting to secure it.
Step 7: Create a Humid Environment
To promote rooting, cover the pot with a plastic bag or plastic wrap. This creates a mini-greenhouse effect, maintaining humidity which is ideal for root growth. Ensure the plastic doesn’t touch the leaves by using sticks or small stakes as support.
Step 8: Provide Proper Care
Place the pot in a warm, bright location with indirect light. Direct sunlight can be too harsh for cuttings. Water moderately to keep the soil moist but not soggy, as too much water can lead to rot.
Troubleshooting Common Issues
-
Yellowing Leaves: This can indicate overwatering. Make sure your pot has adequate drainage and the soil is drying out between watering sessions.
-
No Root Growth: Ensure the cutting is in a warm and humid environment. If needed, try again with fresh cuttings and consider applying rooting hormone.
Additional Tips
- Propagation Success Rate: Not every cutting will take root successfully. To improve your chances, consider taking multiple cuttings.
- Patience is Key: Rooting can take several weeks. Resist the urge to check for roots frequently as disturbing the cutting can impede growth.
- Prevent Pests: Regularly check your cuttings for aphids or mites, and address any worries promptly.
Propagating umbrella plants can be a rewarding way to cultivate new plants and share them with friends and family. By following these steps and tips, you’ll likely see healthy new growth sprouting from your effort.
Troubleshooting Common Problems in Umbrella Plant Propagation
Propagating an umbrella plant, also known as Schefflera, can be a rewarding gardening project. With the right approach, you can successfully grow new plants from stem cuttings or seeds. Here’s a step-by-step guide to help you propagate your umbrella plant efficiently, along with tips for troubleshooting common problems and maximizing your success.
Step-by-Step Guide to Propagate Umbrella Plant
Propagation from Stem Cuttings
-
Preparation
- Tools and Materials: Gather a clean pair of gardening shears, a small pot, well-draining potting soil, and rooting hormone (optional).
- Ideal Time: The best time to take cuttings is in the spring or early summer when the plant is actively growing.
-
Cutting Selection
- Choose a healthy stem from the mother plant, preferably with 4-6 leaves.
- Make a clean cut about 4-6 inches long just below a leaf node as this is where roots will form.
-
Prepare the Cutting
- Remove the leaves from the bottom half of the cutting to reduce water loss.
- Dip the cut end into rooting hormone to encourage root development, although this step is optional.
-
Planting the Cutting
- Fill a small pot with a mix of peat and perlite or any well-draining potting soil.
- Insert the cutting about 2 inches deep into the soil.
- Firmly pat the surrounding soil to ensure it holds the cutting upright.
-
Creating the Right Environment
- Water the soil gently to make it evenly moist — not soggy.
- Cover the cutting with a plastic bag or a clear plastic container to create a miniature greenhouse, which helps retain humidity.
- Place the pot in a warm location with indirect sunlight.
-
Care and Monitoring
- Check the cutting periodically, ensuring the soil remains moist but not overly wet to prevent root rot.
- Remove the cover once you see new growth, indicating root formation, generally within 4-6 weeks.
Propagation from Seeds
-
Sourcing Seeds
- Use fresh seeds from a mature umbrella plant or purchase from a reputable source to ensure viability.
-
Sowing Seeds
- Fill a pot or seed tray with a light, well-draining potting mix.
- Sow seeds on the surface, lightly covering them with a thin layer of soil.
- Gently water to moisten the substrate.
-
Environment Control
- Place the seed tray in a warm, bright location without direct sunlight.
- Maintain consistent moisture by misting regularly.
- A plastic cover can help maintain soil moisture and warmth, aiding germination.
-
Germination and Growth
- Seedlings typically appear in 4-8 weeks.
- Once established, remove the plastic cover to harden seedlings before transplanting.
Troubleshooting Common Problems
- Root Rot: Often caused by overwatering or poorly draining soil. Ensure your pot has drainage holes and allow the soil to dry slightly between waterings.
- Poor Rooting in Cuttings: Temperature and light are crucial. Keep the cuttings warm and ensure they have indirect light. Use a rooting hormone to enhance success rates.
- Seedlings Failing to Germinate: Ensure seeds are fresh and the planting medium is kept consistently moist but not waterlogged. Optimal temperatures for germination should be maintained.
Additional Tips
- Humidity is Key: Maintaining high humidity around the cuttings or emerging seedlings can accelerate root development and health.
- Pest Control: Keep an eye out for pests like aphids or spider mites, as they can weaken the plant. Use neem oil or insecticidal soap as a preventative measure.
With these guidelines and proactive troubleshooting, you’ll be well on your way to successfully propagating your umbrella plant and enjoying its lush foliage for years to come.
In conclusion, successfully propagating an umbrella plant is a rewarding and straightforward process that can increase your indoor garden with lush greenery. By choosing the right method, whether it’s through cuttings, division, or air layering, you can expand your collection of these beautiful and resilient plants. Remember to provide the necessary conditions for growth, such as using well-draining soil, maintaining adequate humidity, and ensuring they receive enough indirect sunlight.
By applying these techniques and tips, you’ll be able to observe your new plants thriving in their environment, adding a touch of nature’s elegance to your living space. Lastly, a final tip: consider documenting your propagation journey by taking notes or pictures. This will not only help you track the progress but also refine your skills and share insights with fellow plant enthusiasts. Happy gardening!