
If you’re a plant enthusiast with a penchant for captivating greenery, you’ve likely come across the exquisite Hoya plant, affectionately known as the "Wax Plant." Renowned for their striking foliage and perfumed blooms, Hoyas are adored for their aesthetic charm and low-maintenance nature. The good news? You don’t need to rely on scarce nursery supplies to cultivate your own Hoya collection. By mastering the art of propagation, you can expand your Hoya family right from the comfort of your home.
In this comprehensive guide, we’ll walk you through the steps of propagating Hoya plants, revealing insider tips that seasoned horticulturists swear by. Understanding how to propagate these charming plants is pivotal, not only for satisfying your own plant passion but also for gifting friends with botanical treasures. From elevating your gardening skills to fostering personal satisfaction and sustainable green spaces, this guide promises invaluable insights. So, grab your gardening gloves, and let’s embark on this rewarding journey to multiply nature’s wonders!
Understanding the Basics of Hoya Propagation
Propagating a hoya plant is a rewarding process that allows you to expand your collection of these captivating, waxy-leafed plants. While there are several methods to propagate hoyas, the most popular and successful technique is through stem cuttings. Below is a detailed step-by-step guide to help you master how to propagate a hoya plant effectively.
Step-by-Step Instructions
1. Choosing the Right Time:
The best time to propagate a hoya plant is during the growing season, preferably in spring or early summer. This is when the plant has the most energy to foster new growth.
2. Selecting a Healthy Cutting:
Begin by selecting a healthy, mature hoya plant. Look for a stem that is at least 4 to 6 inches long with a few leaves and at least two nodes—a node is a small bump from where roots and new growth will sprout.
3. Making the Cut:
Using a clean, sharp pair of scissors or pruning shears to prevent infection, cut the stem just below a node. Ensure the cutting is free of any pests or diseases which may hinder propagation.
4. Preparing the Cutting:
Remove the lower leaves from the cutting, leaving two or three leaves at the top. This helps the cutting focus its energy on root development rather than sustaining leaves.
5. Rooting Medium Options:
You have a choice between rooting your cutting in water or soil:
-
In Water: Place the cutting in a jar of water, ensuring that the nodes are submerged. Change the water every 2-3 days to prevent stagnation and promote root health. Place the jar in a warm, bright location, but away from direct sunlight. You’ll notice roots beginning to form in about 4 weeks.
-
In Soil: Alternatively, you can plant the cutting directly in a well-draining soil mix, rich in perlite or vermiculite to improve aeration. Moisten the soil and create a small hole to insert the cutting, ensuring the nodes are buried.
6. Maintaining Ideal Conditions:
To encourage rooting, maintain consistent moisture, warmth, and humidity. Covering the plant with a plastic bag can help create a greenhouse effect, keeping the humidity high, but ensure you allow some ventilation to prevent mold growth.
7. Transplanting:
Once the roots are approximately 1-2 inches long, they are ready for transplantation. Move water-grown cuttings to soil, ensuring to handle the roots gently to avoid damage. Plant the rooted cutting in a pot with appropriate size and drainage.
Troubleshooting and Tips
-
Lack of Rooting: If your cutting is not rooting in water, try transitioning to the soil method, as some hoya varieties respond better to one medium over the other.
-
Yellowing Leaves: This can occur from overwatering or excessive light exposure. Adjust the environment by reducing watering frequency or relocating the plant.
-
Humidity Boost: Use a humidity tray or mist the cuttings regularly if the air in your home is too dry.
Additional Advice
Consider using a rooting hormone on the cut end to speed up root development and increase success rates. Furthermore, be patient, as hoya propagation can take several weeks to a few months.
By following these steps and tips, you’ll be well on your way to successfully propagating your hoya plants, expanding your indoor garden with these beautiful and resilient botanicals.
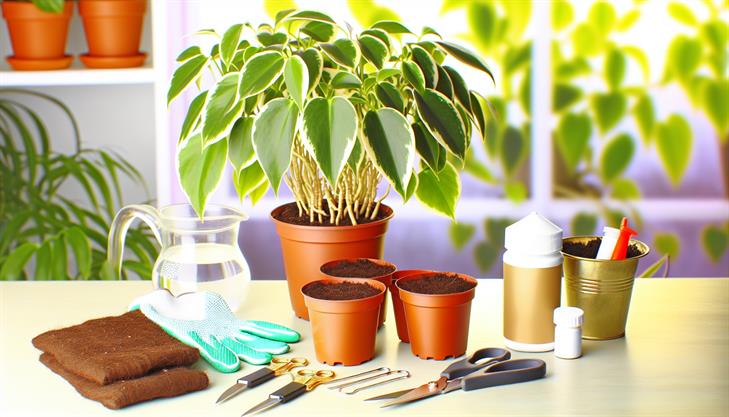
Tools and Materials Needed for Hoya Plant Propagation
Propagating a Hoya plant can be a rewarding process that allows you to expand your collection or share these beautiful plants with others. To ensure success with Hoya plant propagation, it’s essential to be prepared with the right tools, materials, and knowledge.
Tools and Materials Needed
-
Sharp, Clean Scissors or Pruning Shears: Using sharp and sterilized scissors helps ensure a clean cut on the plant, reducing the risk of infections in your Hoya.
-
Rooting Hormone (Optional): While not strictly necessary, a rooting hormone can increase the chances of successful propagation by encouraging faster root development.
-
Sterile Potting Medium: A well-draining mixture is crucial. A mix of perlite and orchid bark with sphagnum moss or a specialized potting mix for succulents can work well.
-
Small Pots or Containers: Choose containers with drainage holes to prevent waterlogging, which can cause root rot.
-
Plastic Bags or Cling Film: These help create a mini greenhouse effect, keeping humidity levels high around the cutting.
-
Water: Clean, room-temperature water is essential for keeping your cutting hydrated during the water propagation method.
Step-by-Step Instructions for Propagating Hoya Plants
-
Selecting the Cutting: Choose a healthy vine with several leaves. Ideally, the cutting should be about 4-6 inches long and include a node—a small bump from where roots emerge.
-
Making the Cut: Use sharp scissors to make a clean cut just below a node. This node will be the point of root growth once you plant it.
-
Preparing the Cutting:
- Optionally dip the cut end in rooting hormone to promote root development.
- Remove leaves that are too close to the cut end to prevent them from rotting when submerged in soil or water.
-
Choosing a Propagation Method: There are two primary methods—water propagation or soil propagation.
-
Water Propagation: Place the cutting in a jar of clean water, ensuring that the node is submerged while the leaves remain above water. Change the water every few days to keep it fresh and clear. It can take a few weeks for roots to develop.
-
Soil Propagation: Plant the cutting in a pre-moistened well-draining potting mix. Cover the pot with a plastic bag or cling film to maintain humidity, creating a greenhouse effect. Make sure the bag doesn’t touch the leaves to avoid mold issues.
-
-
Setting Up the Environment: Place the cutting in a bright, indirect light location. Too much direct sunlight can scorch the cutting, while too little light can impede rooting.
-
Monitoring and Maintenance: Keep the humidity high and soil slightly moist but not waterlogged. For water propagation, watch for root growth; for soil propagation, gently tug on the plant after a month to check root development.
Common Issues and Troubleshooting
- Yellowing Leaves: This typically indicates overwatering. Adjust the watering frequency or ensure your container has adequate drainage.
- No Root Growth: If roots are slow to form, ensure the cutting is getting enough light and consider using a rooting hormone to catalyze the process.
- Mold or Mildew: High humidity can sometimes cause mold on leaves or soil. Ensure adequate air circulation and consider reducing the use of plastic coverings.
Additional Tips
- Propagation works best during the growing season, typically in spring or early summer when the plant’s metabolic processes are most active.
- Be patient, as root development can take time. Avoid disturbing the cutting unnecessarily to increase your chances of successful propagation.
By following these steps and ensuring you have the right tools and materials, you’ll increase your chances of successfully propagating a Hoya plant, allowing you to enjoy their mesmerizing beauty in several parts of your home or share with friends.
Step-by-Step Guide to Propagating Your Hoya Plant
Propagating a hoya plant is a rewarding process that can expand your indoor garden with minimal effort. Follow these step-by-step instructions to successfully propagate your hoya plant and enjoy the beauty of its waxy leaves and delicate flowers.
Step 1: Choose the Right Time and Tools
Start by selecting the optimal time for propagation. Spring and early summer are the best seasons since hoya plants are in their active growing phase. Gather your essential tools: a pair of sharp sterilized scissors or pruning shears, a clean container or pot, fresh potting mix, and rooting hormone (optional).
Step 2: Select the Perfect Cutting
Identify a healthy, mature hoya stem with multiple leaves. The cutting should be about 4 to 6 inches long and have at least two nodes, as nodes are key to root development. Nodes are the spots on the stem where leaves and roots can sprout.
Step 3: Prepare the Cutting
Using your sterilized scissors, make a clean cut just below a node. Remove the leaves closest to the bottom node but leave the top few leaves intact to enable photosynthesis, which supports root growth. Dip the cut end in rooting hormone to encourage root development, although this step is optional for hoyas.
Step 4: Plant the Cutting
Fill your container with a well-draining potting mix, such as a combination of orchid bark, perlite, and peat moss. Insert the hoya cutting into the soil, ensuring at least one node is below the surface. Firm the soil gently around the base to secure the cutting in place.
Step 5: Create the Ideal Environment
To foster root growth, place your potted cutting in a warm, humid environment with indirect sunlight. You can cover the container loosely with a plastic bag or place it in a propagation box to maintain humidity, avoiding direct contact with the plant, which could lead to mold.
Step 6: Watering and Maintenance
Keep the soil slightly moist but not waterlogged. Water sparingly to prevent root rot, allowing the topsoil to dry between waterings. Within a few weeks, you should start noticing growth, indicating successful propagation.
Step 7: Transplant and Care
Once the cutting has developed a stable root system, noticeable as resistance to gentle tugs, transplant the young plant to a larger pot with a general-purpose houseplant mix. Continue to provide bright, indirect light and consistent humidity to support the plant’s transition and growth.
Common Challenges and Tips
- Yellowing Leaves: This may be due to overwatering. Ensure proper drainage to prevent waterlogging.
- Slow Rooting: If rooting is slow, placing the cutting in a warm space can help; some enthusiasts use heat mats for added warmth.
- Leaf Drop: Low humidity levels or too much sun can cause this. Maintain proper humidity and avoid direct sunlight exposure.
By following these steps and incorporating these tips, you can successfully propagate your hoya plant and enjoy the lush greenery and fragrant blooms it brings. Replace any struggling cuttings with fresh ones, and remember patience is key in plant propagation.
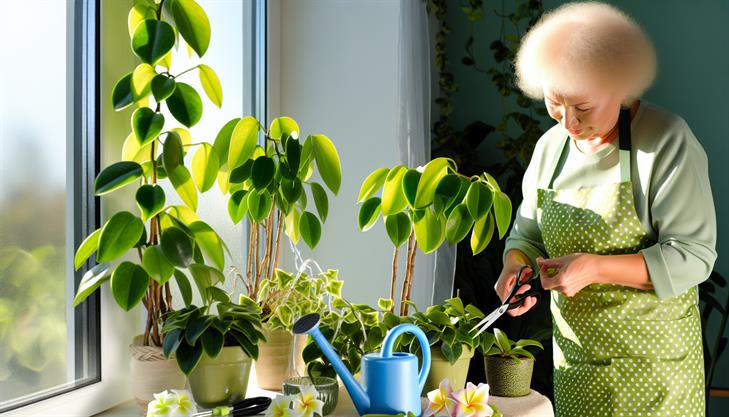
Tips for Ensuring Healthy Hoya Growth
Propagating a hoya plant can be a rewarding and straightforward process, allowing you to expand your collection or share these beautiful plants with friends. Hoyas, with their lush, waxy leaves and charming blooms, are quite easy to propagate through stem cuttings. Here’s a detailed, step-by-step guide on how to propagate hoya plants effectively.
Step-by-Step Guide to Propagating Hoya Plants
-
Select a Healthy Parent Plant:
Begin by choosing a robust hoya plant with lush foliage and no signs of disease or pest infestation. Healthy plants produce healthier cuttings, which are more likely to root successfully. -
Prepare Your Tools:
Use a clean, sharp pair of scissors or pruning shears to take cuttings. Sterilizing your tools with rubbing alcohol or a bleach solution prevents the spread of diseases. -
Obtain the Stem Cuttings:
- Choose the Right Stem: Look for a vine that has at least two to three leaves and is about 4-6 inches long. Cut just below a node, which is where roots will form.
- Avoid Flowering Stems: It’s best to select a non-flowering stem as they tend to root more readily than stems with flowers.
-
Prepare the Cuttings:
- Remove Lower Leaves: Carefully strip off the leaves from the lower half of your cutting to expose the nodes.
- Use Rooting Hormone (Optional): Dip the cut end into a rooting hormone powder, which can help accelerate root development but isn’t strictly necessary.
-
Plant the Cuttings:
- In Water: Place the cut end of your hoya cutting into a jar of water, ensuring that at least one node is submerged. Change the water every few days to prevent stagnation, and place the jar in a warm, bright spot out of direct sunlight.
- In Soil: Alternatively, plant the cutting in a pot with well-draining soil. Use a mix of perlite and peat moss or a cactus potting mix to encourage drainage. Water the cutting lightly and cover it with a plastic bag or dome to maintain humidity.
-
Wait for Roots to Develop:
- Monitor Environment: Keep the temperature consistently warm and the humidity high; this may take about 2-6 weeks. Roots should begin to emerge from the nodes.
- Signs of Success: Look for new leaf growth, which indicates that roots have established and the plant can be potted up.
Common Issues and Tips
- Rotting Cuttings: Overwatering or overly wet conditions can cause the cuttings to rot. Ensure proper drainage and avoid letting leaves sit in water.
- Lack of Growth: If cuttings are not rooting, check that they have sufficient warmth. Temperatures around 70-75°F (21-24°C) are ideal.
- Humidity: Hoyas love humidity, so if propagating in soil, occasionally mist the cuttings or keep them in a greenhouse environment if possible.
Additional Advice
- Patience is Key: Hoya plants may take a little time to root, so patience and consistent care are essential.
- Experiment with Methods: Don’t hesitate to try both water and soil propagation to see which method works better for your conditions.
- Label Your Cuttings: If propagating more than one type of hoya, label them to avoid confusion as they grow.
By following these steps and addressing potential issues, you’ll be well on your way to successfully propagate hoya plants, thereby enjoying the process and benefits of growing these delightful plants.
Troubleshooting Common Propagation Issues.
Propagating a hoya plant can be a rewarding experience for gardening enthusiasts looking to expand their collection. Known for their waxy leaves and fragrant blooms, hoyas are relatively easy to propagate through cuttings. Here’s a step-by-step guide on how to propagate a hoya plant, along with troubleshooting tips for common propagation challenges.
Step-by-Step Guide to Propagating Hoya Plants
1. Select a Healthy Parent Plant
Choose a well-established hoya with healthy, robust growth. Look for stems with several leaves and nodes, as these will enhance your chance of successful propagation.
2. Prepare Your Tools
Gather the necessary tools: sharp, sterile scissors or pruning shears, a small pot, well-draining potting mix (like a peat and perlite blend), and a transparent plastic bag or container to create a mini greenhouse effect.
3. Take the Cutting
Select a stem section with at least two nodes and cut it just below one of the nodes. Each cutting should ideally be 3 to 6 inches long. Remove the leaves from the lower node, leaving a couple of leaves at the top.
4. Rooting in Water (Optional)
If you prefer to see root development, you can place the cutting in a jar of water, ensuring the lower node is submerged. Change the water every couple of days to prevent stagnation and bacterial growth. Roots should begin developing within 2-4 weeks.
5. Rooting in Soil
Alternatively, plant the cutting directly into a pot containing your well-draining potting mix. Bury the cutting deep enough to cover the node. Water the soil lightly, making sure it’s evenly moist but not soggy.
6. Create a Humid Environment
Place a clear plastic bag or container over the pot to maintain humidity. Ensure that there is enough space around the cutting for air circulation, which helps prevent mold and rot. Keep the plant in a warm location with indirect sunlight.
Troubleshooting Common Propagation Issues
-
Problem: Cuttings Not Rooting
- Solution: Ensure that you’re using fresh and healthy cuttings. Make sure that the cutting includes at least one node with leaves. Lightly wound the base of the cutting if roots aren’t forming, and use a rooting hormone to stimulate root growth.
-
Problem: Mold or Rot
- Solution: High humidity can sometimes lead to mold or rot. Ensure that the soil is moist but not waterlogged and avoid sealing the plastic covering completely, allowing for airflow. Check that the container is not in direct sunlight, which can exacerbate these issues due to excessive heat buildup.
-
Problem: Yellowing Leaves
- Solution: Yellowing can be a sign of stress from too much direct light or overwatering. Ensure your hoya cutting is in a location with bright, indirect light, and check your watering schedule.
Additional Tips
- Patience is Key: Hoya cuttings can take several weeks to months to establish, depending on the species and environmental conditions.
- Temperature Matters: Ensure the environment is consistently warm, ideally between 65-75°F (18-24°C), as hoya cuttings root best in stable, warm conditions.
- Select the Right Potting Medium: Using a light and airy medium like a peat-perlite mix will improve aeration and drainage, crucial for new roots to avoid rot.
By following these steps and guidelines, you’ll have a better chance of successfully propagating your hoya plant and enjoying new growth for seasons to come. Happy gardening!
In conclusion, propagating a Hoya plant can be a rewarding and exciting endeavor for both novice and experienced gardeners. By understanding the unique requirements of Hoya propagation, such as choosing the right cutting, ensuring optimal growing conditions, and maintaining consistent care, you can successfully grow a flourishing collection of these beautiful, waxy-leaved plants. Remember to utilize sterilized tools when taking cuttings, provide the cuttings with a warm and humid environment, and be patient as they develop their root systems.
As you venture into propagating your own Hoya plants, don’t hesitate to experiment with different varieties and propagation techniques, such as water propagation or using various rooting mediums, to find what works best for your garden.
A final tip: consider documenting your propagation journey with notes and photos. This not only enhances your learning experience but can also serve as a reference for future propagation projects, and potentially ignite a passion for sharing your newfound expertise with fellow plant enthusiasts. Happy propagating!