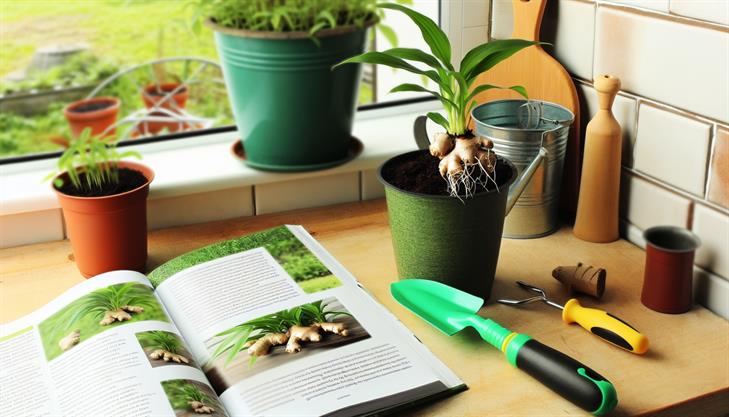
Have you ever considered transforming your indoor space into a lush sanctuary that not only beautifies your home but also enriches your culinary adventures? Imagine the aromatic zing and earthy spice of freshly harvested ginger right at your fingertips. Growing ginger indoors isn’t just for seasoned gardeners or plant enthusiasts—it’s an attainable and rewarding endeavor for anyone willing to get their hands a little dirty. In today’s fast-paced world, where finding time for gardening can be a luxury, cultivating this versatile root indoors effortlessly creates a sustainable source of flavor and health benefits all year round. This guide will walk you through each step of the process, equipping you with the knowledge and confidence needed to embark on this green-thumb journey. Dive in and discover how to turn your home into a verdant oasis and enjoy the freshest ginger while basking in the joy of nurturing your own natural delights.
Choosing the Right Ginger Variety for Indoor Growth
Growing a ginger plant indoors can be a rewarding experience, offering fresh, homegrown ginger at your fingertips. Here’s a complete guide to help you choose the right ginger variety and successfully cultivate it within your home environment.
Selecting the Right Ginger Variety
When selecting a ginger variety for indoor growth, it is essential to focus on types that are well-suited to containers and smaller spaces. Commonly, the Zingiber officinale variety is popular due to its culinary uses and manageable growth indoors.
Step-by-Step Guide to Growing Ginger Indoors
-
Choose Your Rhizome:
- Begin by selecting a fresh ginger root, known as a rhizome, from a grocery store or farmer’s market. Look for one that’s plump, firm, and has visible eyes or buds, as these are potential growth points.
-
Soak and Prep:
- Soak the ginger rhizome in warm water overnight to remove potential growth inhibitors. This step encourages faster sprouting.
-
Prepare the Pot:
- Use a wide, shallow pot with good drainage holes. Ginger grows horizontally, so the container’s width is more crucial than its depth. Fill it with well-draining potting mix rich in organic matter.
-
Planting:
- Plant the rhizome about 2-3 inches into the soil, with the buds facing upwards. Ensure each piece is adequately spaced if planting multiple segments, as they will need room to spread.
-
Placement and Environment:
- Position the pot in a warm spot with indirect sunlight. A windowsill or a room with filtered light works well. Ideal temperatures range between 70°F to 80°F.
-
Watering:
- Keep the soil consistently moist but not waterlogged. Overwatering can lead to mold and root rot, common issues when growing ginger indoors. A humidity tray or a low-flow dripper system can help maintain adequate moisture without excess.
-
Fertilization:
- Use a balanced fertilizer every few weeks during the growing season. Opt for an organic fertilizer if you plan to consume the ginger.
-
Managing Growth:
- As shoots begin to appear, you may need to thin them out to prevent overcrowding, ensuring each plant receives enough nutrients and space. Trim any yellowing leaves to encourage overall health.
Troubleshooting Common Issues
-
Lack of Growth:
- If your ginger plant isn’t showing signs of growth, ensure it receives enough warmth and moisture. Inadequate sunlight can also restrict growth; consider using grow lights if natural light is insufficient.
-
Pests and Diseases:
- Watch out for pests like spider mites and aphids. Natural insecticidal soaps or neem oil can effectively manage infestations. Ensure good air circulation to prevent fungal diseases.
Additional Tips
-
Harvesting:
- Ginger typically takes 8-10 months to mature indoors. Harvest by carefully lifting sections of the rhizome, leaving some parts to continue growing.
-
Seasonal Considerations:
- While ginger can grow year-round indoors, it may require more light during winter months, making supplemental lighting beneficial.
By following these steps and addressing common indoor growth issues, cultivating ginger in your home can be an easy and fruitful endeavor. Whether you’re looking to spice up your culinary experiments or explore the plant’s health benefits, home-grown ginger offers many advantages right at your fingertips.
Preparing the Perfect Pot and Soil for Ginger
Growing a ginger plant indoors can be a rewarding experience, offering both ornamental beauty and fresh, flavorful roots for culinary use. To successfully cultivate ginger indoors, it’s essential to carefully prepare the pot and soil. Follow these step-by-step instructions to set up an ideal environment for your ginger plant.
Step 1: Selecting the Right Pot
The first step in growing a ginger plant indoors is choosing an appropriate container. Ginger roots, or rhizomes, grow horizontally, so a wide and shallow pot is preferable. Aim for a container that is at least 12 inches in diameter and 10 to 12 inches deep. Ensure it has adequate drainage holes to prevent waterlogging, which can lead to root rot.
Step 2: Choosing the Best Soil
Ginger thrives in rich, loamy soil with excellent drainage. Start with a quality potting mix, and enhance its properties by mixing in some sand or perlite to further improve drainage. Ginger prefers a slightly acidic to neutral pH level, ideally between 6.0 and 6.5. You can amend the soil with compost or well-rotted manure to boost its nutrient content, providing a fertile environment for your ginger to grow.
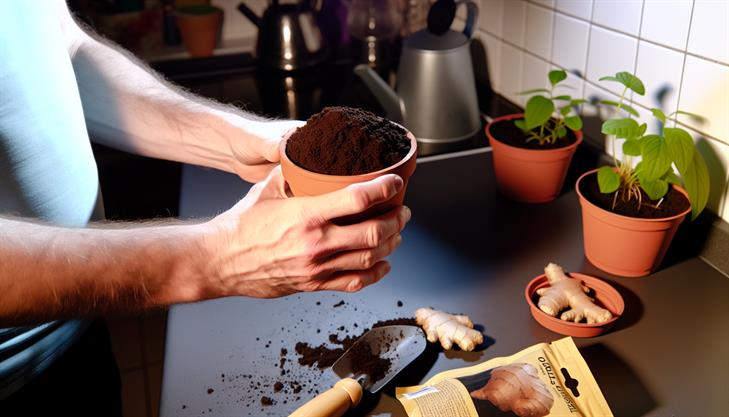
Step 3: Planting the Ginger Rhizome
To plant ginger indoors, begin by selecting fresh, healthy ginger rhizomes from your local grocery store or garden center. Look for firm pieces with visible "eyes" or buds. Soak the rhizomes in water overnight to stimulate growth and then cut them into 2-3 inch pieces, ensuring each piece has at least one eye.
Fill your chosen pot with the prepared soil mix, leaving a gap of about one inch from the top. Place the rhizome pieces horizontally on the soil surface, with the buds facing up. Cover the rhizomes with 1-2 inches of soil and water lightly.
Step 4: Ensuring Optimal Growing Conditions
For ginger to flourish indoors, it requires warm temperatures, ideally between 70°F and 85°F. Position the pot in a location where it will receive indirect sunlight, like a bright windowsill that isn’t exposed to harsh midday sun, which can scorch the plant.
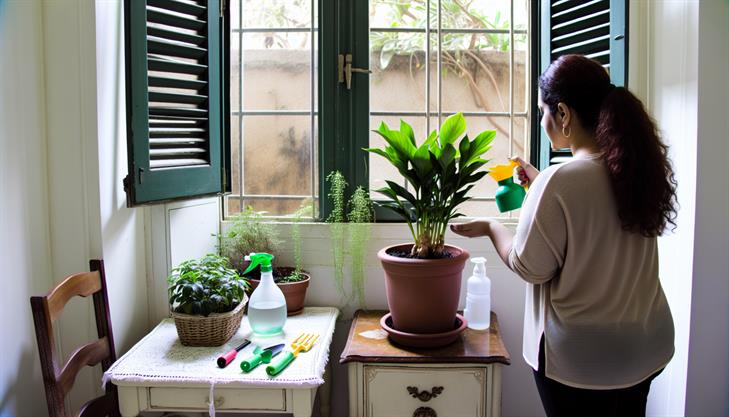
Humidity is crucial for ginger plant development. If your indoor air is dry, consider using a humidity tray or a room humidifier. Regularly misting the leaves can also help maintain the necessary moisture level.
Step 5: Watering and Fertilizing Practices
Ginger demands consistent moisture but dislikes being waterlogged. Water the plant when the top inch of soil feels dry to the touch. During active growth periods in spring and summer, feed your ginger plant with a balanced liquid fertilizer every month to promote vigorous growth. Reduce watering and cease fertilization in winter as the plant enters dormancy.
Common Issues and Tips
-
Pests: Watch out for common indoor plant pests like spider mites and aphids. These can be managed with insecticidal soap or neem oil.
-
Overwatering: Ensure you’re not overwatering, as this can lead to root rot. A well-draining soil mix is crucial to prevent this.
-
Growth Stagnation: If ginger isn’t growing as expected, check for adequate sunlight, temperature, and humidity levels. Adjusting these might rejuvenate growth.
Growing ginger indoors is a relatively easy process with the right setup. By providing the perfect pot and soil conditions, you can enjoy fresh ginger at home year-round. Ensure you monitor your plant’s needs and adjust as necessary to keep it thriving.
Planting Ginger and Providing Ideal Growing Conditions
Growing a ginger plant indoors can be a rewarding endeavor, providing a constant supply of fresh ginger that’s perfect for culinary and medicinal uses. Follow these steps to ensure your indoor ginger plant thrives, even if space or natural light is limited.
Selecting the Right Ginger Root
Start by obtaining a healthy, organic ginger root, which is sometimes labeled as "rhizome." Choose plump roots that have tight skin and, ideally, visible eye buds, similar to those on potatoes.
Preparing the Ginger Root
-
Soak the Ginger: Begin by soaking the ginger root overnight in lukewarm water. This helps to remove any growth-inhibiting chemicals that might be present and prepares the root for planting.
-
Cut the Rhizome: If your ginger root has multiple buds, you can cut it into segments, ensuring each piece has at least one or two buds. Let the pieces dry for a day or two to form a protective callus over the cut areas, reducing the risk of root rot.
Planting Ginger Indoors
-
Choose the Right Container: Use a wide, shallow pot with sufficient drainage holes. Ginger grows horizontally, so a wider space allows more room for the rhizome to spread out.
-
Select the Ideal Soil Mix: A rich, well-draining potting mix is essential. You can enhance the soil by mixing in some perlite or sand to improve drainage and prevent waterlogging.
-
Plant the Ginger: Place each ginger piece in the soil with the buds facing upward, about an inch below the soil surface. Space pieces 6-8 inches apart if planting multiple segments in a large container.
-
Water Lightly: Moisten the soil gently without soaking it. Too much moisture can lead to root rot, which is a common issue when growing ginger indoors.
Creating the Ideal Conditions
-
Light: Ginger thrives in indirect sunlight. If natural light is insufficient, consider using grow lights to simulate the ideal growing conditions. Place the pot where it receives bright, indirect sunlight for several hours a day.
-
Temperature: Maintain indoor temperatures between 75°F and 85°F. Ginger does not tolerate cold drafts or sudden temperature changes well.
-
Humidity: Keep the environment humid, as ginger naturally grows in tropical climates. Use a humidifier or regularly mist the plant to enhance humidity levels.
Caring for Your Ginger Plant
-
Watering: Regularly check the soil moisture, ensuring it remains lightly moist. Allow the top inch of soil to dry out between waterings.
-
Fertilizing: Feed your ginger plant with a balanced liquid fertilizer every few weeks during the growing season, which typically stretches from spring through fall.
-
Monitoring for Pests: Indoor plants can attract pests like spider mites and aphids. Inspect the leaves regularly and treat infestations with gentle insecticidal soap if needed.
Harvesting Your Ginger
Ginger takes several months to mature, often between 8 to 10 months. You can begin harvesting when the leaves start to yellow and die back. Pull the plant gently from the pot, harvest some of the rhizome, and replant a section to continue growing.
By providing the right conditions and care, you can successfully grow a ginger plant indoors, generating a sustainable supply of fresh ginger. Whether you have a sunny kitchen window or a cozy apartment corner, these steps guide you to enjoy this versatile plant’s benefits at home.
Tips for Maintaining Healthy Ginger Plants Indoors
Growing ginger plants indoors can be a rewarding experience, offering both culinary benefits and a touch of greenery to your home. Here’s a comprehensive guide with step-by-step instructions, tips, and advice to help you successfully cultivate a thriving ginger plant indoors.
1. Selecting the Right Ginger Root
Begin by selecting a fresh ginger root (rhizome) from the grocery store or a gardening center. Look for a plump piece with firm skin and noticeable growth buds or "eyes," which are the points from which the plant will sprout. If possible, choose an organic ginger root to avoid growth retardants commonly used on conventional produce.
2. Preparing the Ginger for Planting
Before planting, it’s advisable to soak the ginger root in warm water for a few hours or overnight. This process helps remove any growth inhibitors applied to the root and hydrates it, promoting faster sprouting.
3. Choosing the Right Container
Ginger plants thrive in wide, shallow containers because they grow horizontally. Opt for a pot with ample drainage holes to prevent waterlogging, which can lead to root rot. A container at least 12 inches deep and 12 inches wide is ideal for optimal growth.
4. Preparing the Soil
Use a light, rich potting mix that is well-draining. A mixture of potting soil, sand, and compost can mimic ginger’s natural growing conditions. Fill the container with soil, leaving a couple of inches at the top.
5. Planting the Ginger
To plant the ginger root, gently press it into the soil with the buds facing upwards. Cover with a thin layer of soil, about 1-2 inches deep. Space out multiple pieces of root if using a wider pot, ensuring each piece has room to grow.
6. Creating the Right Environment
Place the pot in a warm, humid area with indirect sunlight. Ginger thrives in temperatures between 70-85°F (21-29°C). If your indoor environment is dry, consider using a humidity tray or misting the plant regularly. Avoid direct sunlight, which can scorch the leaves.
7. Watering and Feeding
Water the ginger plant regularly, keeping the soil moist but not soggy. During the growing season (spring and summer), fertilize the plant every few weeks with a balanced, all-purpose fertilizer to encourage vigorous growth.
8. Monitoring Growth and Troubleshooting
Ginger plants typically take about 2-3 weeks to sprout and can take nearly a year to mature indoors. Be patient and watch for signs of growth. Common issues include yellowing leaves, often a sign of overwatering, or slow growth due to insufficient light or humidity.
9. Harvesting the Ginger
Harvest time usually arrives when the leaves turn yellow and start to die back. Carefully dig up the ginger root, wash it, and then cut off what you need, replanting a segment with growth buds if desired to keep a continuous cycle.
Additional Tips
- Pest Control: Keep an eye out for common houseplant pests like aphids or spider mites. Regularly inspect and rinse the foliage if pests are detected.
- Winter Care: During the dormant winter months, reduce watering and avoid fertilizing to let the plant rest.
- Propagating New Plants: You can propagate ginger by simply cutting off a portion of the root with at least one bud and planting it fresh.
By following these comprehensive steps, maintaining a healthy ginger plant indoors can be a simple and enjoyable process. With the right setup and care, you’ll have a bountiful supply of fresh ginger at your fingertips.
Troubleshooting Common Indoor Ginger Growing Issues
Growing a ginger plant indoors can be a rewarding endeavor, providing you with a continuous supply of this aromatic spice. Here’s a step-by-step guide along with tips on troubleshooting common indoor ginger growing issues.
Getting Started with Indoor Ginger Cultivation
-
Choosing the Right Rhizome: Begin with purchasing a fresh ginger rhizome from a garden store or an organic market. Look for plump, firm pieces with well-developed “eyes” (growth buds).
-
Soaking the Rhizome: Before planting, soak the rhizome in warm water overnight to remove any growth inhibitors often applied to edible ginger.
-
Container and Soil Preparation: Choose a wide, shallow pot with good drainage. Ginger roots grow horizontally, so ample surface area is essential. Use a rich, well-draining potting mix. A mix of potting soil, compost, and coarse sand often yields good results.
-
Planting the Rhizome: Plant the ginger 2-3 inches below the soil with the bud eyes facing upwards. Cover lightly and water sparingly.
-
Optimal Growing Conditions: Place the pot in a warm location indoors, ideally between 70-85°F. Ginger prefers indirect sunlight; a spot near a west- or south-facing window is ideal.
Caring for Your Indoor Ginger Plant
-
Watering Needs: Keep the soil consistently moist but avoid waterlogging, as this can cause root rot. Allow the top inch of soil to dry out between waterings.
-
Humidity and Temperature: Ginger thrives in humid conditions. If your home is dry, consider using a pebble tray or a humidifier to maintain adequate humidity around the plant.
-
Nutrient Requirements: Feed ginger every 6-8 weeks with a balanced liquid fertilizer to support its growth.
Common Indoor Ginger Growing Issues and Solutions
-
Yellowing Leaves: This often indicates too much direct sunlight or lack of nutrients. Ensure adequate shading and adjust your fertilization routine.
-
Root Rot: Overwatering is the typical culprit. Check for soggy soil and improve drainage by adding more sand or perlite to your soil mix.
-
Lack of Growth: If your ginger isn’t sprouting, it may be due to insufficient warmth or light. Re-evaluate the placement of your pot and ensure temperatures stay in the optimal range.
-
Pests: Indoor ginger is susceptible to pests like spider mites and aphids. Regularly inspect the plant and use insecticidal soap or neem oil as needed.
Additional Indoor Ginger Growing Tips
-
Harvesting: Ginger can be harvested throughout the year, but it’s best after the plant has matured for at least 8-10 months. For continual harvest, gently dig up parts of the rhizome while allowing the rest to grow.
-
Overwintering: If you live in a colder climate, indoor ginger can be overwintered easily. Reduce watering during its dormant phase, typically in the cooler months.
By following these guidelines on how to grow a ginger plant indoors, you can successfully cultivate this versatile and healthful root right in your home. Keep a close eye on its environment and adjust care practices as needed to ensure a thriving ginger plant.
In conclusion, growing ginger indoors can be a rewarding and enriching experience, allowing you to enjoy fresh ginger year-round. By choosing the right container and ensuring it has adequate drainage, you set the stage for your ginger plant’s success. Selecting a healthy rhizome, providing the right amount of light, and maintaining consistent humidity and temperature are crucial steps in fostering robust growth. Regular watering and occasional feeding with organic fertilizer will keep your ginger vibrant and healthy.
Armed with these key strategies, you are well-equipped to embark on your indoor ginger-growing adventure. Remember, patience is essential, as ginger takes several months to mature. Embrace this opportunity to cultivate a personal connection with your plant, enjoying the journey as much as the destination of harvesting your own fresh ginger.
As a final tip, consider companion planting other herbs or plants that thrive in similar conditions, such as mint or lemongrass, to create a mini indoor garden that not only beautifies your space but also offers a variety of flavors and aromas to enhance your culinary creations. Happy gardening!