If you’ve ever tried to cultivate a pristine garden only to find it overrun by robust yucca plants, you’re not alone. Known for their architectural beauty and tenacity, yuccas can turn from ornamental ally to overwhelming adversary in the blink of an eye. Revered by some for their drought resistance and striking appearance, they can also become an invasive force that takes over your carefully planned landscape. So, what happens when your yucca admiration turns into a maintenance nightmare? Fear not: we’re here to guide you through the steps of reclaiming your garden. In this blog post, we’ll delve into proven strategies for effectively managing and eliminating these persistent plants, ensuring you can restore balance and beauty to your green space. Whether you’re a seasoned gardener or a determined novice, this guide will equip you with the knowledge you need to tackle yuccas head-on. Say goodbye to plant invasion and hello to garden harmony—your ultimate guide to getting rid of yucca plants awaits.
Understanding Yucca Plants: Characteristics and Challenges
Yucca plants are popular for their striking appearance and resilience, often gracing xeriscaped gardens or desert-themed landscapes. However, their robust nature can sometimes become problematic, leading gardeners to seek effective ways to manage or eliminate them. If you’re looking to get rid of yucca plants, here’s a comprehensive guide to help you tackle this challenge effectively.
Understanding the Challenge
Yucca plants are known for their deep root systems, which store water and nutrients efficiently, making them particularly hardy. This resilience makes them difficult to remove completely, as even a small piece of root left behind can regenerate into a new plant. Therefore, understanding the plant’s biology is key before choosing a removal method.
Comprehensive Removal Strategies
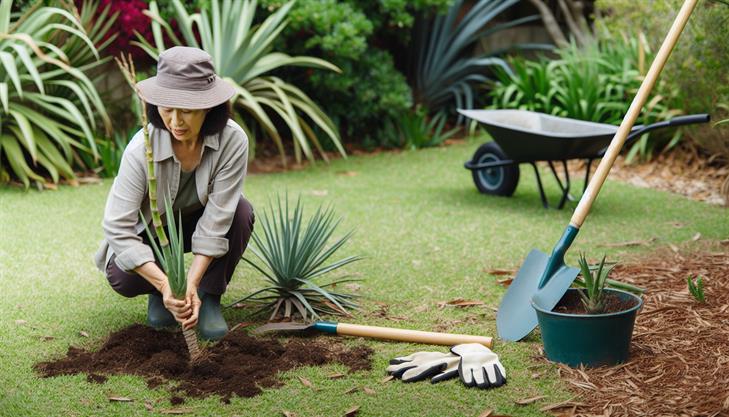
1. Manual Removal
Step 1: Prepare the Area
- Begin by clearing away any debris around the yucca plant to have a clear work area.
- Wear protective gloves and long sleeves, as the leaves of yucca plants can be sharp.
Step 2: Cut Down the Plant
- Use a sharp spade or a garden saw to cut the yucca plant down to the base. This cuts off the foliage and makes accessing the root system easier.
Step 3: Dig Out the Roots
- To fully remove yucca plants, it is crucial to dig up the root system. Starting from the base, dig a trench around the plant approximately 2-3 feet wide.
- Continue to dig until the main root ball is exposed. Take care to remove as much of the root as possible.
Step 4: Inspect for Remaining Roots
- Carefully sift through the soil to remove any remaining small roots. This will reduce the chance of regrowth.
Step 5: Dispose Properly
- Dispose of the yucca plant in accordance with local waste disposal regulations to prevent re-establishment.
2. Chemical Treatment
Step 1: Choose an Herbicide
- Select a systemic herbicide containing glyphosate or triclopyr, which is effective against yucca plants.
Step 2: Apply the Herbicide
- Cut the plant down to just above the ground level.
- Immediately apply the herbicide to the freshly cut surface of the stump. This maximizes absorption and effectively kills the root system.
Step 3: Monitor and Reapply
- Regularly check the area for new growth. Re-apply the herbicide to any resprouting plants until they are completely eradicated.
3. Natural Methods
Step 1: Solarization
- Cover the area with a heavy-duty plastic sheet or tarp during the hottest months. This method traps heat and sunlight, effectively cooking the plant and its roots underneath.
Step 2: Persistence in Removal
- Continuously remove any new sprouts by cutting them back regularly. Without leaves, the yucca plant will not photosynthesize and will eventually die off.
Common Issues and Precautions
- Re-growth: Be vigilant about potential regrowth due to leftover root fragments. Continuously monitor and remove any new sprouts.
- Soil Disturbance: Digging can significantly disturb the soil. Consider replanting with a suitable cover or ground plant to prevent erosion.
- Safety Precautions: Always wear protective clothing to guard against the plant’s sharp leaves and potential allergens in the herbicide.
By following these step-by-step methods on how to get rid of yucca plants, you can effectively manage and eliminate these hardy perennials from your garden. Remember that persistence and thoroughness are your best tools in ensuring complete removal.
Step-by-Step Guide to Removing Yucca Plants Safely
Removing yucca plants from your garden can be a challenging process due to their deep roots and resilience. However, with the right approach, you can successfully eliminate yuccas and prevent them from regrowing. This guide will walk you through the steps needed to remove yucca plants safely and effectively.
Step 1: Gather the Necessary Tools
Before beginning the removal process, ensure you have the following tools on hand:
- A sharp spade or shovel
- Gardening gloves
- Pruning shears
- A pickaxe or mattock (for stubborn roots)
- A garden hose
- Herbicide (optional, for chemical removal)
- Protective eyewear
Step 2: Initial Preparation
Wear your gardening gloves and protective eyewear to protect yourself from the sharp leaves and debris. If the yucca plant is large, use pruning shears to trim the leaves and stalks down to a manageable size. This not only makes the plant easier to handle but also reduces the risk of injury.
Step 3: Dig Around the Yucca Plant
Using a sharp spade or shovel, dig a trench around the base of the yucca plant. Begin about 2 feet away from the center of the plant to ensure you capture the extensive root system. Aim for a depth of at least 16 to 24 inches, as yucca roots can grow deep into the ground.
Step 4: Loosen and Remove the Root Ball
Once you’ve excavated the area around the plant, use a pickaxe or mattock to gently loosen the soil and root ball. Carefully lift the roots from the soil, taking care not to leave any segments behind, as yucca can regenerate from root fragments. Continue to dig deeper if you encounter more roots.
Step 5: Eradicate Remaining Roots
Inspect the immediate area for any remaining roots. It’s crucial to remove as many as possible to prevent regrowth. For particularly stubborn roots, use the pickaxe to break them apart and remove them from the ground.
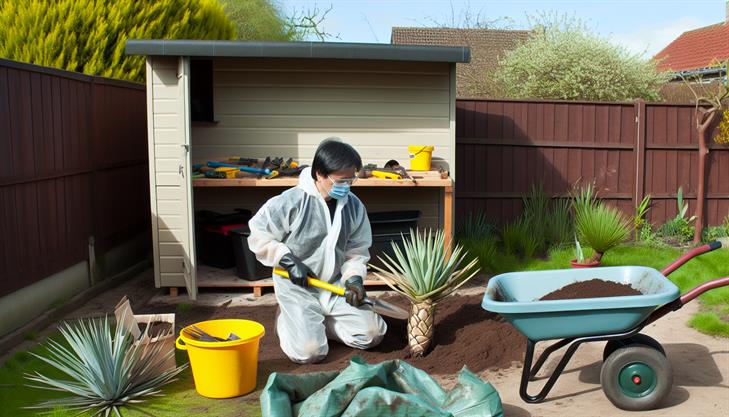
Step 6: Apply Herbicide (Optional)
If you prefer a chemical method, or to bolster your efforts, apply a garden-safe herbicide specifically designed for use on yucca plants. Follow the manufacturer’s instructions carefully. This approach can help kill any residual root fragments and deter growth.
Step 7: Monitor and Maintain the Area
After removal, regularly check the area for any signs of new growth. If you spot any yucca sprouts, dig them up promptly or apply additional herbicide. Keeping the area clean and free of new growth will help ensure your efforts to get rid of yucca plants are permanent.
Additional Tips
- Timing: Early spring or late fall are ideal times for manual removal, as the soil is typically more workable.
- Replanting: Consider replacing the area with a less invasive plant species to restore the garden’s appearance and prevent erosion.
- Persistence: Yucca plants are hardy, and it may take several attempts to fully eliminate them. Consistent monitoring and removal of new growth are key.
By following these steps, you can effectively remove yucca plants from your landscape and reclaim your garden space. Adapting methods to suit your specific situation and utilizing both manual and chemical approaches if necessary will yield the best results.
Top Tools and Techniques for Efficient Yucca Plant Removal
Getting rid of yucca plants can be a tough task due to their resilient nature and deep root systems. However, with the right tools and methods, removal can be accomplished effectively. Here’s a step-by-step guide to help you eliminate yucca plants from your garden:
Step 1: Prepare Your Tools
Before you begin, gather the essential removal tools. You will need:
- Protective Gear: Gloves, long sleeves, and goggles, as yucca leaves can be sharp.
- Shovel: For digging out the root system.
- Pruning Saw: To cut through thick stalks.
- Pickaxe or Mattock: Essential for loosening stubborn roots.
- Herbicide (optional): A systemic herbicide can be used if you want to ensure complete root eradication.
Step 2: Cut Back the Plant
Start by cutting back the yucca plant:
- Chop off the Leaves: Use the pruning saw to cut the leaves as close to the base as possible. This makes the plant easier to manage and exposes the main stalk for removal.
- Remove the Stalk: With the pruning saw, cut the stalk close to the ground. Dispose of the leaves and stalk appropriately since yucca leaves are tough and decompose slowly.
Step 3: Dig Out the Root System
Yucca plants are known for their extensive root systems, which are critical to remove to prevent regrowth:
- Loosen the Soil: Use a shovel or mattock to dig around the base of the plant to expose the roots. Start digging about 2-3 feet away from the stalk to accommodate the wide root spread.
- Dig Deep: As yucca plants have deep taproots, dig as deep as possible until you expose the main root.
- Remove the Roots: Carefully cut the roots with a sharp shovel or pruning saw. Extracting as much of the root system as possible is crucial; any remnants can lead to regrowth.
Step 4: Apply Herbicide (if necessary)
- Systemic Herbicide: If pieces of root persist, apply a systemic herbicide designed for tough perennials. Be sure to follow manufacturer instructions to prevent damage to nearby plants and soil health.
Step 5: Monitor and Repeat
- Watch for Regrowth: Even after exhaustive effort, remnants can cause new growth. Continue to monitor the area and remove any new shoots promptly.
- Re-Treat with Herbicide: If new shoots appear, retreat with herbicide as needed to ensure the plant does not re-establish.
Common Issues and Additional Tips
- Sharp Leaves: Always handle yucca with care due to their sharp, spine-like leaves.
- Soil Health: Consider amending the soil post-removal to maintain nutritional balance, especially if herbicides were used.
- Consistent Monitoring: Regularly check the area for root sprouts and immediately remove any signs of regrowth.
By following these steps and handling yucca plants with care, you can effectively rid your garden of these hardy plants. The combination of physical removal and herbicide treatment should help keep your landscape yucca-free and easier to manage.
Tips for Preventing Yucca Regrowth and Maintaining Your Garden
Dealing with yucca plants in your garden can be quite challenging due to their resilience and deep root system. However, with the right techniques, you can effectively prevent yucca regrowth and maintain a beautiful, flourishing garden. Follow these comprehensive steps to manage yucca removal, ensuring your garden remains yucca-free.
-
Preparation and Planning: Before embarking on the task of how to get rid of yucca plants, gather the necessary tools. You’ll need a sharp spade or shovel, pruning tools, a pickaxe, or a trowel to tackle the roots, as well as gardening gloves for protection.
-
Cutting Back the Yucca: Begin the process by cutting the yucca plant back to ground level. Use a sharp saw or strong gardening shears to trim the foliage, making it easier to access the root system. This step reduces the plant’s ability to produce energy, preparing it for complete removal.
-
Digging Up the Roots: The key to preventing yucca regrowth lies in removing the roots thoroughly. Start by digging a trench around the base of the plant, roughly about 2 to 3 feet in diameter to capture the entire root ball. Excavate deeply until all roots are exposed; yucca roots can extend several feet below the surface. Carefully extract the entire root system to prevent regrowth.
-
Soil Inspection and Removal: After removing the primary root system, meticulously inspect the soil for any remaining yucca root fragments. Utilize a trowel to sift through the dirt, ensuring no root pieces are left, as even small fragments can sprout new growth.
-
Chemical Treatment (Optional): For particularly stubborn yucca plants, applying a herbicide can be an effective supplementary measure. Select an herbicide specifically designed for tough plants and follow the label instructions carefully. Apply it directly to any remaining root areas to inhibit future growth.
-
Ongoing Monitoring and Maintenance: Following removal, monitor the site regularly for any signs of yucca regrowth. Act promptly if new shoots appear by digging them out to prevent re-establishment. This diligence is crucial for long-term success in maintaining a yucca-free garden.
-
Tips for Garden Maintenance: To further bolster your efforts, consider introducing competitive plant species that can help suppress yucca regrowth. Ground covers or dense shrubs can be effective at shading the soil, making it less hospitable for any remaining yucca fragments.
-
Troubleshooting Common Issues: If yucca regrowth remains persistent despite following these steps, reassess your removal process. Check for overlooked root segments and ensure thorough chemical application where necessary. Persistence and a multifaceted approach are often required for successful and permanent yucca removal.
By carefully following these steps and maintaining vigilance, you’ll be equipped with the knowledge of how to get rid of yucca plants effectively. This will help preserve the health and beauty of your garden, free from unwelcome yucca invasions.
Troubleshooting Common Issues in Yucca Plant Removal.
Getting rid of yucca plants can be a challenging task due to their deep root systems and ability to regrow from small root pieces left in the soil. However, with the right tools and approach, you can successfully remove them. Here’s a step-by-step guide to help you manage this process efficiently, along with solutions to common issues you might encounter.
Step 1: Gather Your Tools and Materials
Before you begin, ensure you have the necessary supplies:
- A sharp spade or shovel
- Gardening gloves
- Safety goggles
- A pruning saw or loppers
- Herbicide (optional, for stubborn regrowth)
- A wheelbarrow or tarp (for debris removal)
Step 2: Prepare the Site
Start by clearing the area around the yucca plant to provide ample working space. This involves removing any rocks, debris, or smaller plants that may hinder your progress.
Step 3: Prune the Yucca Plant
Using a pruning saw or loppers, cut down the yucca plant as close to the ground as possible. This makes it easier to access the root system. Always wear gloves and safety goggles to protect yourself from the plant’s sharp leaves.
Step 4: Dig Around the Roots
Yucca plants have extensive root systems that can make removal difficult. Use a sharp spade to dig a trench around the plant, about 2-3 feet away from the stalk. Dig down until you reach the main part of the root system. This step requires patience and effort, as yuccas can spread quite deep and wide.
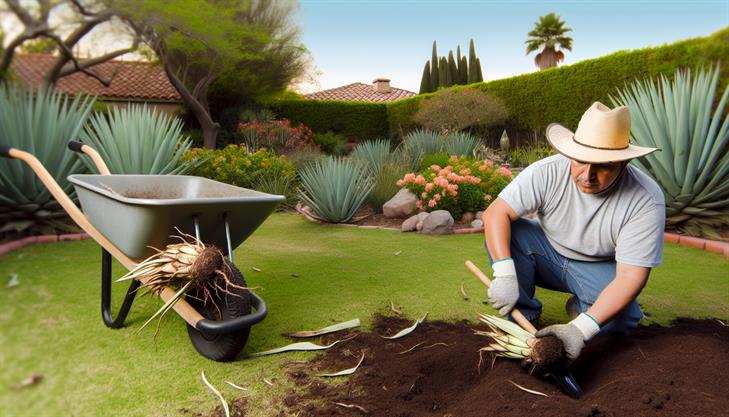
Step 5: Remove the Root Ball
Once you’ve exposed the main root system, use the shovel to loosen and pull out the root ball. Depending on the size of the yucca, you might need extra hands to help lift and remove it. Place it on a tarp or in a wheelbarrow for disposal.
Step 6: Inspect and Remove Remaining Roots
After the main root ball is out, inspect the soil for any remaining root pieces. Yucca plants can regrow from small root fragments, so it’s crucial to remove as much as possible. Use your hands or a small trowel to sift through the soil and extract these parts.
Step 7: Apply Herbicide (If Necessary)
If you’ve had difficulty removing all root fragments or if the yucca plant has regrown after initial removal attempts, consider applying a targeted herbicide. Follow the manufacturer’s instructions carefully, and only use herbicide as a last resort.
Step 8: Monitor the Area
After removal, monitor the area for any signs of regrowth, especially during the growing season. If you notice new shoots emerging, repeat the removal process or apply another round of herbicide.
Troubleshooting Common Issues:
- Regrowth: If the yucca continues to grow back, it usually means some root fragments were left behind. Be meticulous in removing all roots, no matter how small.
- Soil Hardness: In compact or rocky soil conditions, consider watering the area thoroughly a day before removal to soften the soil, making digging easier.
- Environmental Concerns: Use herbicides cautiously to avoid damaging nearby plants or contaminating the soil.
Additional Tips:
- Consider wearing long sleeves and pants to protect your skin from yucca’s sharp leaves.
- Dispose of removed plant material properly, as yuccas can attempt to regrow from plant debris.
- If you prefer not to use herbicides, consistent manual removal can eventually weaken the yucca’s root system over time.
By following these steps, you can effectively learn how to get rid of yucca plants and maintain control over your garden space. Persistence and careful technique are key to successfully eliminating these resilient plants.
In conclusion, effectively eliminating yucca plants from your garden requires a strategic approach that combines manual removal and chemical treatments. We’ve explored the importance of first understanding yucca’s robust root system and how to leverage tools like shovels and root saws to dig them up meticulously. Introducing systemic herbicides can impede regrowth, while ensuring proper disposal of yucca debris prevents unintentional spreading. Maintaining vigilance for any signs of resurgence will ensure your efforts are not in vain.
Now armed with these techniques, you’re well-equipped to tackle any yucca challenges in your landscape. By staying patient and persistent, you can reclaim your garden space from these hardy plants.
As a final tip, consider planting yucca-repelling plants, such as lavender or rosemary, in the now-yucca-free areas to deter future infestations and enhance your garden’s aesthetic appeal.