
Imagine a world where gardening requires no soil, where vibrant green plants thrive suspended in mid-air like tiny works of art. Welcome to the enchanting realm of air plants! Also known as Tillandsias, these fascinating plants have captured the imagination of botanists and hobbyists alike due to their unique ability to grow without conventional soil. But as you marvel at their seemingly effortless existence, have you ever wondered about the secret behind their propagation process? Enter the intricate and rewarding journey of harvesting air plant seeds.
Harvesting air plant seeds is not just a captivating endeavor; it’s a crucial step in ensuring the continuation and diversity of these remarkable flora. While many people opt for buying mature plants, diving into the process of seed harvesting opens up a world of sustainability and conservation, adding a fresh layer of involvement and understanding to your gardening experience.
In this guide, we will unravel the mysteries of air plant seed development, equipping you with the knowledge and techniques to successfully gather and nurture these tiny vessels of life. Whether you’re an air plant enthusiast eager to deepen your connection with these plants or a novice looking to explore new horticultural adventures, this guide will be your invaluable companion. Prepare to embark on a journey where patience meets discovery, and learn how you can contribute to the thriving legacy of air plants.
Understanding Air Plant Reproduction: A Beginner’s Guide
Air plants, or Tillandsias, are fascinating epiphytes popular for their unique appearance and minimal care requirements. Though primarily propagated through offsets or "pups," some enthusiasts enjoy the challenge and satisfaction of growing air plants from seeds. Harvesting air plant seeds can be a rewarding process, but it requires patience and specific conditions to succeed. Follow this comprehensive guide to understand how to harvest air plant seeds effectively.
Identifying Seed Pods
Before you can harvest seeds, it’s crucial to recognize when your air plant is ready to produce them. After flowering, air plants develop seed pods instead of immediately producing pups. The seed pod formation is a sign that the plant is busy reproducing. Look for a swelling at the base of a flower spike, which indicates that seeds are maturing within.
Timing the Harvest
Patience is key when harvesting air plant seeds. The pods can take several months to mature, drying out and turning brown in the process. It is essential not to rush and open them prematurely. As the pod dries and splits naturally, approximately three to four months after forming, it indicates the seeds are ready to be harvested.
Step-by-Step Harvest Instructions
-
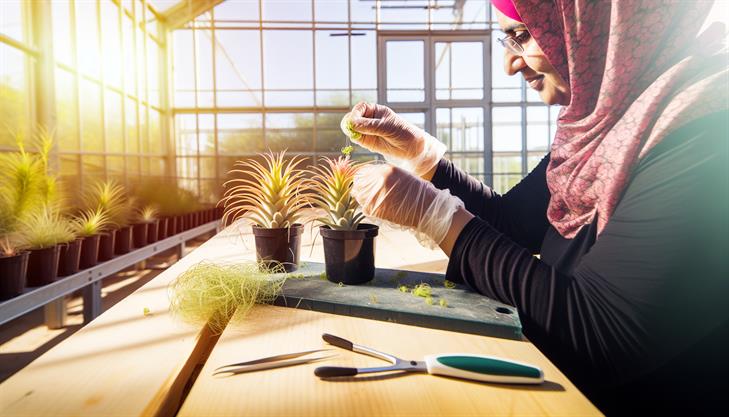
Gather Your Materials: You’ll need a clean, dry workspace, tweezers or a small knife, and an envelope or small jar to store the seeds.
-
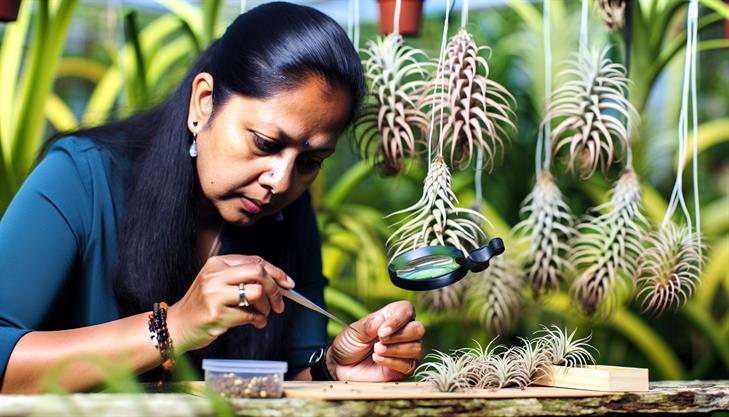
Monitoring Maturity: Inspect the seed pods daily. A fully mature pod will appear dry and begin to split along its seam.
-
Securing the Seeds: Attach a fine mesh or a piece of nylon stocking around the pod just before it splits. This prevents the lightweight seeds from dispersing in the wind, as they are naturally designed to do.
-
Collecting the Seeds: Once the pod has split, use tweezers or a small knife to gently pry it open further, if needed. Carefully remove the seeds, which are small and feathery, from the pod.
-
Storing the Seeds: Immediately place the harvested seeds into an envelope or a small jar for storage. Ensure they remain dry and away from direct sunlight to maintain viability until you are ready to plant them.
Tips and Common Issues
-
Avoid Excess Moisture: Excess moisture during the seed pod maturation can lead to mold growth, which can spoil the seeds. Ensure good air circulation around your maturing pods.
-
Patience Pays Off: Opening the pod too soon or mishandling it can lead to accidentally losing your seeds. Monitoring and careful timing are crucial.
-
Label and Date: If harvesting from multiple plants, label your seeds with the plant variety and the date of harvest. This information can be valuable during the planting process and when tracking growth experiences.
By following these steps and tips, you’ll be well-prepared to harvest air plant seeds successfully. Though growing air plants from seeds can require more time and effort compared to using pups, the experience can be incredibly fulfilling for plant enthusiasts who enjoy witnessing the full life cycle of these captivating organisms.
Step-by-Step Process: How to Harvest Air Plant Seeds
Harvesting air plant seeds can be a rewarding and fascinating process, especially given the unique features of these plants. Air plants, or Tillandsias, belong to the bromeliad family and are known for their striking appearance and low maintenance requirements. Collecting their seeds requires patience and good timing. Here’s a comprehensive guide to help you through the process:
Step 1: Understand Air Plant Flowering
Before you can harvest air plant seeds, it’s essential to understand their flowering process. Air plants bloom only once in their lifecycle. After flowering, they can produce seeds or pups (offsets). Identifying the flowering phase is crucial since it marks the onset of potential seed production. Watch for vivid spikes or bracts as signs that your air plant is ready to flower.
Step 2: Pollinating the Flowers
Pollination is necessary for seed production. In the wild, air plants rely on natural pollinators such as hummingbirds and insects. In a home environment, manual pollination may be required. You can achieve this by gently transferring pollen from one flower to another using a small brush or cotton swab. Ensure the pollen from the stamen (male part) reaches the pistil (female part) for successful fertilization.
Step 3: Monitoring Seed Pod Development
Post-pollination, air plants develop seed pods, which need several months to mature fully. Regular observation is vital; seed pods typically mature in three to six months. Ensure your plants are placed in an environment with adequate light and air circulation to support healthy pod development.
Step 4: Harvesting the Seeds
When the seed pods begin to turn brown and crack open slightly, it’s time to prepare for harvesting. Gently shaking the plant can dislodge mature seeds. Collect them carefully over a clean sheet of white paper to see the small, feathery seeds clearly. If handling delicate seeds is challenging, using tweezers can help.
Step 5: Seed Storage and Sowing
Once harvested, air plant seeds are best sown immediately due to their delicate nature. If immediate sowing isn’t feasible, store them in a cool, dry place inside a paper envelope. To sow the seeds, scatter them over a mesh or paper towel in a well-ventilated area with indirect light. Mist lightly with water to keep them moist, but avoid overwatering as it may lead to mold development.
Common Issues and Tips
- Moisture Control: Prevent seed rot by ensuring good air circulation around the seeds. Mold is a common issue; hence, balancing moisture and ventilation is key.
- Light: Provide bright, indirect sunlight without direct exposure, which could desiccate the seeds.
- Patience: Germination can be slow, taking weeks to months. Consistency in care during this period is crucial for seedling success.
With these steps and tips, you can successfully harvest and sow air plant seeds, embarking on an exciting journey of growing your air plant collection. This process enhances your connection with these unique plants, offering an opportunity to observe and participate in their fascinating lifecycle.
Essential Tools and Tips for Successful Seed Harvesting
Harvesting air plant seeds can be a rewarding endeavor if you are patient and attentive to detail. Air plants, or Tillandsia, are fascinating plants that reproduce predominantly through seeds and pups. Here’s a step-by-step guide on how to harvest air plant seeds effectively:
Understanding the Seed Production Process
Before you can harvest air plant seeds, you need to understand the flowering and seeding cycle of these unique plants. Air plants bloom only once in their lifetime. During or after the flowering stage, the plant may produce seed pods. It’s important to monitor this process closely, as the seeds are incredibly small and can be easily lost.
Step 1: Identify the Seed Pods
Once your air plant blooms, it may start to develop seed pods. These pods typically form after the flower wilts and dries. They usually appear as small, green, or sometimes brown protrusions at the base of the flower.
Step 2: Wait for Seed Pod Maturity
Be patient and wait for the seed pods to mature and dry out. This phase could take several weeks or even months, depending on the specific air plant species and environmental conditions. The pods are ready when they turn brown and start to appear dry and papery.
Step 3: Collect the Seeds
As the seed pods fully mature, they will begin to split open naturally. This is the optimal time to collect the seeds. Place a piece of paper or a container beneath the plant to catch any seeds as they are released. Be gentle to avoid damaging the pods or losing any seeds.
Step 4: Store the Seeds Properly
After gathering the seeds, it’s crucial to store them correctly to maintain their viability. Place the seeds in a small envelope or paper bag. Store them in a cool, dry place away from direct sunlight. Ensure the storage area is free of moisture to prevent mold or germination before you’re ready to plant.
Common Issues and Solutions
-
Seeds Blowing Away: Due to their lightweight nature, air plant seeds can easily be blown away by wind. Collect them in a wind-sheltered area to minimize loss.
-
Mold Formation: If seeds are stored in a humid environment, they may develop mold and become unviable. Always opt for a dry, airy storage space.
-
Low Germination Rates: Some air plant species are known for low germination success. This can be improved by ensuring optimal temperature and humidity conditions once you are ready to sow them.
Additional Tips for Successful Harvest
-
Timing is Key: Monitor your plants regularly once the pods begin drying to ensure you collect the seeds at the right time.
-
Labeling is Helpful: If you’re collecting from multiple plant varieties, label your seed storage to keep track of different types and species.
By following these steps and tips, you can successfully harvest air plant seeds, providing you a chance to grow your own air plant collection or experiment with different propagation techniques. Always remember, patience and attention to detail are your best allies in this intricate process.
Common Challenges and Solutions in Air Plant Seed Harvesting
Harvesting air plant seeds can be a rewarding endeavor for plant enthusiasts looking to propagate their collection. Understanding the unique qualities of air plants, or Tillandsias, is crucial to successfully harvesting their seeds, as their growth habits differ from other traditional plants.
Understanding Air Plant Reproduction
Air plants reproduce through seed pods that form after their flowers are pollinated. It’s important to note that air plants often rely on insects and wind for pollination, so outdoor plants are more likely to produce seeds. Be patient, as air plants can take several months from blooming to seed pod production.
Step-by-Step Guide on How to Harvest Air Plant Seeds
-
Identify Mature Seed Pods: Start by observing your air plants for seed pods, which are typically long, slender, and brown or tan when mature. Pods usually develop at the base of spent flowers. They should be fully developed before harvesting.
-
Wait for Pods to Dry: Allow the seed pods to dry on the plant. When dry, they naturally begin to split open, indicating that the seeds inside are ready for harvesting.
-
Collect the Seeds: Once the seed pods open, carefully collect the small, fluffy seeds. Inside each pod, you’ll find many seeds equipped with fine, cotton-like filaments that help them become airborne in nature. Gently shake the pods over a clean surface to catch the seeds.
-
Store Properly: If you’re not planting immediately, store the seeds in a dry, cool, and dark place to preserve their viability. Use a paper envelope or a small container to keep them safe from moisture.
Common Challenges in Harvesting Air Plant Seeds
-
Pollination Requirements: Many people find it challenging to achieve successful pollination, especially indoors. Consider gently transferring pollen using a small brush if growing indoors.
-
Timing of Harvest: One common mistake is harvesting pods too early. Ensure they are dry and naturally split open; premature collection results in immature seeds that may not germinate effectively.
-
Seed Viability: Air plant seeds have a short viability period and are best sown soon after harvest. Delayed planting may significantly reduce germination rates.
Tips for Successful Seed Harvest
-
Monitor Regularly: Regularly check your air plants after they bloom for seed pod development, ensuring you don’t miss the optimal harvest time.
-
Protect from Elements: If your air plants are outdoors, ensure they are sheltered from heavy rain and strong winds, which can cause seed pods to be lost prematurely.
-
Label Your Seeds: If harvesting from multiple species of air plants, labeling each collection will help you manage and plan your propagation efforts accurately.
By following these guidelines, harvesting air plant seeds can become an integral part of expanding your collection. With patience and careful monitoring, you’ll enjoy the rewards of seeing your air plant seeds grow into beautiful plants. Whether you’re a novice or experienced plant parent, understanding these basics will enhance your ability to successfully propagate your air plants from seed.
Storing and Sowing Air Plant Seeds for Best Results
Harvesting air plant seeds can be a rewarding yet meticulous process, as it allows you to propagate these unique plants from your collection. To successfully harvest air plant seeds, follow these comprehensive steps:
Understanding the Air Plant Life Cycle
Before you can harvest seeds, understand that air plants, or Tillandsias, need to bloom first. After blooming, it’s common for air plants to produce seed pods. This is the phase where your opportunity to collect seeds begins.
Step-by-Step Guide to Harvesting Air Plant Seeds
-
Identifying the Seed Pods:
- After flowering, look for the formation of seed pods on your air plant. These pods are small, cylindrical, and will develop where the flowers were produced.
- Patience is key, as pods can take several months to mature.
-
Observing the Pods:
- Monitor the pods regularly. Mature pods will start to dry and may turn brown, indicating readiness.
- Avoid forcing the pods open; instead, let them open naturally.
-
Collecting the Seeds:
- As the pods begin to split, you will see seeds with fluffy attachments, much like dandelion seeds, designed for wind dispersion.
- Carefully collect these seeds by hand. Do this indoors or in a controlled environment to prevent them from being carried away by wind.
-
Drying and Storing:
- Lay the seeds on a dry, clean surface. Allow them to dry completely to prevent mold.
- Store seeds in a cool, dark place using paper envelopes or airtight containers to maintain viability.
Common Issues and Tips
- Premature Pod Opening: If pods open prematurely due to damage, salvage any viable seeds quickly and let them dry.
- Mold Growth: Ensure seeds are thoroughly dry before storing. Moisture is the primary cause of mold.
- Environmental Factors: Changes in humidity and temperature can impact seed development. Keep them stable when possible.
Sowing Air Plant Seeds for Best Results
Once you’ve successfully harvested and stored your air plant seeds, the next step is sowing them:
-
Preparing the Sowing Medium:
- Use a well-ventilated medium that does not retain much moisture. A mix of peat moss and perlite can be effective.
-
Sowing Process:
- Scatter the seeds over the surface evenly, pressing them down gently to ensure contact with the medium.
- Keep the medium consistently moist but not waterlogged, as excessive moisture can drown the seeds.
-
Maintaining Optimal Conditions:
- Provide bright, indirect light and maintain a warm temperature to encourage germination.
- Regularly mist the seeds to keep humidity levels stable.
-
Observing Seedlings:
- Be patient, as it may take months for seeds to germinate and years to develop into mature plants.
- If germination rates are low, consider atmospheric factors and adjust as needed.
By following these steps, you can successfully harvest and sow air plant seeds, promoting their growth and adding vibrant additions to your air plant collection. Over time, your efforts in understanding how to harvest air plant seeds will yield a thriving garden of Tillandsias.
In conclusion, harvesting air plant seeds is a rewarding process that can expand your collection while providing a deeper appreciation for these unique plants. We’ve explored the essential steps: identifying a blooming air plant, waiting for seed pod maturity, carefully collecting the seeds, and preparing them for germination. Each phase requires patience and attention to detail, but the thriving young air plants that result are well worth the effort.
Remember, success in air plant seed harvesting hinges on timing and environmental conditions. Ensure that your workspace is clean and your tools are sterilized to avoid any contamination that may hinder seed development.
As a final tip, consider documenting your journey by keeping a journal of observations and progress. This practice can help you refine your techniques over time and gain valuable insights into the habits and lifecycles of air plants. Now, armed with knowledge and a touch of curiosity, you’re ready to embark on your air plant propagation adventure. Happy harvesting!