
Imagine having a lush, verdant sanctuary right in the comfort of your home, where vibrant green leaves dance in the light and the soothing aroma of fresh herbs fills the air. Growing pot indoors offers just that tantalizing possibility—a personal oasis that not only yields a thriving crop but also offers a fulfilling and rewarding hobby. With changing attitudes toward cannabis and its myriad uses, more individuals are turning toward home cultivation, seeking both the therapeutic benefits and the ultimate DIY challenge. But where do you start, and how can you ensure a successful harvest in your indoor environment? This guide is your roadmap to transforming a corner of your home into a flourishing nursery, covering everything from lighting and temperature control to soil selection and growth stages. Whether you’re a seasoned gardener looking to branch into something new or a curious newcomer eager to cultivate your green thumb, this blog will equip you with all the tips and tricks needed to master indoor pot growing. Dive in, and let’s turn your home into an enviable green escape!
Setting Up Your Indoor Grow Space: Essential Tips and Tools
Growing pot indoors can be a rewarding endeavor, offering the ability to cultivate high-quality plants year-round in a controlled environment. Whether you’re a beginner or experienced grower, understanding the essentials of setting up your indoor grow space is key to a successful harvest.
Choosing the Right Location
Start by selecting a space that can accommodate your planned operation. Consider a spare room, closet, or basement as potential grow areas. Ensure the space has easy access to electricity and can be ventilated, as air exchange is crucial for plant health. Also, it’s vital to ensure the space can be kept at an optimal temperature, generally between 70-85°F (20-30°C).
Lighting Essentials
Lighting is one of the most crucial components when learning how to grow pot indoors. Consider using LED grow lights, which are energy-efficient and offer full-spectrum light, replicating sunlight needed for photosynthesis. Alternatively, high-intensity discharge (HID) lights, such as metal halide (MH) and high-pressure sodium (HPS), are traditional choices, known for their effectiveness. Position lights so they’re at least 12-24 inches above your plant canopy to prevent burning the plants.
Ventilation System
Proper ventilation helps control temperature, humidity, and prevents mold and pests. Installing an exhaust fan will remove stale air and bring in fresh air, enriching CO2 levels. Oscillating fans are beneficial for circulating air throughout the space, promoting strong stems and preventing hotspots.
Choosing Growing Mediums
Select a growing medium that retains moisture but allows for adequate drainage. Soil is a popular choice due to its availability and ease of use; choose a high-quality, organic soil for the best results. For faster growth and higher yields, consider hydroponics, which allows plants to grow in a nutrient-rich solution, bypassing soil entirely.
Watering and Nutrients
Watering your plants properly is crucial when growing pot indoors. Depending on the strain and growing medium, plants typically need watering when the top inch of soil feels dry. Overwatering is a common issue, leading to root rot. Well-balanced nutrients are essential; most indoor growers use a three-part nutrient system containing nitrogen, phosphorus, and potassium (N-P-K). Adjust nutrient levels for different growth stages: more nitrogen during vegetative and increased phosphorus and potassium during flowering.
Temperature and Humidity Control
Install a thermometer and hygrometer to monitor environmental conditions closely. Many plants thrive at 40-60% humidity during the vegetative stage and around 40-50% during flowering to prevent mold. Tools like humidifiers, dehumidifiers, and heaters can help maintain ideal conditions.
Pest Control and Plant Care
Regularly inspect your plants for signs of pests such as spider mites or aphids. Natural pest control methods, such as introducing beneficial insects or using neem oil, are often effective. Additionally, practice topping (removing the top of the plant) to promote bushier growth, increasing potential yield.
Common Issues and Troubleshooting
Be prepared to tweak light schedules and feeding as your plants grow. Yellow leaves can indicate nutrient deficiencies, while slow growth might signal a need to adjust environmental conditions. Keeping a grow journal helps track changes and improvements throughout the growth cycle.
By carefully planning your indoor grow setup and paying attention to these key areas, you’ll increase your chance of a successful yield, ensuring that you grow pot indoors like a pro. Always remember to check and adhere to local laws and regulations concerning cultivation.
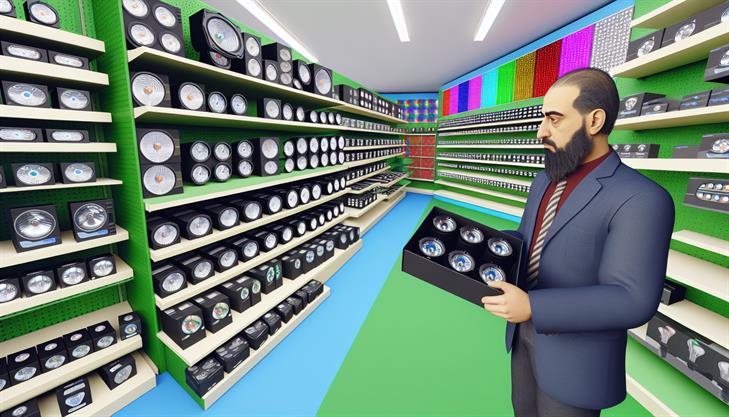
Selecting the Perfect Grow Lights for Optimal Cannabis Growth
Growing cannabis indoors can be both a rewarding and complex endeavor. Selecting the right grow lights is fundamental, as they simulate the natural sunlight plants need for photosynthesis and effective growth. Here’s a detailed guide on how to grow pot indoors using the right grow lights for optimal results.
Step 1: Understanding Light Spectrum
Cannabis plants have different light spectrum requirements throughout their growth stages. During the vegetative stage, plants thrive under blue light (400-500 nm). During the flowering stage, they need more red light (620-780 nm). Understanding these needs is crucial in selecting the perfect grow lights.
Step 2: Choosing the Right Type of Grow Lights
There are several types of grow lights to consider:
-
LED Grow Lights: These are energy-efficient, emit less heat, and can be programmed to deliver a full spectrum of light. Many consider them to be the best for beginners due to their versatility and longevity.
-
HID Grow Lights: High-Intensity Discharge lights, including Metal Halide (MH) and High-Pressure Sodium (HPS), are powerful and effective. MH lights are suitable for the vegetative phase, whereas HPS is preferred for flowering. They require additional equipment like ballasts and reflectors.
-
Fluorescent Grow Lights: These are suitable for small-scale growers or those cultivating cannabis in small spaces. They are less powerful but good for seedlings and clones.
Step 3: Determine Light Coverage
Calculate the coverage area to ensure adequate light distribution across your grow area. As a general guideline, 50 watts per square foot is recommended for optimal growth. Always check manufacturers’ specifications to understand the coverage each light provides.
Step 4: Setting Up Your Grow Lights
-
Positioning: Place your lights at a distance that covers the entire canopy evenly. Avoid positioning too close to prevent light burn or too far to minimize light effectiveness.
-
Height Adjustments: As plants grow, adjust the light height to maintain the appropriate distance. This helps avoid overheating and light stress.
-
Lighting Schedule:
- Vegetative Stage: Implement an 18-6 light cycle (18 hours of light, 6 hours of darkness).
- Flowering Stage: Switch to a 12-12 light cycle to initiate flowering.
Step 5: Monitor and Troubleshoot
-
Heat Management: Ensure good ventilation to prevent heat buildup, which can damage plants. Use fans and exhaust systems if necessary.
-
Humidity Control: Cannabis plants require different humidity levels at each growth stage. Use a hygrometer to monitor and a humidifier/dehumidifier to maintain ideal conditions.
-
Light Stress Signs: Watch for signs of light stress like discoloration or leaf curling and adjust accordingly.
Additional Tips
-
Invest in Quality Lights: Consider investing in high-quality lights. The upfront cost often results in better yields and plant health over time.
-
Energy Costs: Be mindful of energy consumption. LED lights are generally more energy-efficient compared to other types.
-
Reflective Surfaces: Use reflective materials on the walls of your grow space to maximize light penetration and reduce wastage.
Growing pot indoors offers you control over the growing environment, but understanding the intricacies of grow light selection is essential for success. By following these guidelines, you can ensure that your cannabis plants receive the best possible start and maximize their growth potential indoors.
Best Practices for Maintaining Ideal Temperature and Humidity
Growing pot indoors can be a rewarding endeavor for both personal use and hobbyist growers. To achieve the best yields and highest quality cannabis, maintaining the ideal temperature and humidity is crucial. In this guide, we’ll provide step-by-step instructions on how to grow pot indoors, emphasizing best practices and tips for maintaining an optimal growing environment.
Setting Up Your Indoor Growth Space
1. Choose the Right Space:
- Allocate a space like a dedicated grow tent, a spare room, or a closet with proper ventilation.
- Ensure that the space is easily accessible for daily maintenance but away from harsh elements such as excessive heat or drafts.
2. Equip Your Grow Room:
- Lighting: Use LED grow lights or high-intensity discharge (HID) lights, which mimic natural sunlight. Ensure your plants receive 18-24 hours of light per day during the vegetative stage and 12 hours during flowering.
- Ventilation: Install an exhaust fan to circulate air, which helps control temperature and humidity while also strengthening plant stems.
- Timers and Thermometers: Use these to automate light schedules and monitor environmental conditions.
Maintaining Ideal Temperature
1. Temperature Ranges:
- During the vegetative stage, aim for temperatures between 70-85°F (20-30°C).
- During flowering, cooler temperatures of 65-80°F (18-26°C) will prevent heat stress and enhance terpene profiles for better aroma and flavor.
2. Control Excess Heat:
- Use fans to avoid hotspots, especially near grow lights.
- Adjust lights as necessary—too close can burn plants, and too far can impede growth.
Regulating Humidity Levels
1. Humidity Ranges:
- Maintain 60-70% humidity during the early vegetative period. This supports healthy leaf growth and water retention.
- Gradually decrease to 40-50% as plants enter flowering. Lower humidity reduces mold risk and encourages resin production.
2. Tools for Humidity Control:
- Use dehumidifiers or humidifiers as needed to maintain the appropriate levels.
- Adding a hygrometer will help you monitor changes in real-time.
Watering and Nutrients
1. Watering Practices:
- Avoid over-watering; allow the top inch of soil to dry out between waterings.
- Use pH-balanced water (between 6.0-7.0) to prevent nutrient lockout.
2. Nutrient Management:
- Start with a balanced fertilizer in the vegetative stage, then switch to a higher phosphorus mix during flowering.
- Be cautious with nutrient levels; less is more to avoid nutrient burn.
Common Issues and Troubleshooting
- Heat Stress: Signs include leaf curling and brown leaf edges. Cool down and increase fan circulation to resolve this.
- Mold and Mildew: Often result from high humidity, especially during flowering. Ensure air circulation is sufficient, keep foliage dry, and reduce humidity.
- Nutrient Deficiencies: Yellowing or spotted leaves may signal a deficiency. Adjust nutrient levels carefully.
Additional Tips
- Maintain Cleanliness: Regularly clean your grow room to prevent pests and mold from developing.
- Plant Training: Techniques such as topping or low-stress training (LST) can maximize light exposure and improve yields.
- Monitor Plant Health: Continuously check for signs of pests, disease, or stress to address issues promptly.
By following these guidelines and adjusting environmental conditions to the specific needs of your cannabis plants, you’ll optimize your chances of a successful indoor grow. Embrace the learning curve, as each growth cycle presents an opportunity to refine your techniques.
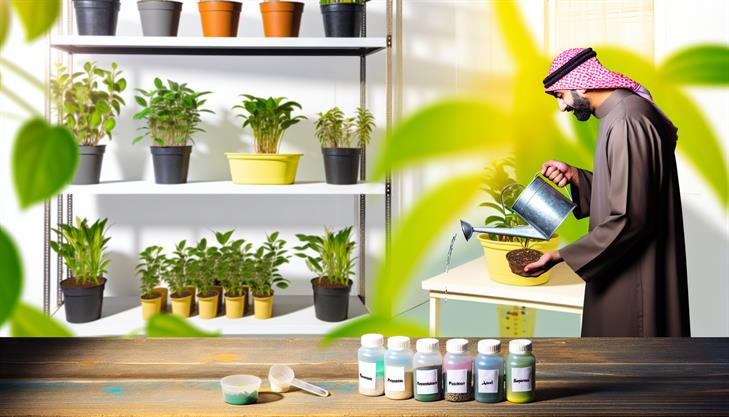
Step-by-Step Guide to Watering and Feeding Your Indoor Plants
Growing pot indoors can be a rewarding endeavor, offering the opportunity to cultivate your own plants in a controlled environment. Whether you’re a novice or looking to refine your skills, this guide provides a clear roadmap to achieving a healthy indoor cannabis garden.
Setting Up Your Indoor Grow Space
1. Selecting the Right Space
- Choose a Suitable Room: Basements, closets, or spare bedrooms can function well. Ensure the area has good ventilation and can accommodate necessary equipment.
- Control the Environment: Temperature, humidity, and light are crucial. Maintain temperatures between 70-85°F during the day and slightly cooler at night.
2. Gathering Necessary Equipment
- Grow Lights: LED and HID grow lights are popular choices for indoor cannabis, providing the spectrum and intensity needed for healthy growth.
- Ventilation: Install fans and carbon filters to control odor and ensure air circulation.
- Containers and Potting Mix: Use pots with good drainage and quality soil or a hydroponic system designed for cannabis.
Germination and Planting
3. Germinating Seeds
- Seed Selection: Select high-quality seeds that are suitable for indoor growing.
- Method: Start by soaking seeds in water for 24-48 hours, then transfer them to a moist paper towel until they sprout.
4. Planting Seeds or Clones
- Transplanting: Once seedlings have sprouted, plant them in your prepared containers or hydroponic systems.
- Spacing: Ensure adequate space between plants for light penetration and airflow.
Growing and Maintenance
5. Watering and Feeding
- Watering: Indoor cannabis typically requires watering every 2-3 days. Avoid overwatering by checking that the top inch of soil is dry before watering again.
- Nutrients: Use commercially available cannabis nutrients, following the manufacturer’s schedule. Adjust nutrient levels based on the plant’s growth stage.
6. Light Cycles
- Vegging Stage: Provide 18-24 hours of light per day to promote lush vegetative growth.
- Flowering Stage: Switch to 12 hours of light per day to initiate and sustain flowering.
Monitoring and Troubleshooting
7. Monitoring Plant Health
- Pest Control: Regularly check for signs of pests like spider mites. Use organic pesticides if necessary.
- Disease Prevention: Ensure good airflow and avoid excessive humidity to prevent mold and mildew.
8. Resolving Common Issues
- Yellowing Leaves: May indicate nutrient deficiency or overwatering. Adjust feeding and watering routines accordingly.
- Stunted Growth: Often caused by inadequate lighting or poor pH balance in soil or water.
Harvesting and Curing
9. Harvesting
- Timing: Harvest when the majority of trichomes (tiny hairs on buds) change from clear to milky white.
- Method: Cut the plants at the base and hang them upside down in a dark, well-ventilated room to dry.
10. Curing
- Curing Process: After drying, trim buds and store them in glass jars. Open jars daily to release moisture for 2-3 weeks to enhance flavor and potency.
Additional Tips
- Record Keeping: Maintain a grow journal to track progress and identify patterns or recurring issues.
- Regular Adjustments: Frequently reassess and modify light, water, and nutrient strategies based on plant response.
By following these steps and remaining attentive to the unique needs of your plants, you can successfully grow pot indoors, resulting in a fruitful and enjoyable cultivation experience.
Troubleshooting Common Issues in Indoor Cannabis Cultivation
Growing cannabis indoors can be a rewarding venture, allowing cultivators to control the environment and potentially produce high-quality yields. Here is a step-by-step guide on how to grow pot indoors, along with troubleshooting tips for common issues to ensure a successful cultivation process.
Step 1: Selecting the Right Strain
Before you begin, it’s crucial to choose a cannabis strain that matches your space, experience level, and desired effects. Indica strains are typically shorter and bushier, making them ideal for limited spaces, whereas sativa strains might require more vertical room.
Step 2: Setting Up the Indoor Grow Space
- Choose a Location: Ideally, select a discreet and easily accessible room, closet, or grow tent.
- Lighting: Utilize grow lights like LED, HID, or fluorescent bulbs. LEDs are often recommended for their efficiency and cooler operation. Lights should mimic the sun’s spectrum and be set on a timer for the appropriate photoperiod.
- Ventilation: Proper airflow is crucial. Install exhaust fans to manage humidity and temperature, preventing mold and mildew.
- Reflective Material: Lining the walls with reflective material like Mylar can maximize light efficiency.
Step 3: Preparing Growing Medium and Containers
- Selecting Soil: Use a high-quality potting soil with good drainage or opt for a soilless mix if hydroponics is of interest.
- Containers: Choose pots with drainage holes to prevent waterlogging. Fabric pots are popular since they improve root aeration.
Step 4: Germination and Planting
- Germination: Soak seeds in water for 12-24 hours or use the paper towel method until they sprout.
- Planting: Once sprouted, plant seeds in small pots and transplant them to larger containers as they grow.
Step 5: Feeding and Watering
- Nutrients: Use a balanced nutrient solution following specific guidelines for each growth stage—vegetative and flowering. Overfeeding is a common issue that can cause nutrient burn.
- Watering: Water plants when the topsoil is dry. Overwatering or underwatering can lead to root rot or stunted growth.
Step 6: Managing the Growth Cycle
- Vegetative Stage: Maintain a light cycle of 18-24 hours per day. Monitor growth and make adjustments to light and nutrients as needed.
- Flowering Stage: Transition to a 12/12 light cycle to induce flowering. This typically begins after 4-6 weeks of vegetative growth.
Troubleshooting Common Issues
- Pest Infestations: Regularly inspect plants for pests like spider mites and aphids. Use organic insecticides or introduce beneficial insects for control.
- Nutrient Deficiencies: Yellowing leaves may indicate deficiencies in nitrogen or other nutrients. Adjust feeding schedules and consult nutrient guides.
- Temperature and Humidity Problems: Ensure consistent temperatures between 70-85°F and maintain humidity between 40-70%. Drastic changes can stress plants.
Step 7: Harvesting
When buds are dense and covered in trichomes, it’s time to harvest. Cut branches carefully and proceed with drying and curing for the best flavor and potency.
Additional Tips for Success
- Start small: If you’re new to growing pot indoors, begin with just a few plants to learn the basic care techniques.
- Invest in quality equipment: Good lights and ventilation systems are worth the investment for healthy plants.
- Keep learning: Stay updated with resources and communities online for tips and troubleshooting advice.
Following these steps and advice can help establish a productive indoor cannabis garden. Remember, patience and attention to detail are key to mastering how to grow pot indoors successfully.
In conclusion, successfully growing pot indoors requires careful attention to detail and a willing spirit to adapt and learn. By setting up a suitable environment with the right lighting, temperature, and humidity, selecting high-quality seeds, and utilizing proper soil and nutrients, you can cultivate healthy plants and achieve a rewarding harvest. Regular monitoring and maintenance of your plants, including proper watering techniques and pest management, are crucial to ensuring their growth and vitality.
Remember, each strain has its unique needs, so continuous research and observation will help in tailoring your approach to get the desired results. As you venture into indoor growing, be patient and prepared to learn from both your successes and mistakes, adapting your methods as needed.
A final tip is to consider integrating an automated system for lighting and watering, which can significantly ease the growing process and ensure your plants receive consistent care, even when you are not around. With dedication and the right tools, your indoor garden can flourish, providing you with both recreational and medicinal benefits.